 What we need:
- Cardboard or mdf template with the shape and size of the bottom and back glasses of the tank, this is helpful to built a struicture with the correct dimensions and proportion.
- Nylon cloth to avoid wetting and soling the floor
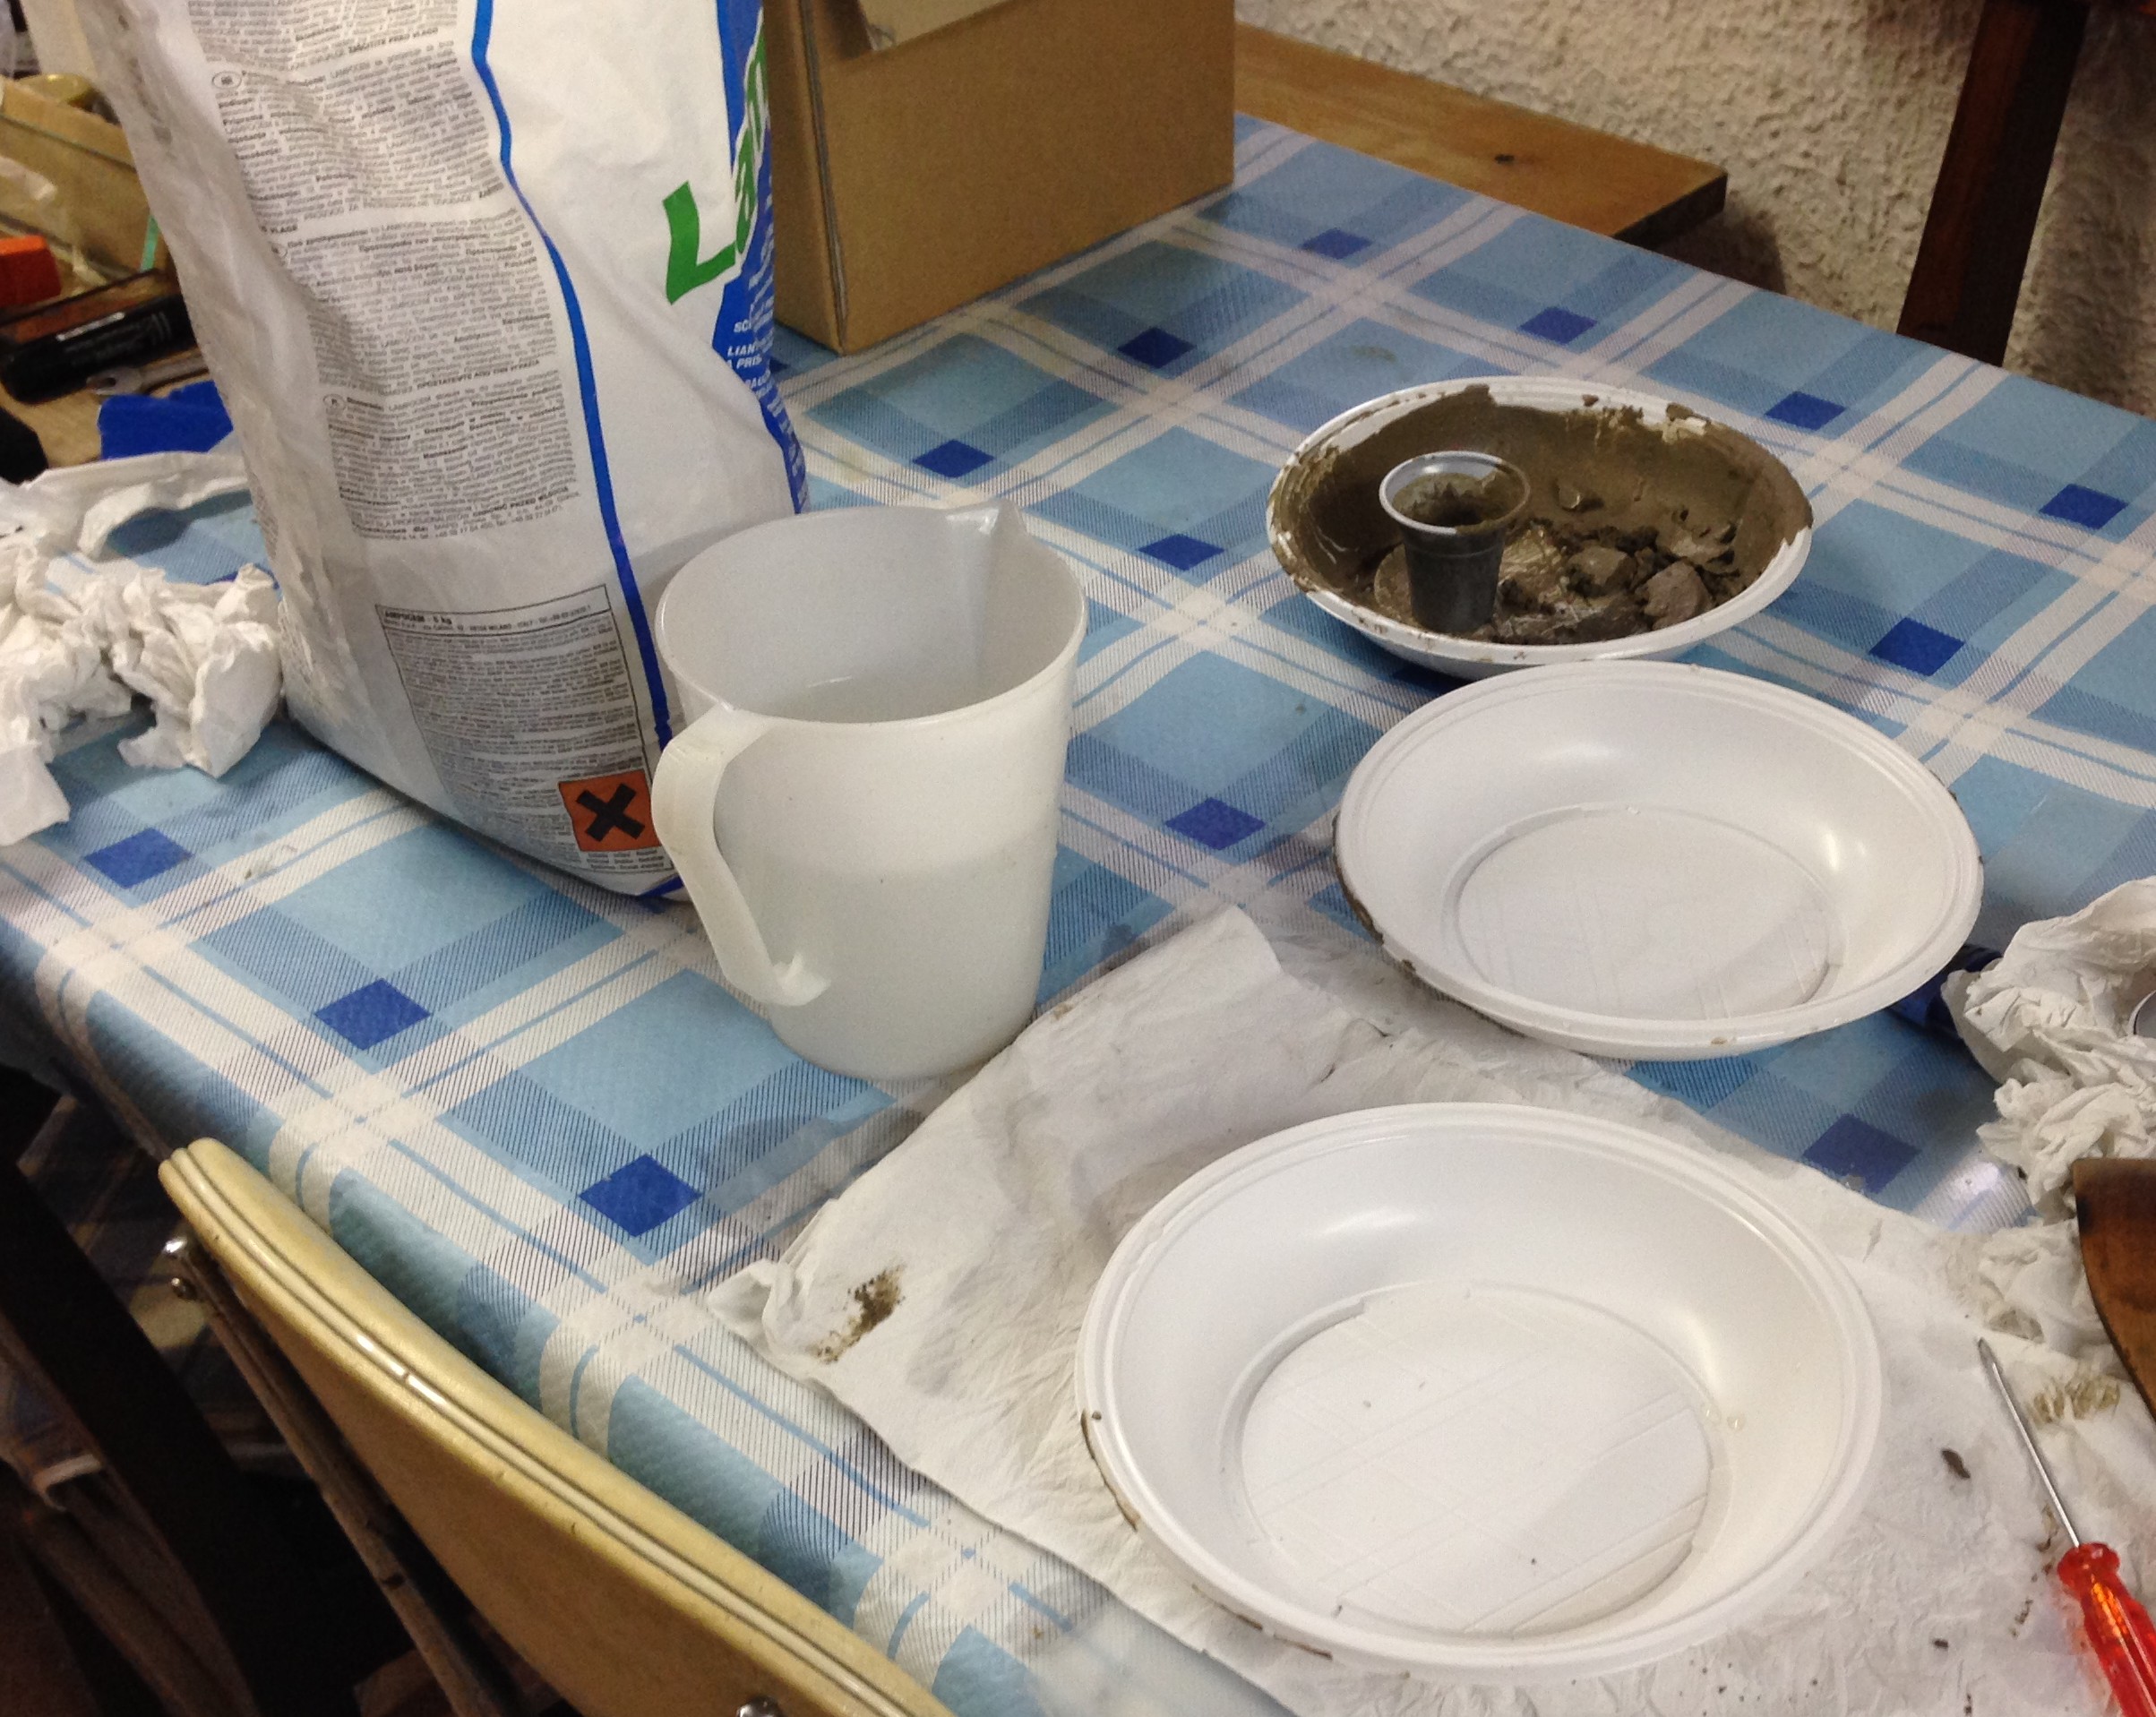
- Disposable plastic bowls and cups in which we prepare small amounts of cement
- Disposable plastic coffee cups
- Little spatula for mixing cement
- Quick cement, bets choice is Mapei Lampocem 5 kg bag absolutely brand new and sealed, this product in my opinion is the best for reef applications and in my experience it never caused problems to fish and corals. Important: quick cement solidify in about 3/5 minutes, meanwhile it becomes warm, this is absolutely normal.
- Latex or vinyl gloves, because fluid cement can irritate skin.
- Smatphone or camera for taking some pictures that help us to remember the position of rocks during the first tests.
- Cable ties and wedges or wood pieces, useful to hold in place the rocks till the cement is solidified.
What we need:
- Cardboard or mdf template with the shape and size of the bottom and back glasses of the tank, this is helpful to built a struicture with the correct dimensions and proportion.
- Nylon cloth to avoid wetting and soling the floor
- Disposable plastic bowls and cups in which we prepare small amounts of cement
- Disposable plastic coffee cups
- Little spatula for mixing cement
- Quick cement, bets choice is Mapei Lampocem 5 kg bag absolutely brand new and sealed, this product in my opinion is the best for reef applications and in my experience it never caused problems to fish and corals. Important: quick cement solidify in about 3/5 minutes, meanwhile it becomes warm, this is absolutely normal.
- Latex or vinyl gloves, because fluid cement can irritate skin.
- Smatphone or camera for taking some pictures that help us to remember the position of rocks during the first tests.
- Cable ties and wedges or wood pieces, useful to hold in place the rocks till the cement is solidified.
 Let's start:
1. If we managed to find a large and flat rock, put it in the center of the cardbord template this will be our base, otherwise we have to attach two or more flat rocks in order to obtain a larger one. Now turn upside down the base, so that the bottom side is not facing us and locate 3 points equidistant from each other and marginal. On each of these 3 points we will make a pillar of our construction.
2. Prepare some fluid cement and fill a coffee cup till the brim, now with a quick movement overturn the cup exactly where we planned to buil the first pillar. Do the same with pillars 2 and 3.
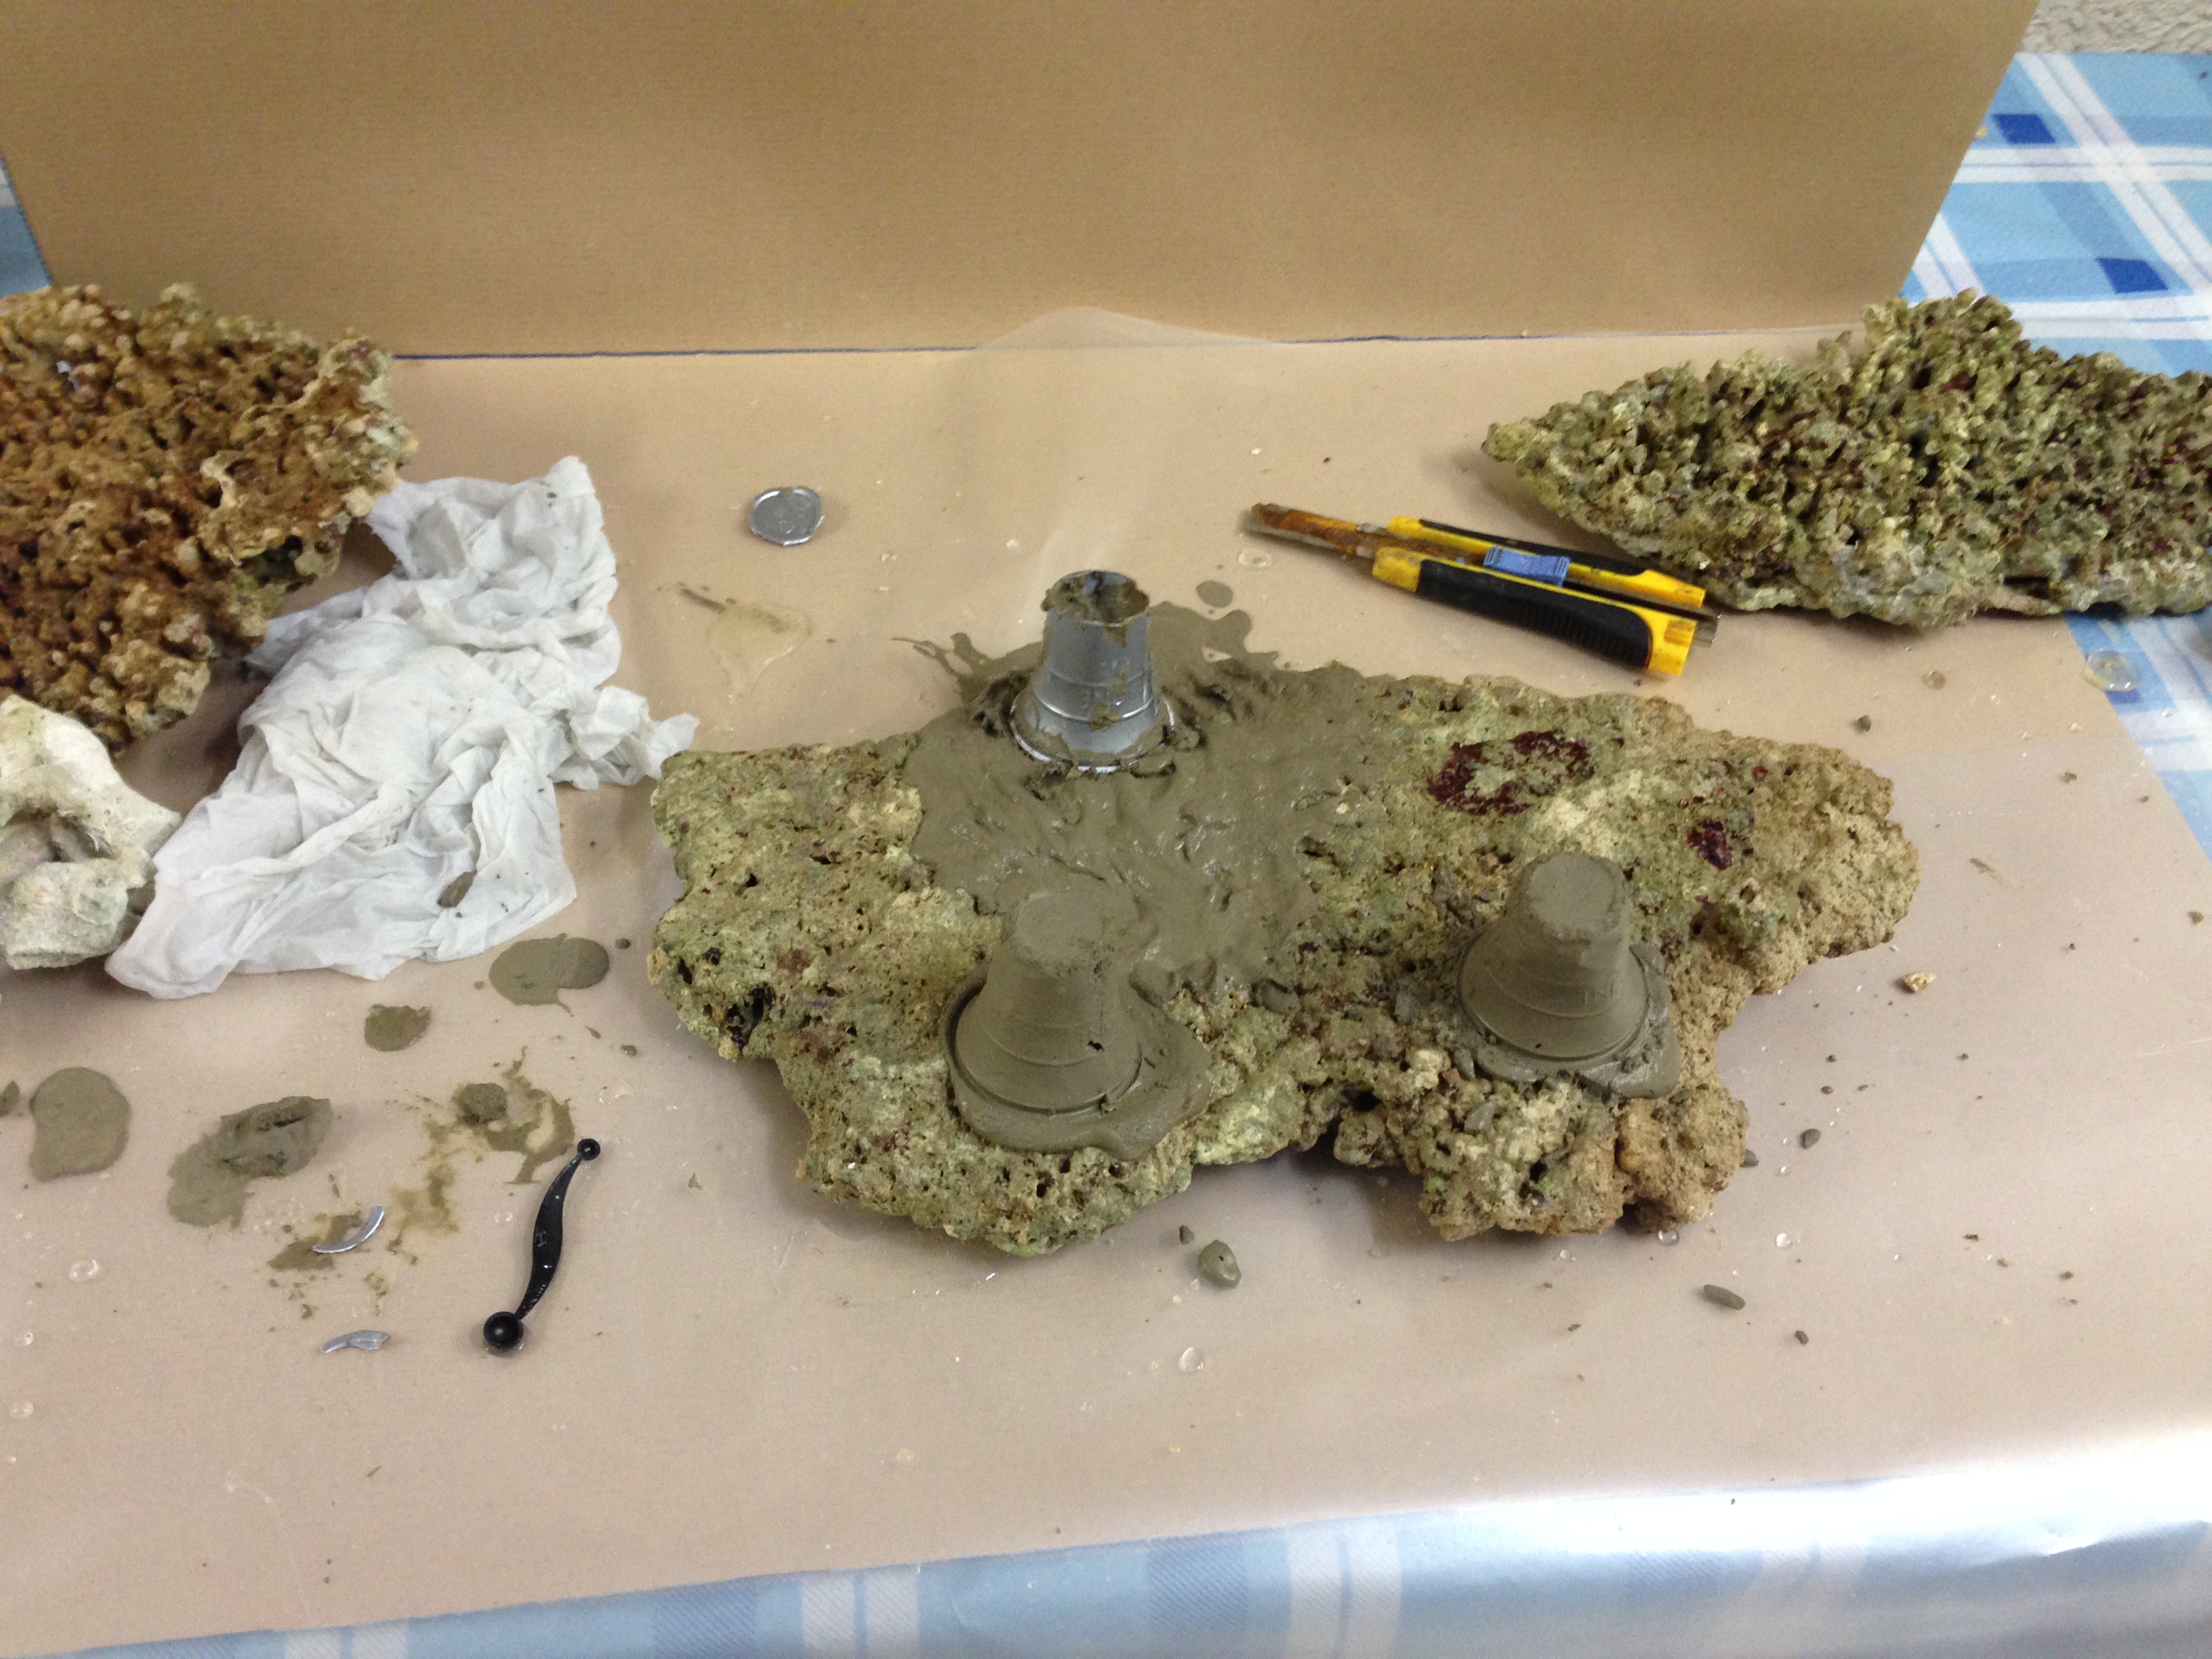
3. Cement need about 5 minutes to harden but it remains fregile for about 15 minutes so we must pay attention when removing the cups, we can use a cutter to cut the bottom of the cup, this makes it easier to remove it. Now prepare other cement (possibly less fluid) and using spathula and fingers we spread it over the pillars, giving them a more natural and rocky shape, when finished just wait a few minutes and turn upside down the base, now it stands up on its own.
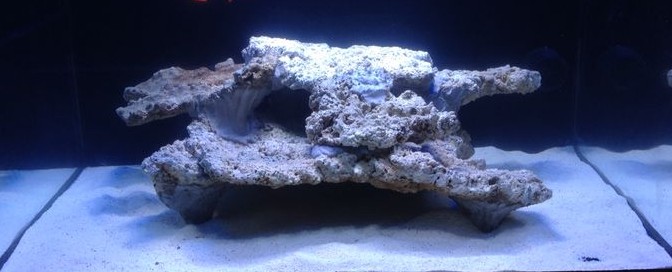
4. Now we arrange the other rocks according to our taste, I suggest not to paste them, just hold in place with tiles and wood pieces. When obtained the desired shape, take a few steps back and check everything is in the correct position, we are still in time for some changes.
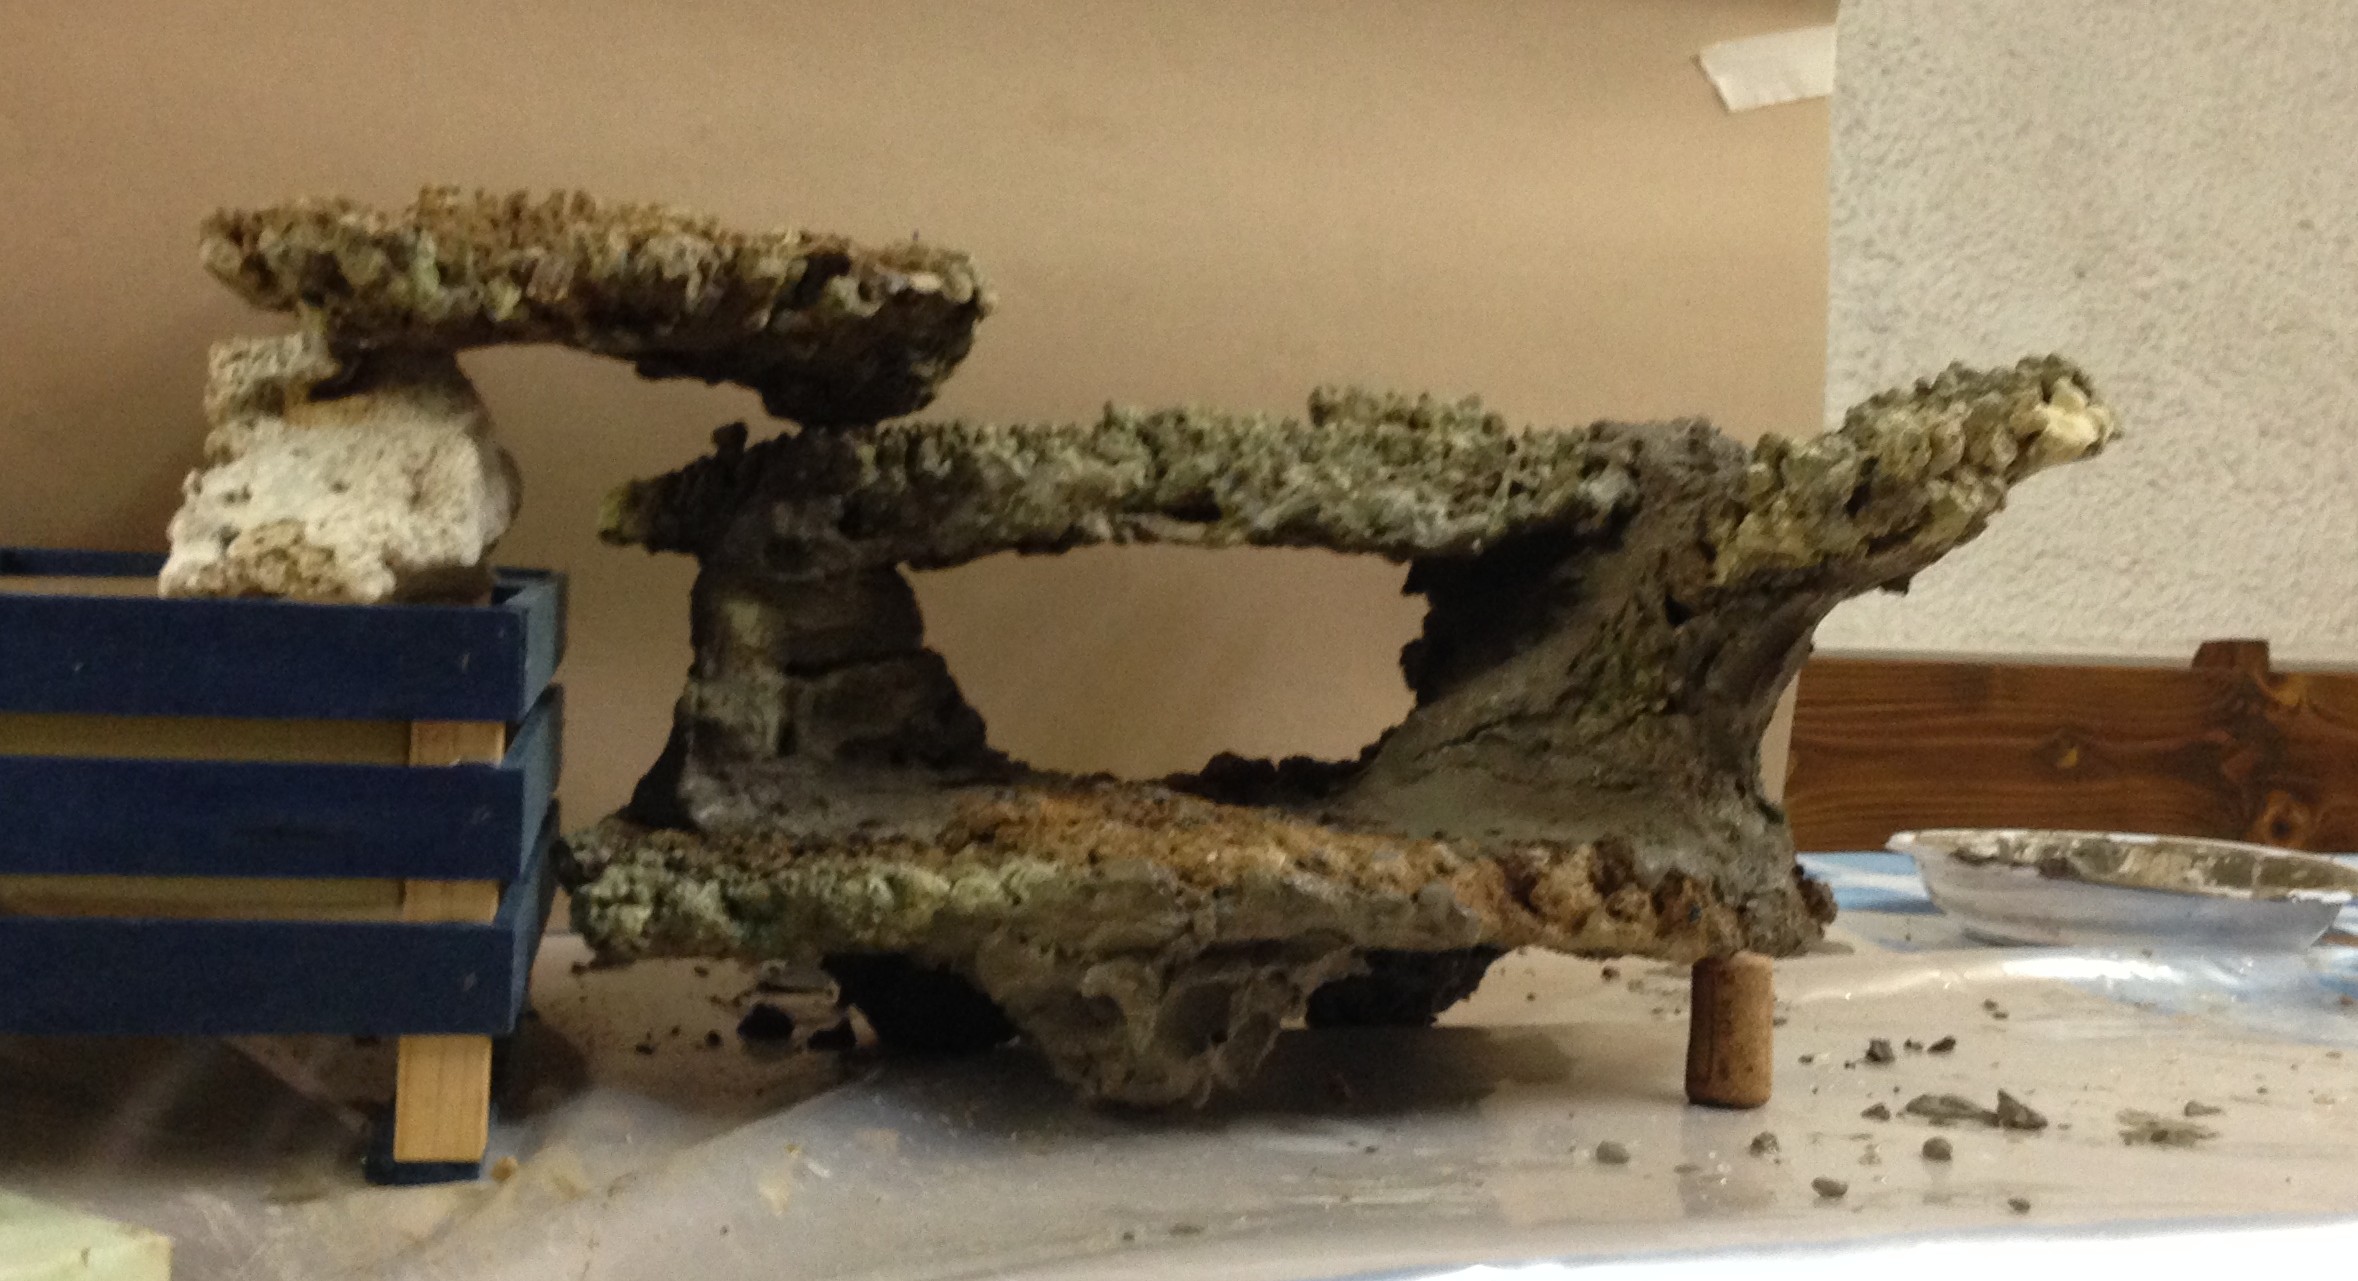
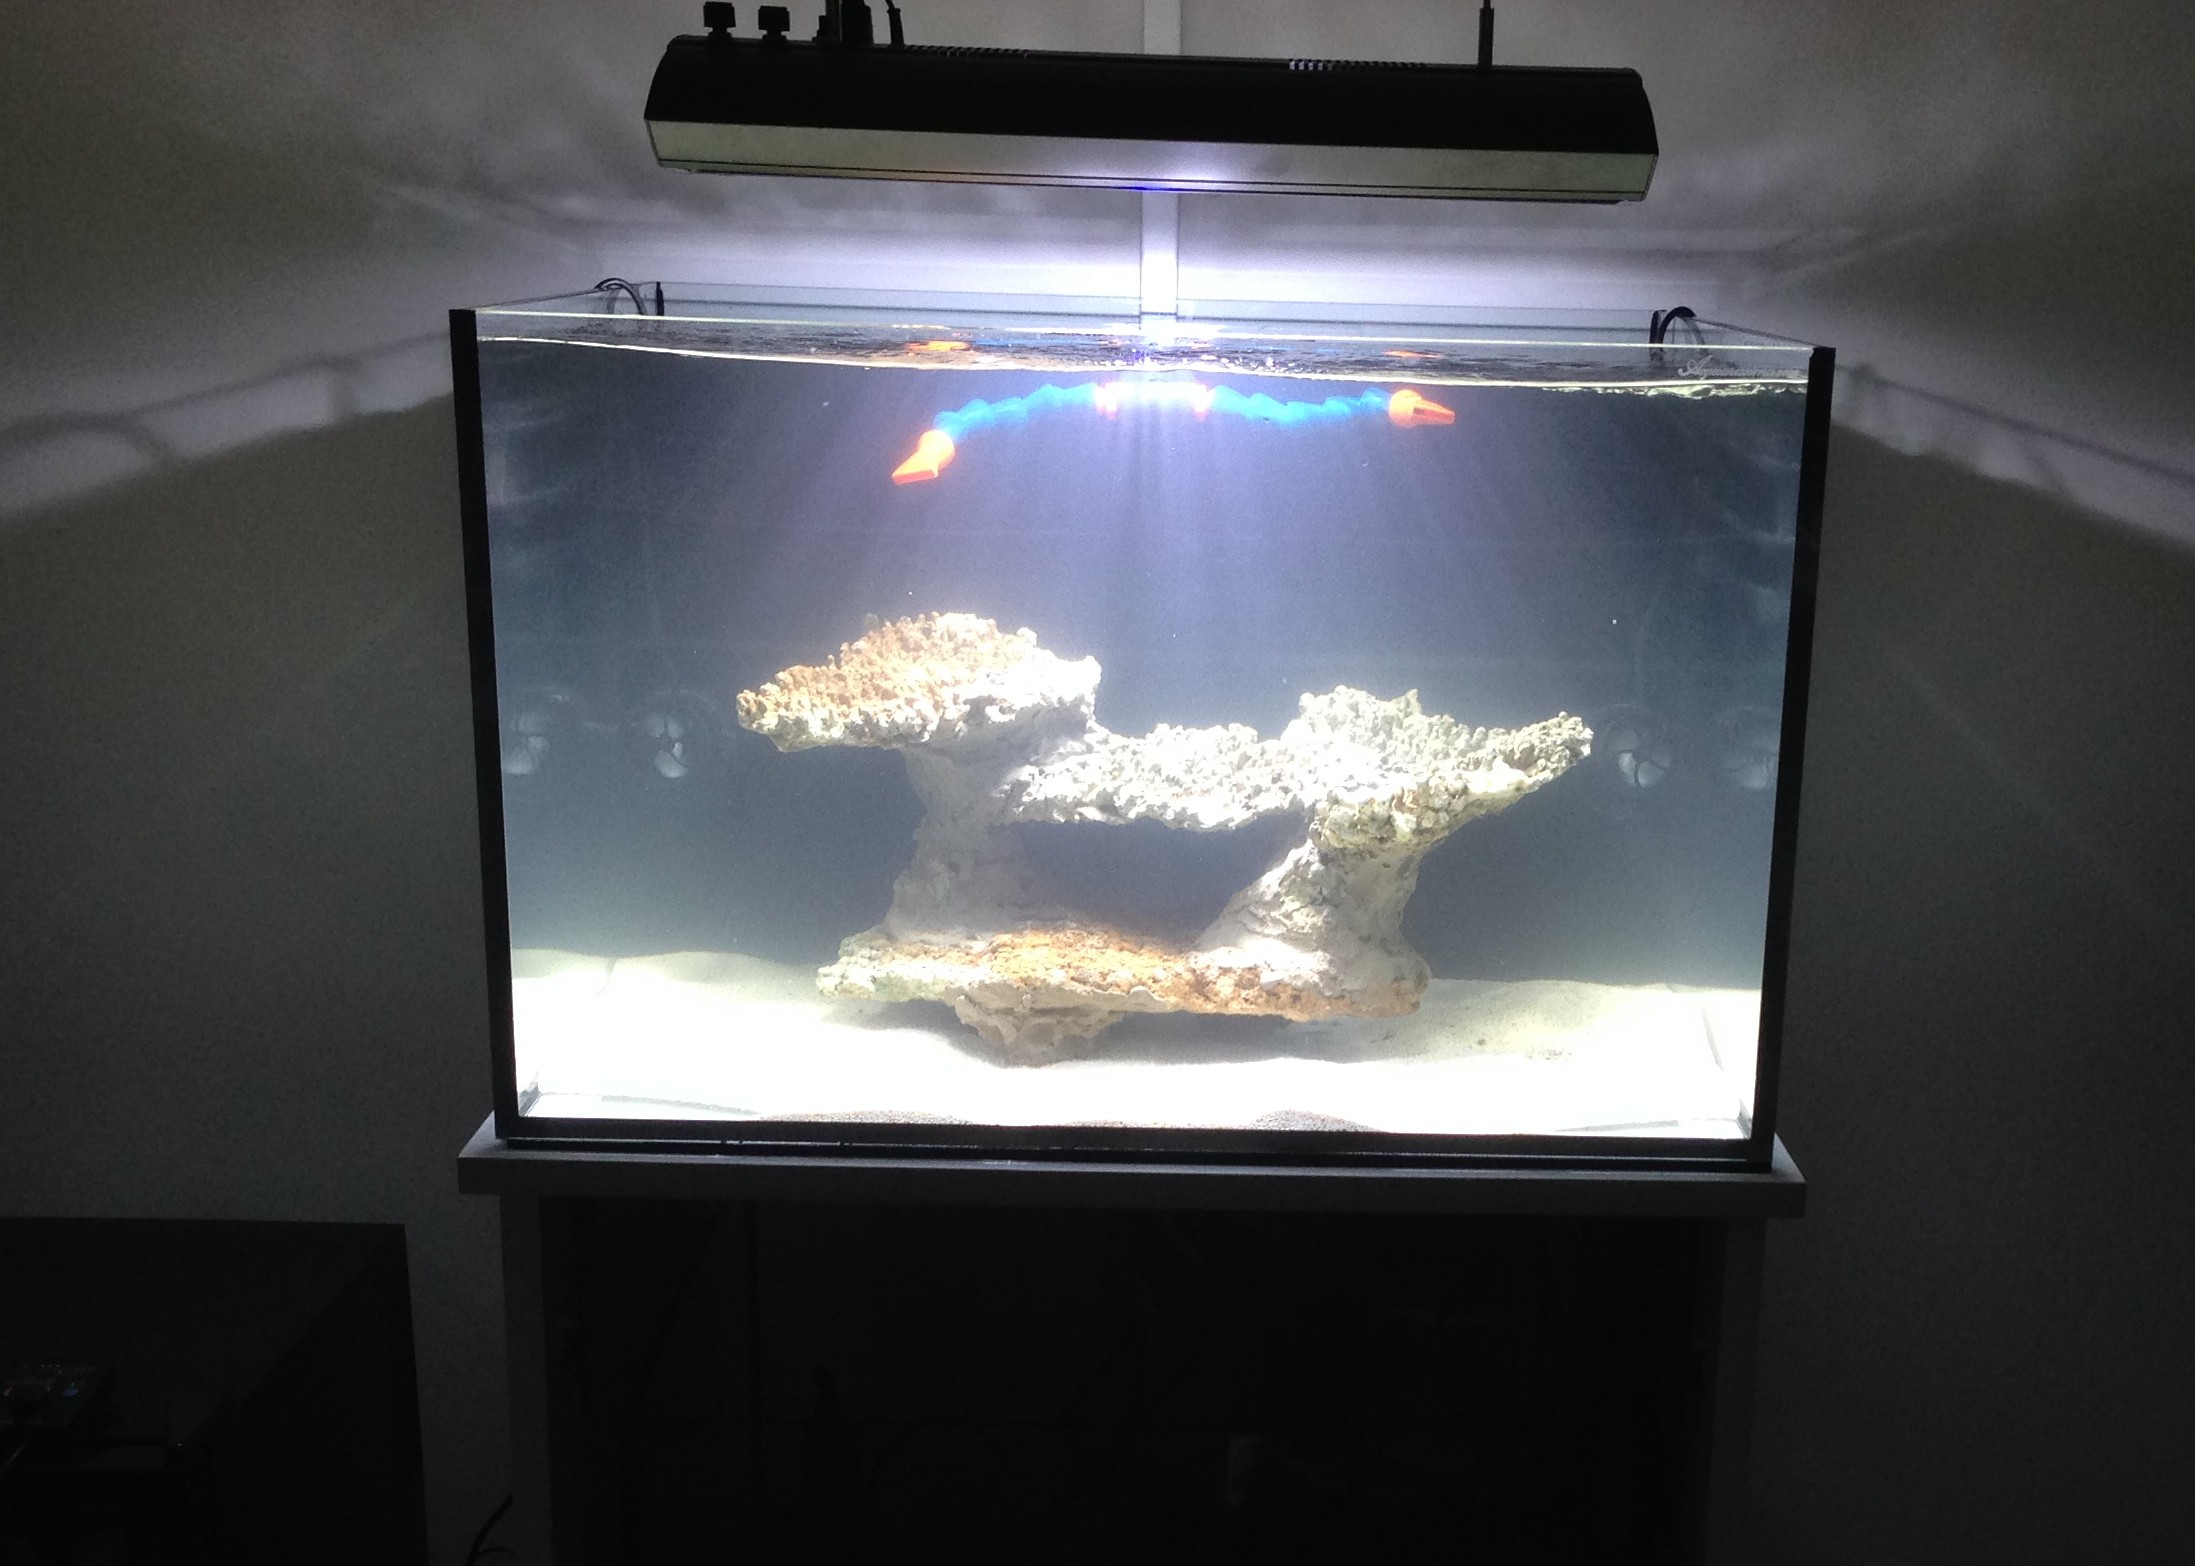
5. Make sure that the total height of the structure don't exceed the ¾ of the water level and the rocks stay at 9/10 cm from the tank glasses, when everything is ok take some pictures. Now disassemble the structure and reassemble it with the cement, helping with photos to put each rock in its position.
6. When all the rocks have been placed, check the points where the cement is subject to greater stress and make some reinforcements with other cement layers.

7. When all the rocks are fixed wait a few minutes then remove the ties and any other support and make a final check of the bonding. Now with the help of some friends put the structure in the tank, previously filled with salt water. Caution: the cement does not need to be fully dry before you can put it in water, it is hydraulic type and the definitive hardening take place in water without releasing toxic substances.