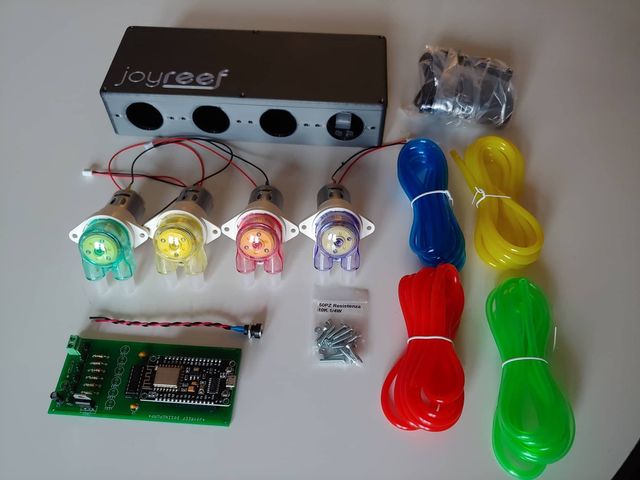
Hello guys! Ok have you bought everything? Do you have all the material for your hands? So let’s see how to mount everything together in just a few steps.
First of all you should have everything you need explained in Part One of this miniseries:
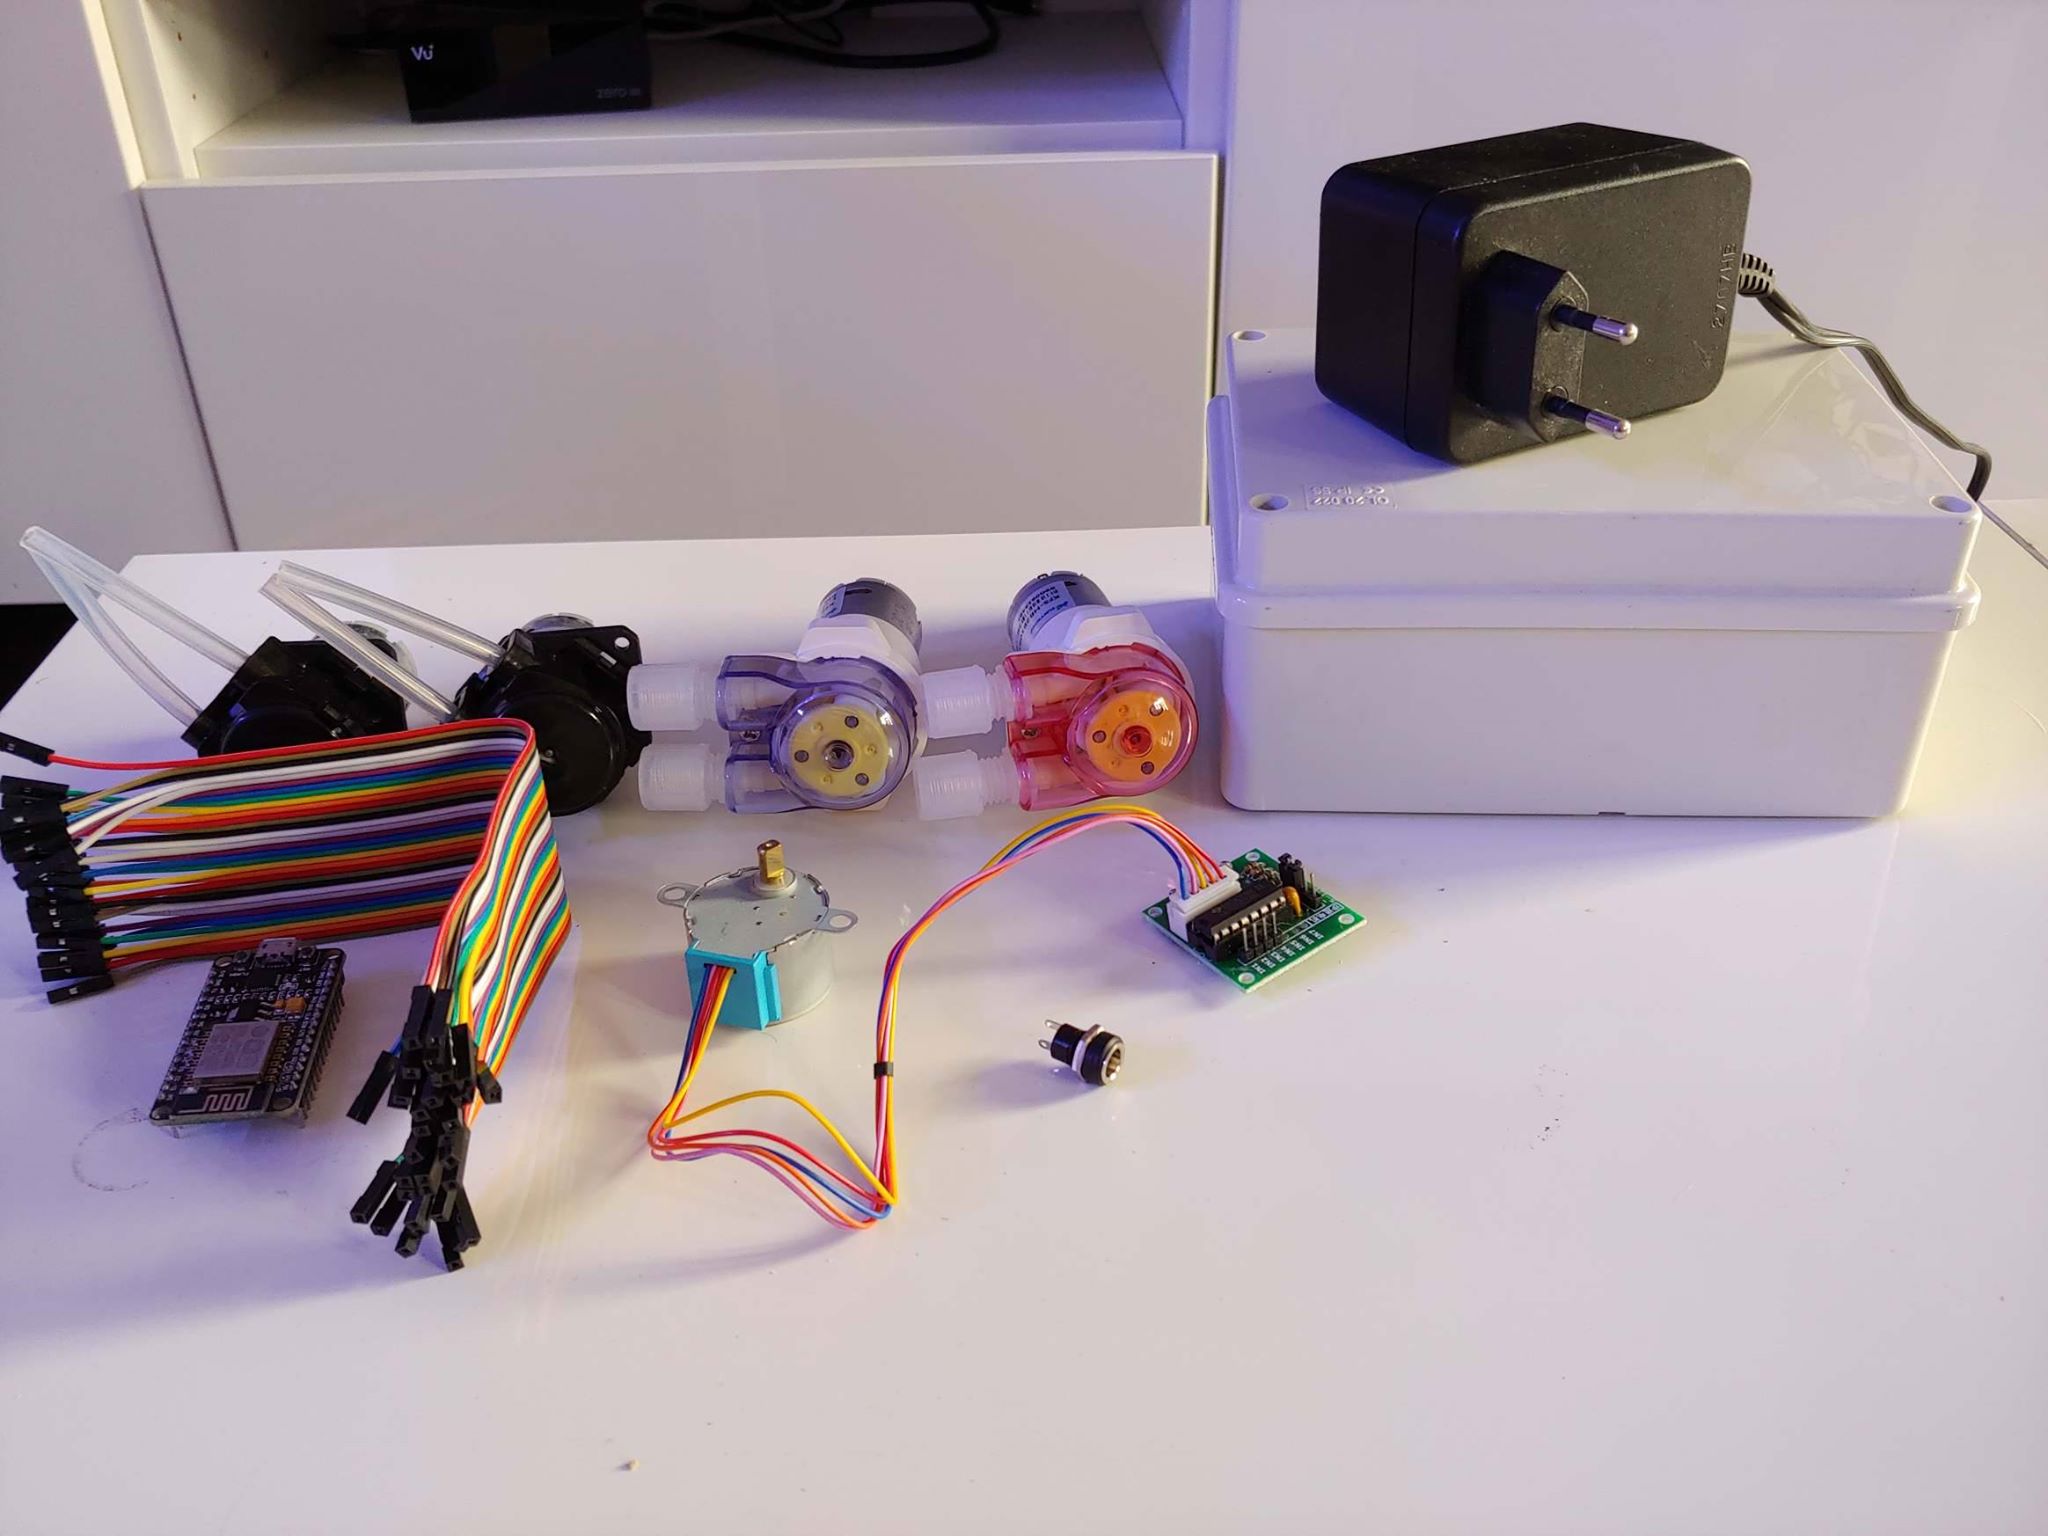
If you want to start trying to mount the circuit you can do everything except the connections to the pumps, on the circuit with the integrated there are LEDs, which will turn on when the pump should be in action. In this way you can already test the whole operation of the Dosometric Pump.
The tools necessary for assembly are the following:
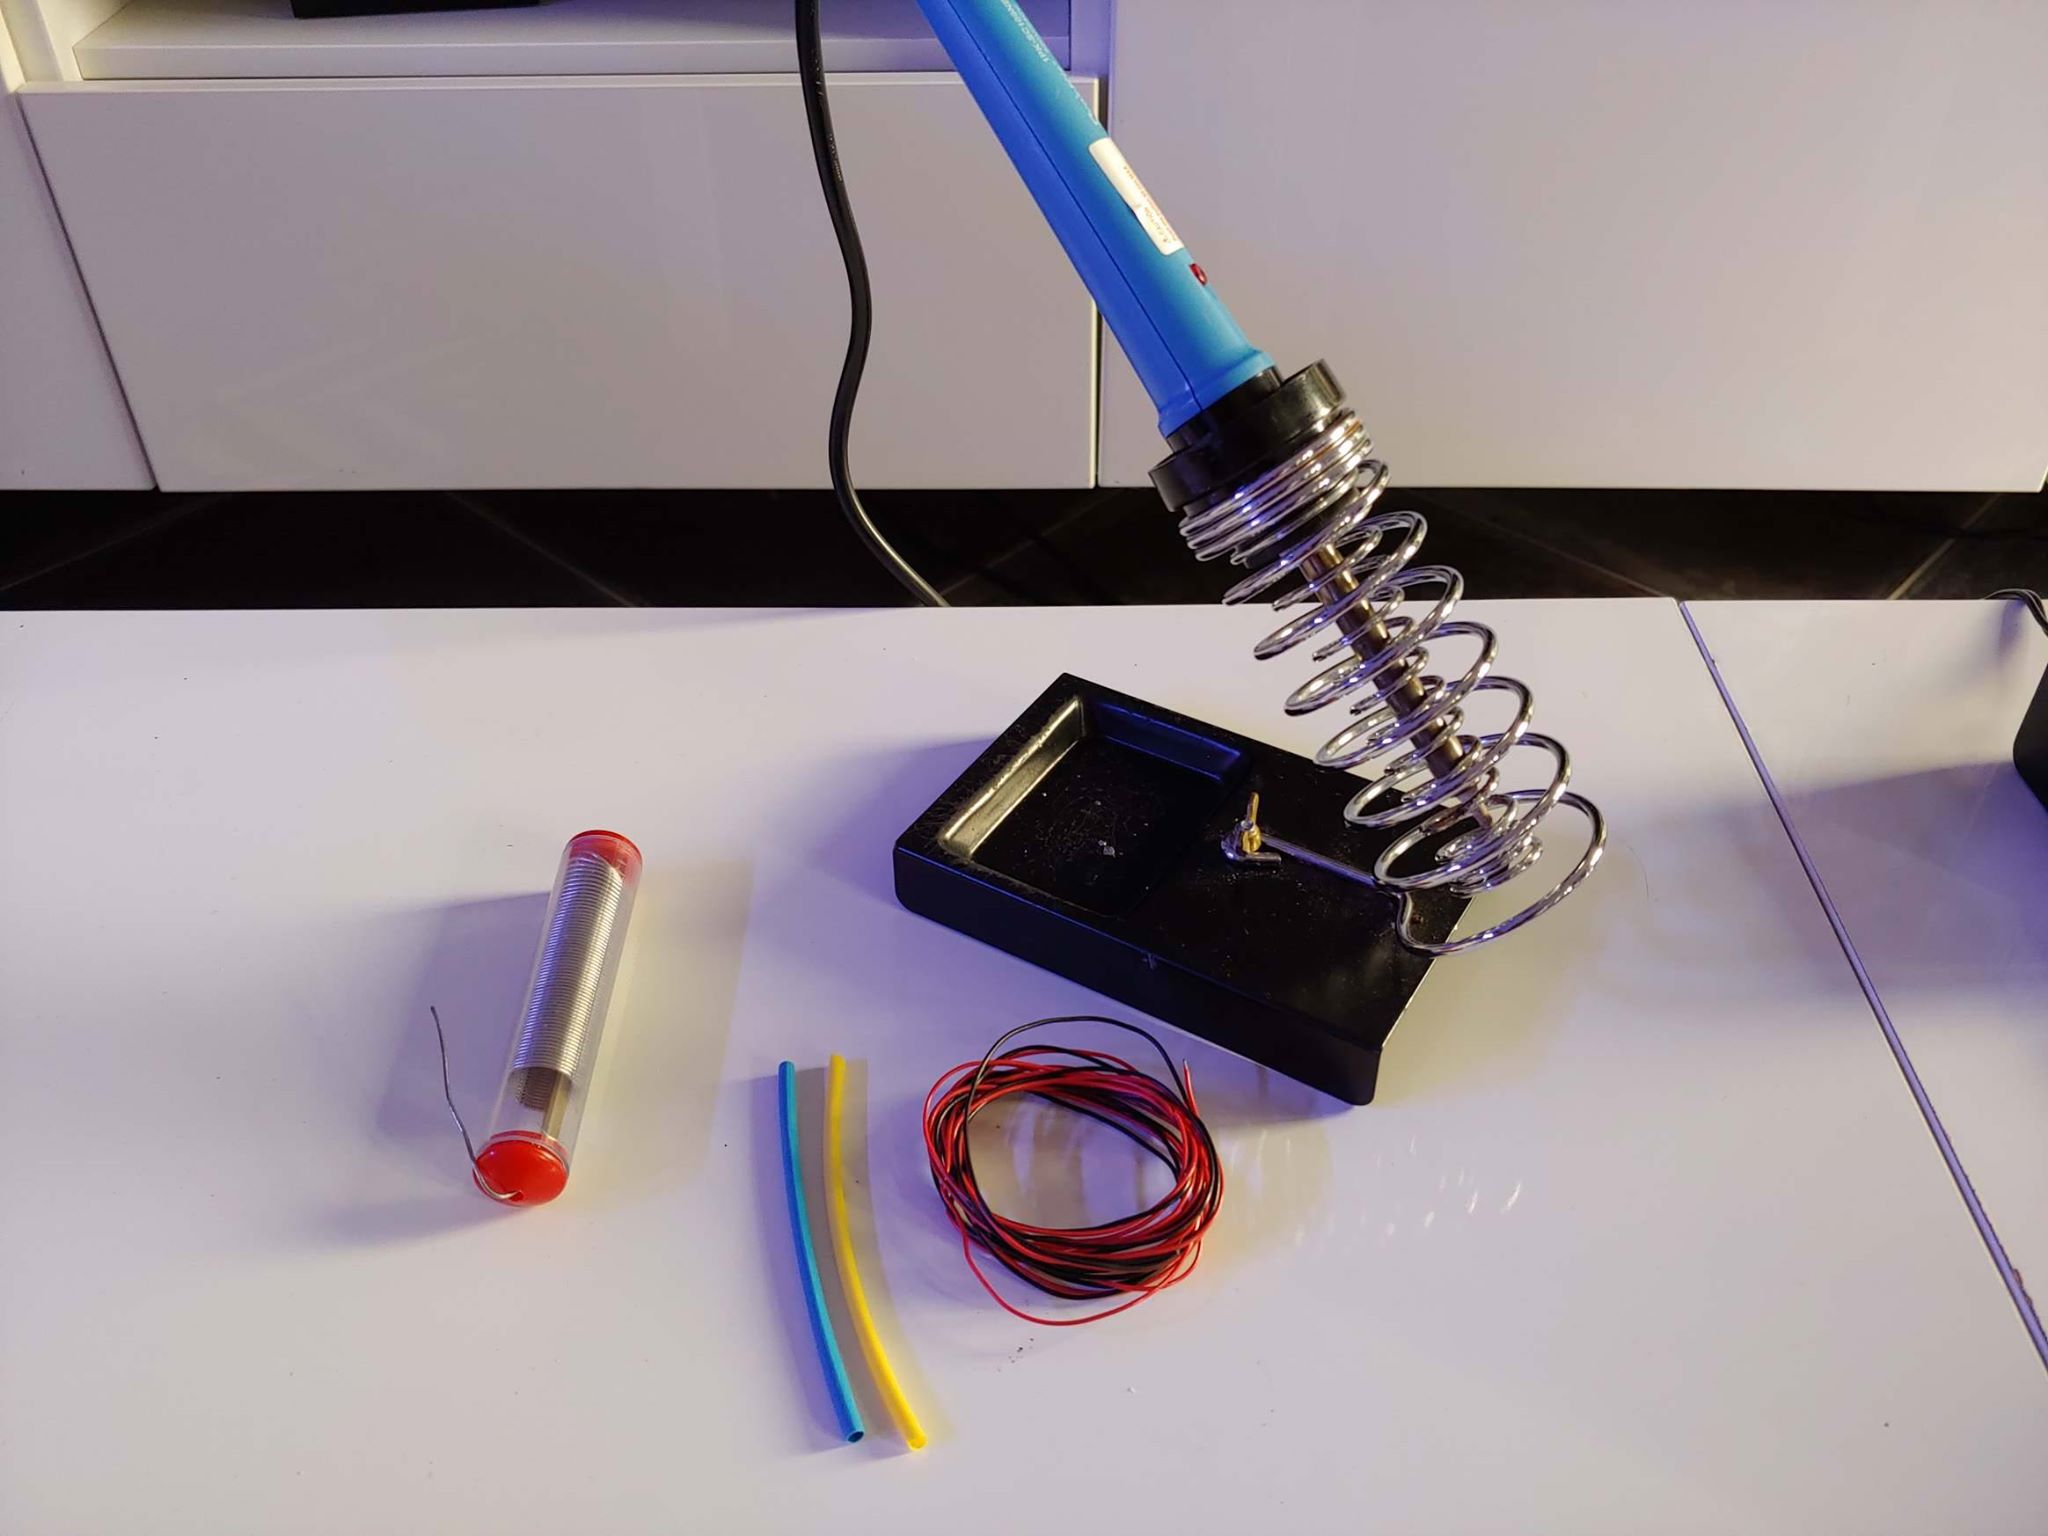
or a welder, of the tin, a heat-shrinkable sheath and of the wire, possibly black and red :). Ah of course you also need a screwdriver.
If you do not have a welder you can buy this, it is a great kit that is great for starting:
If you prefer to buy a little better, you can take this:
Digital soldering Iron Station
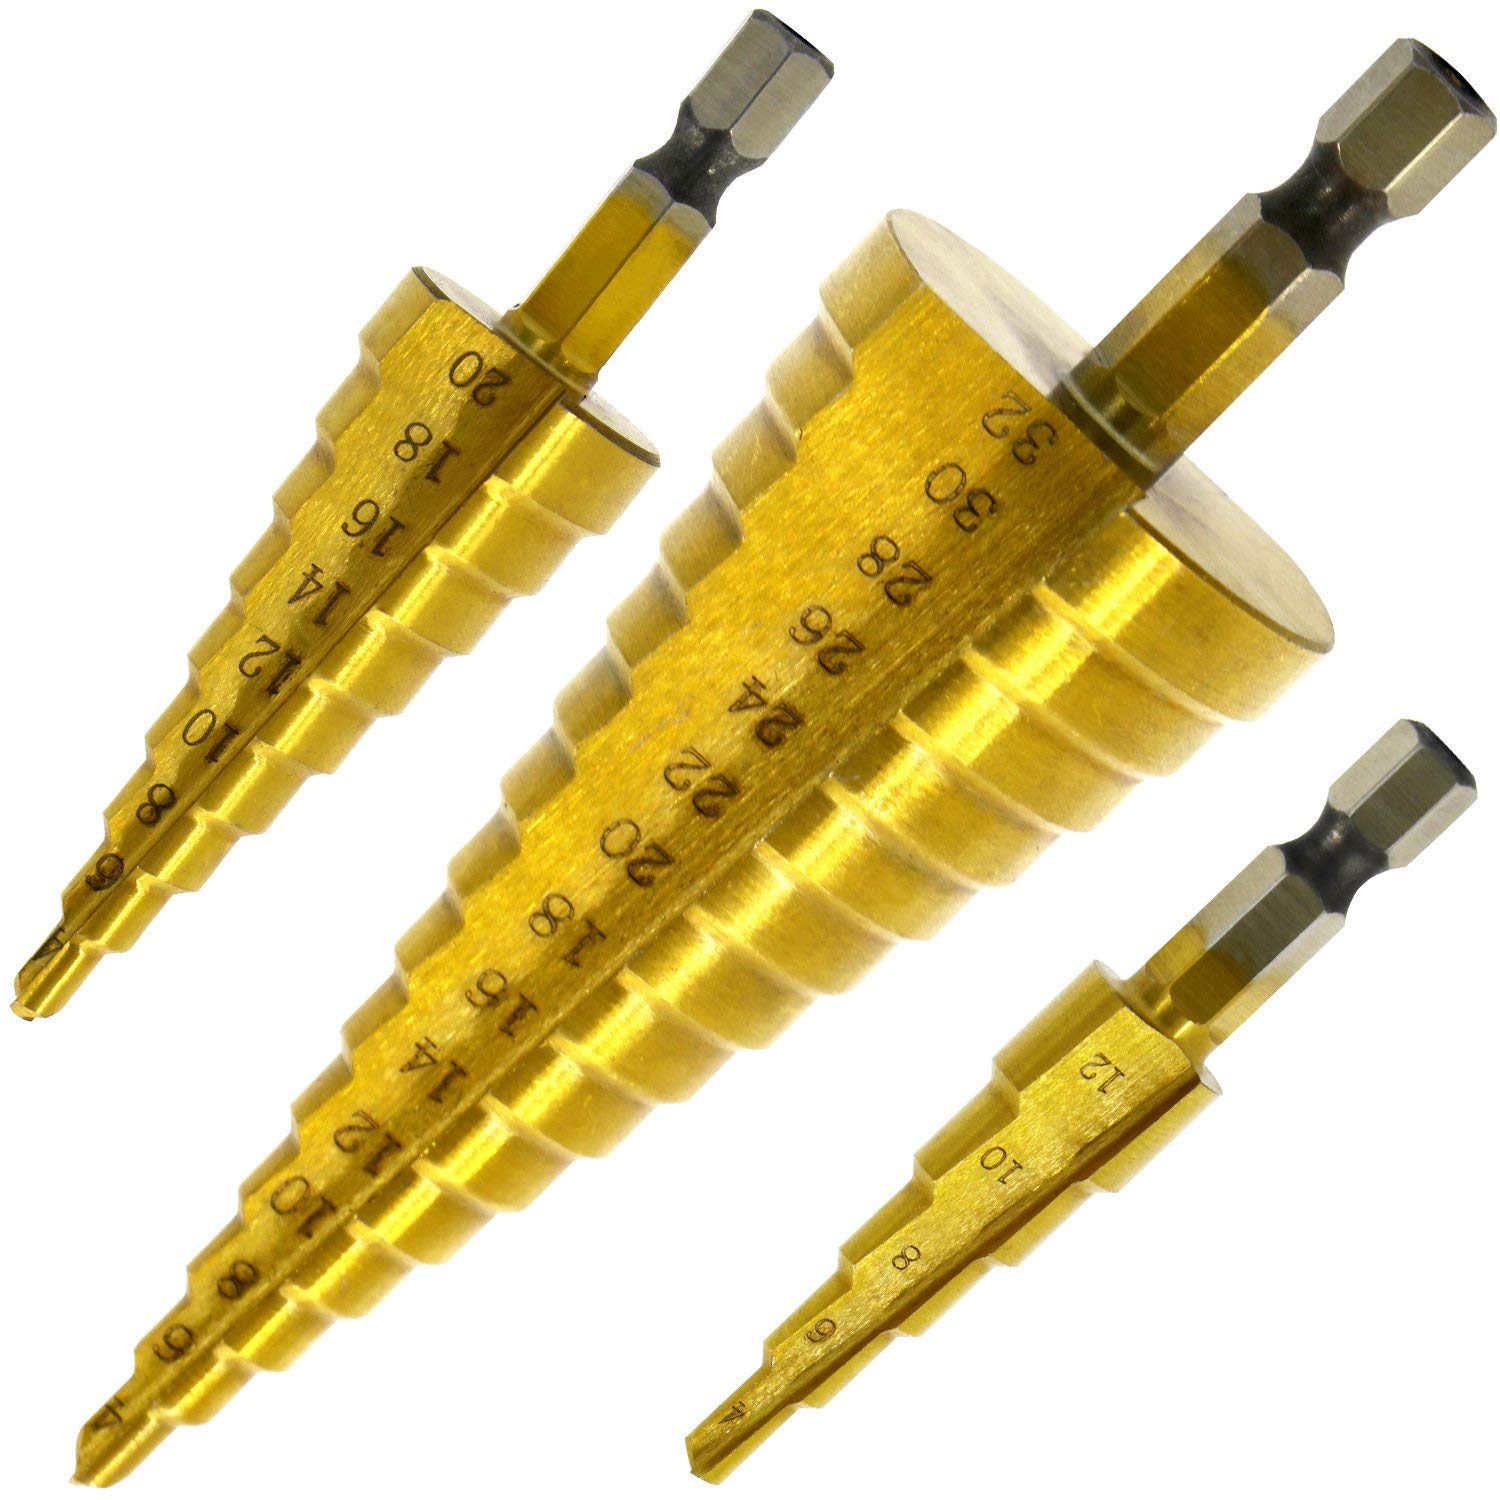
To make holes in the electrical box, such an instrument can be convenient:
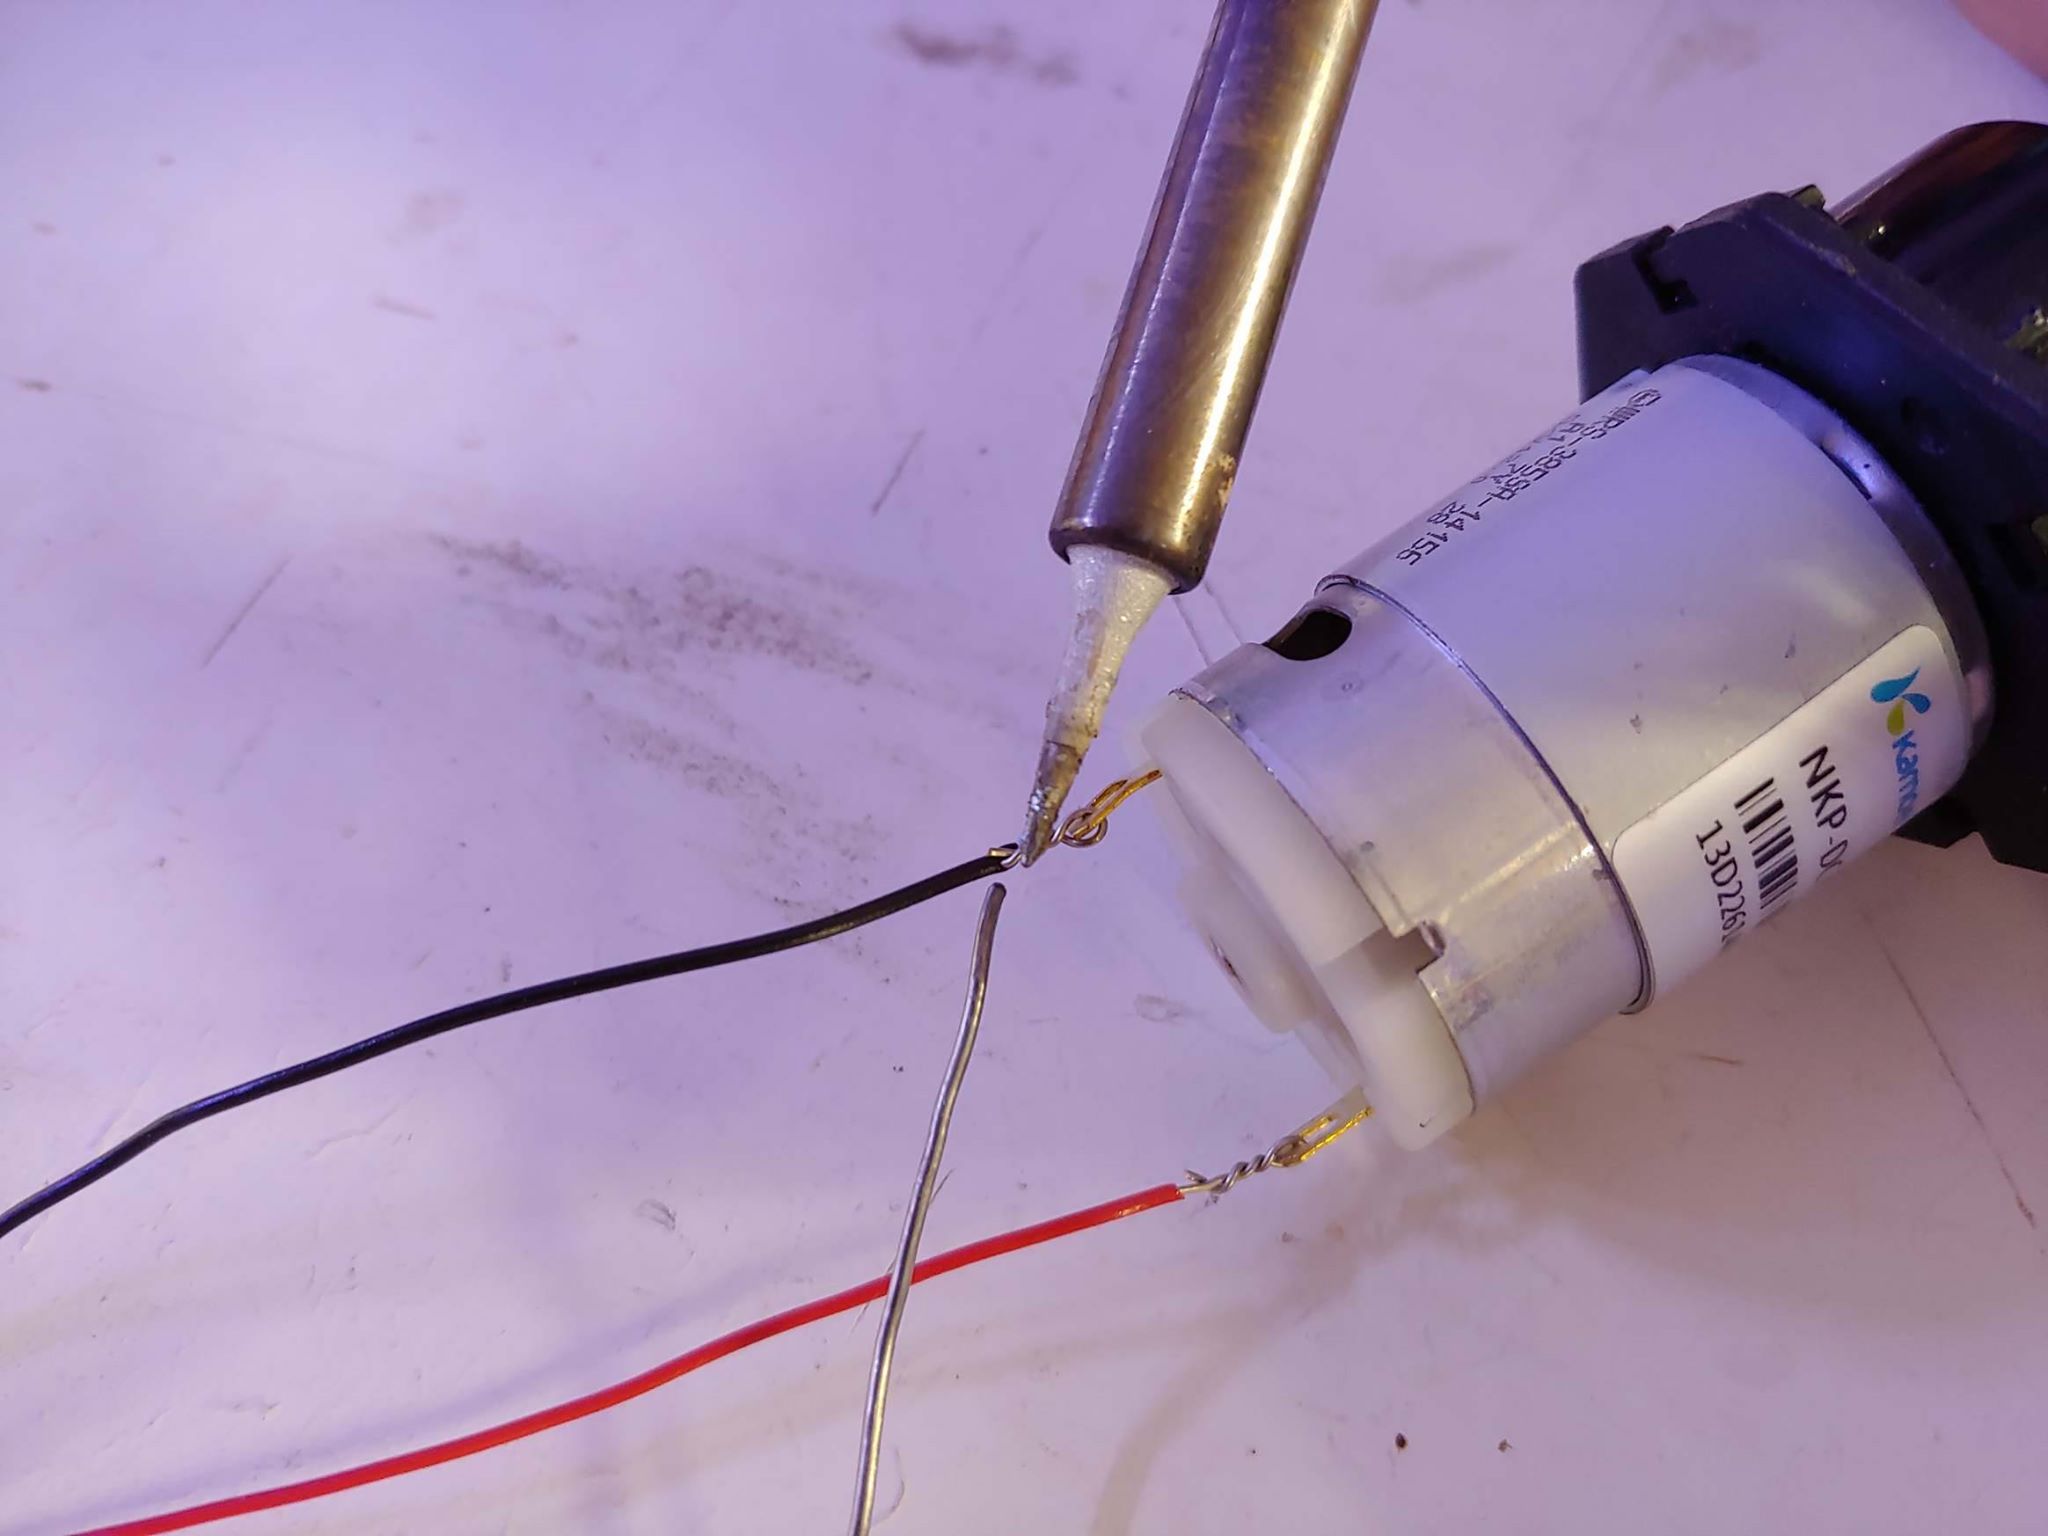
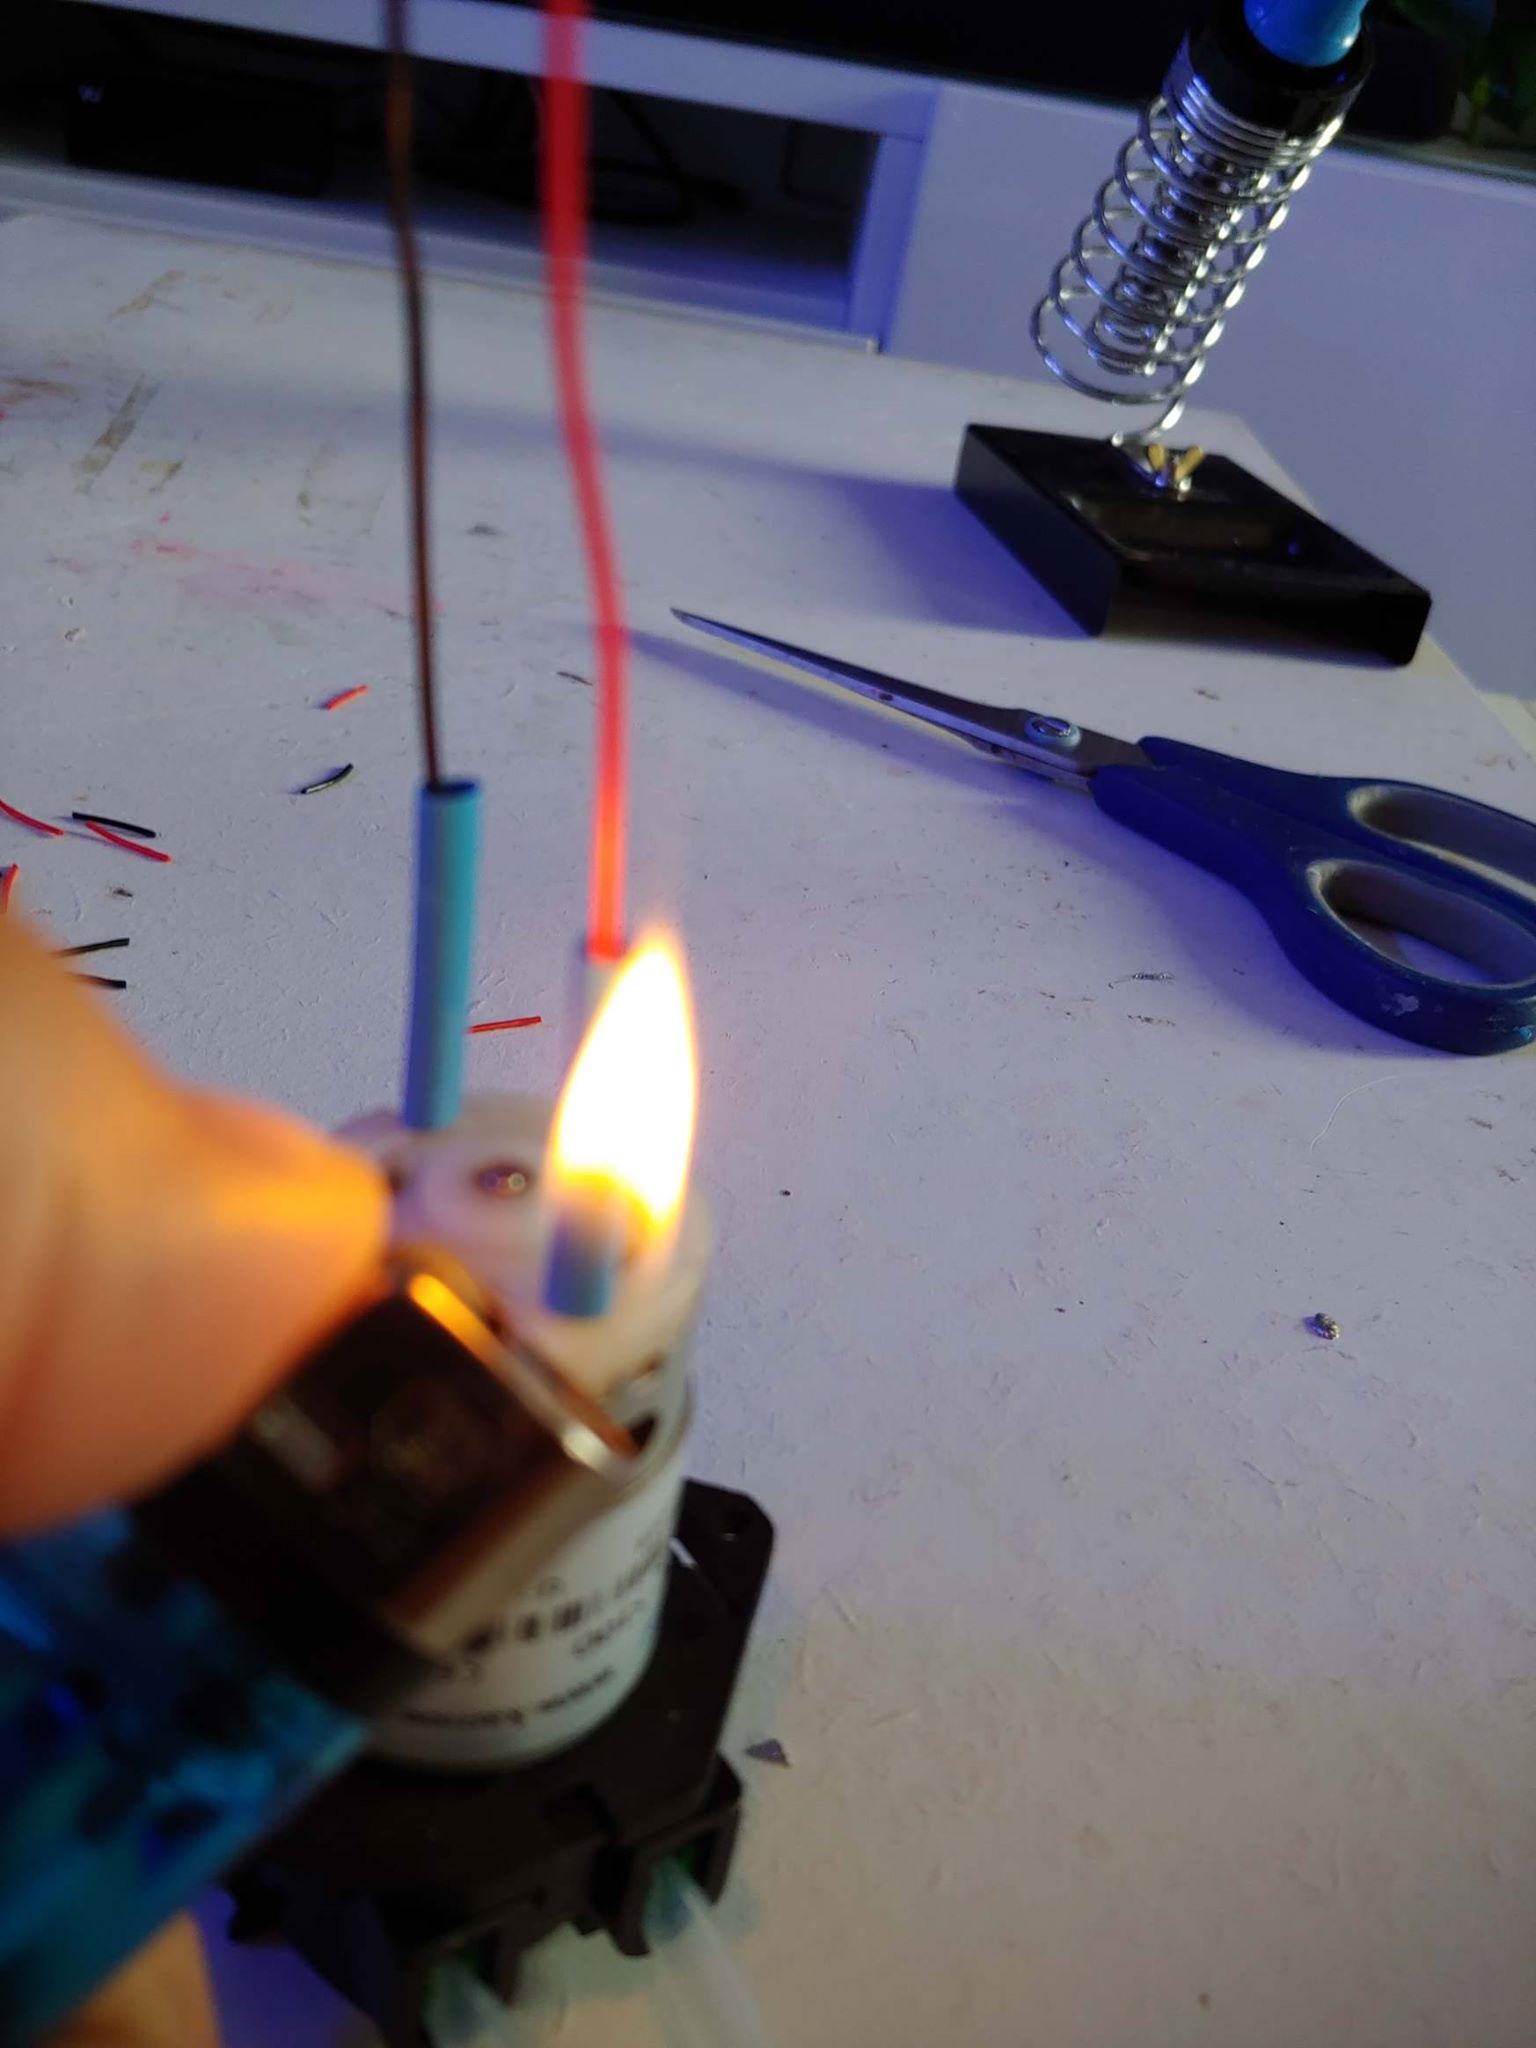
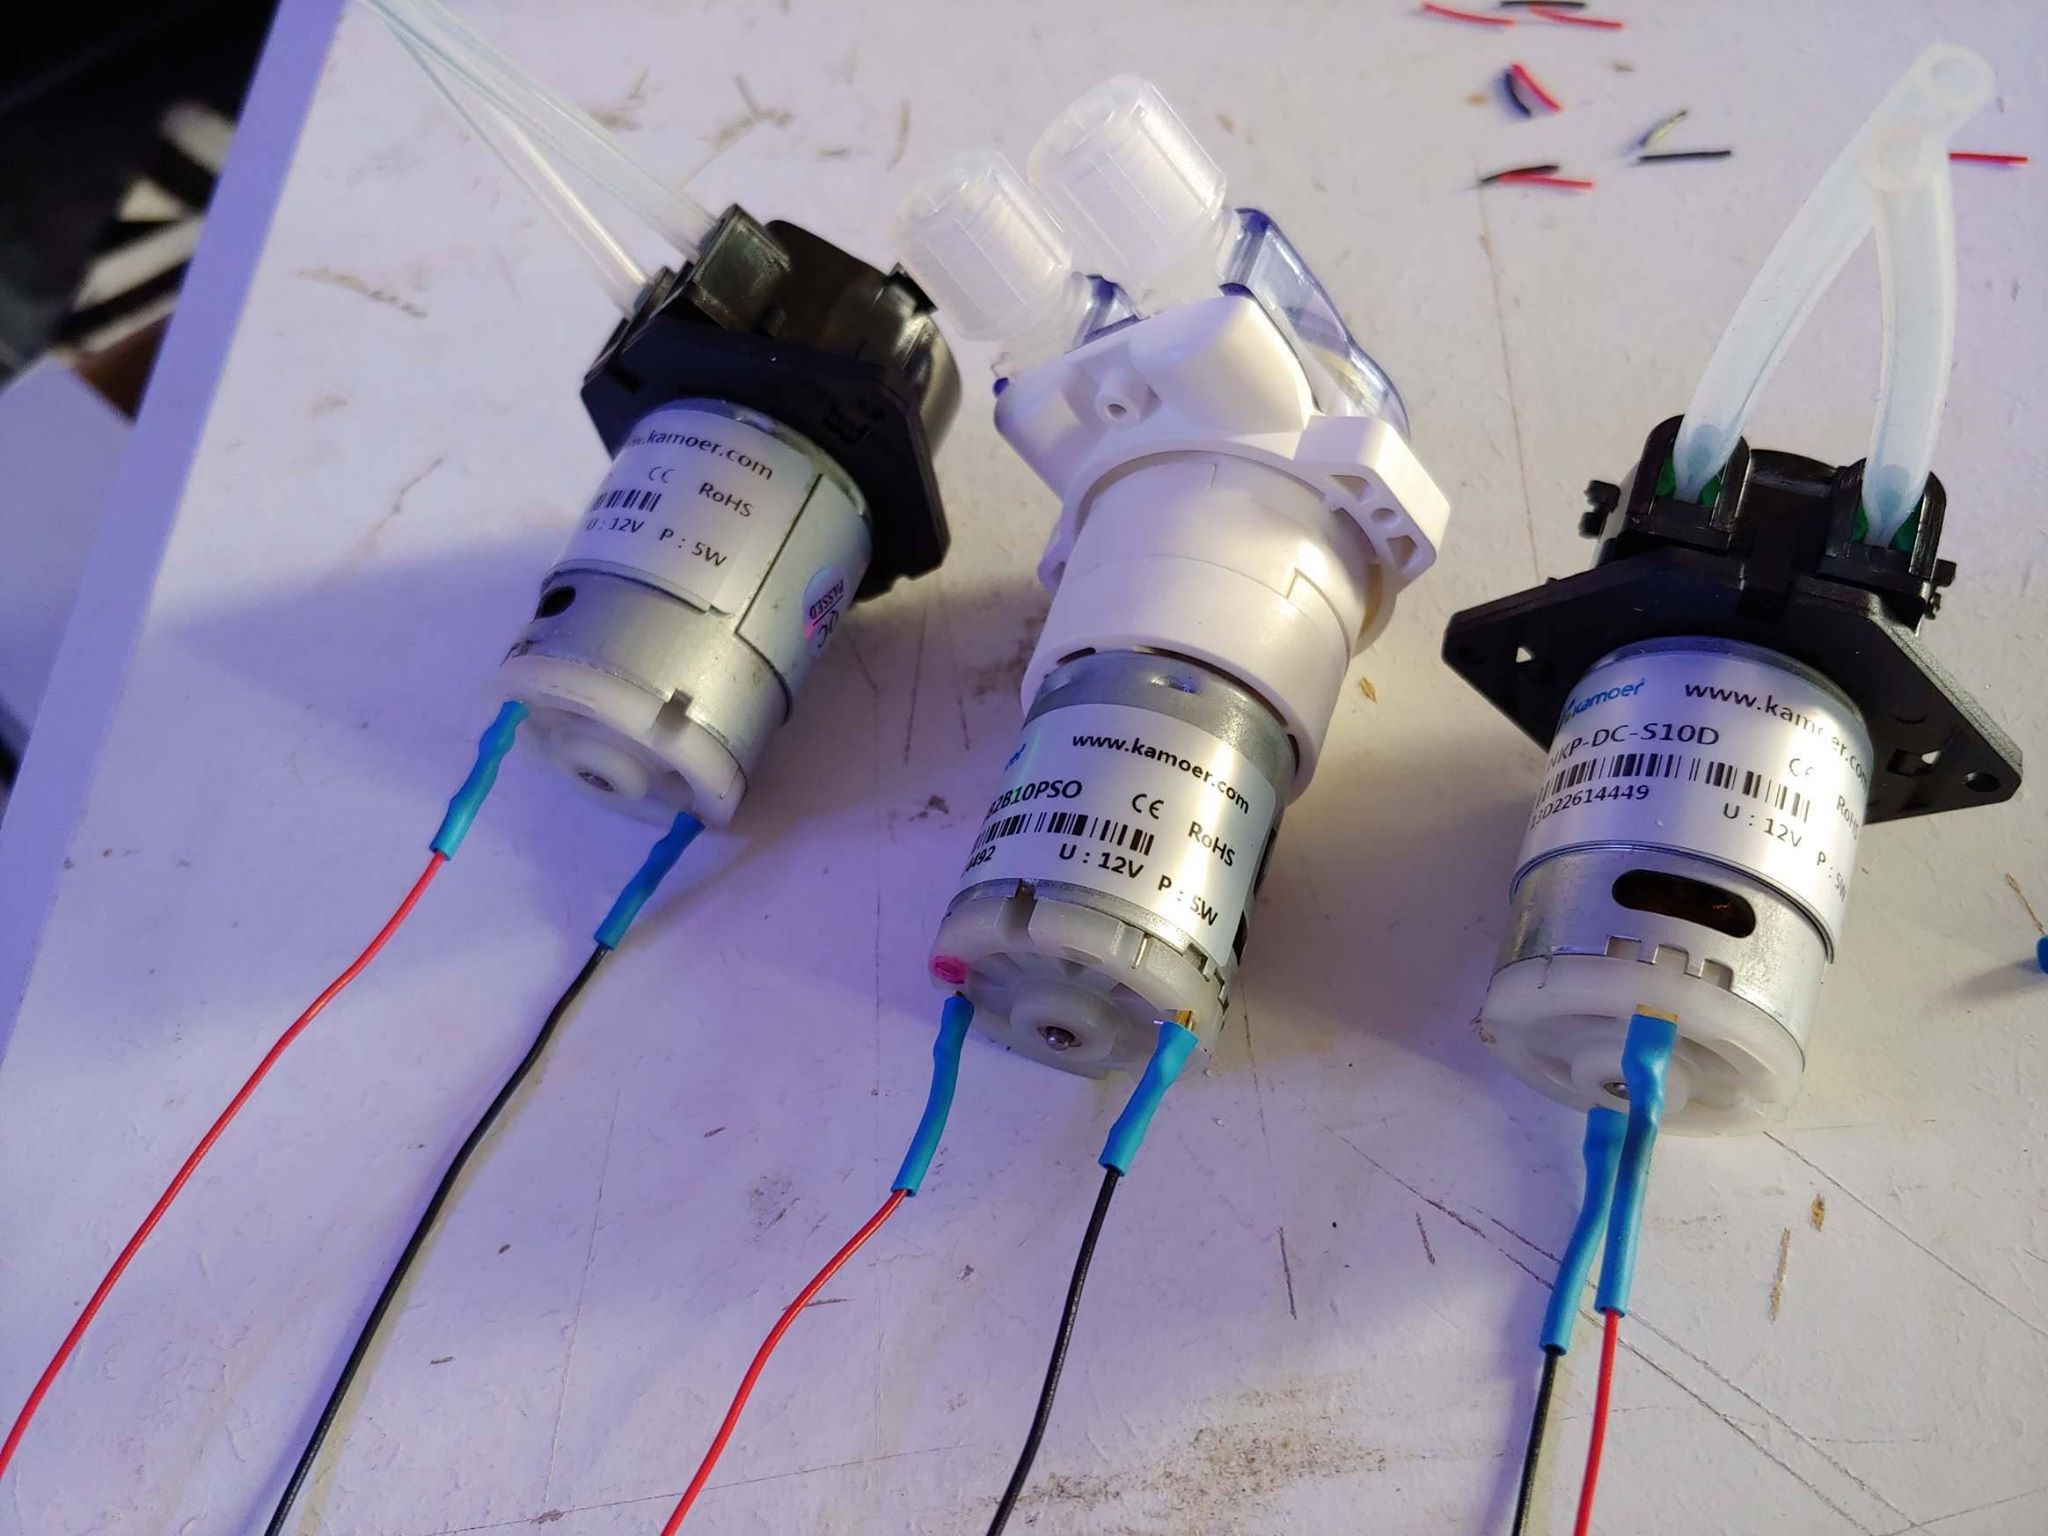
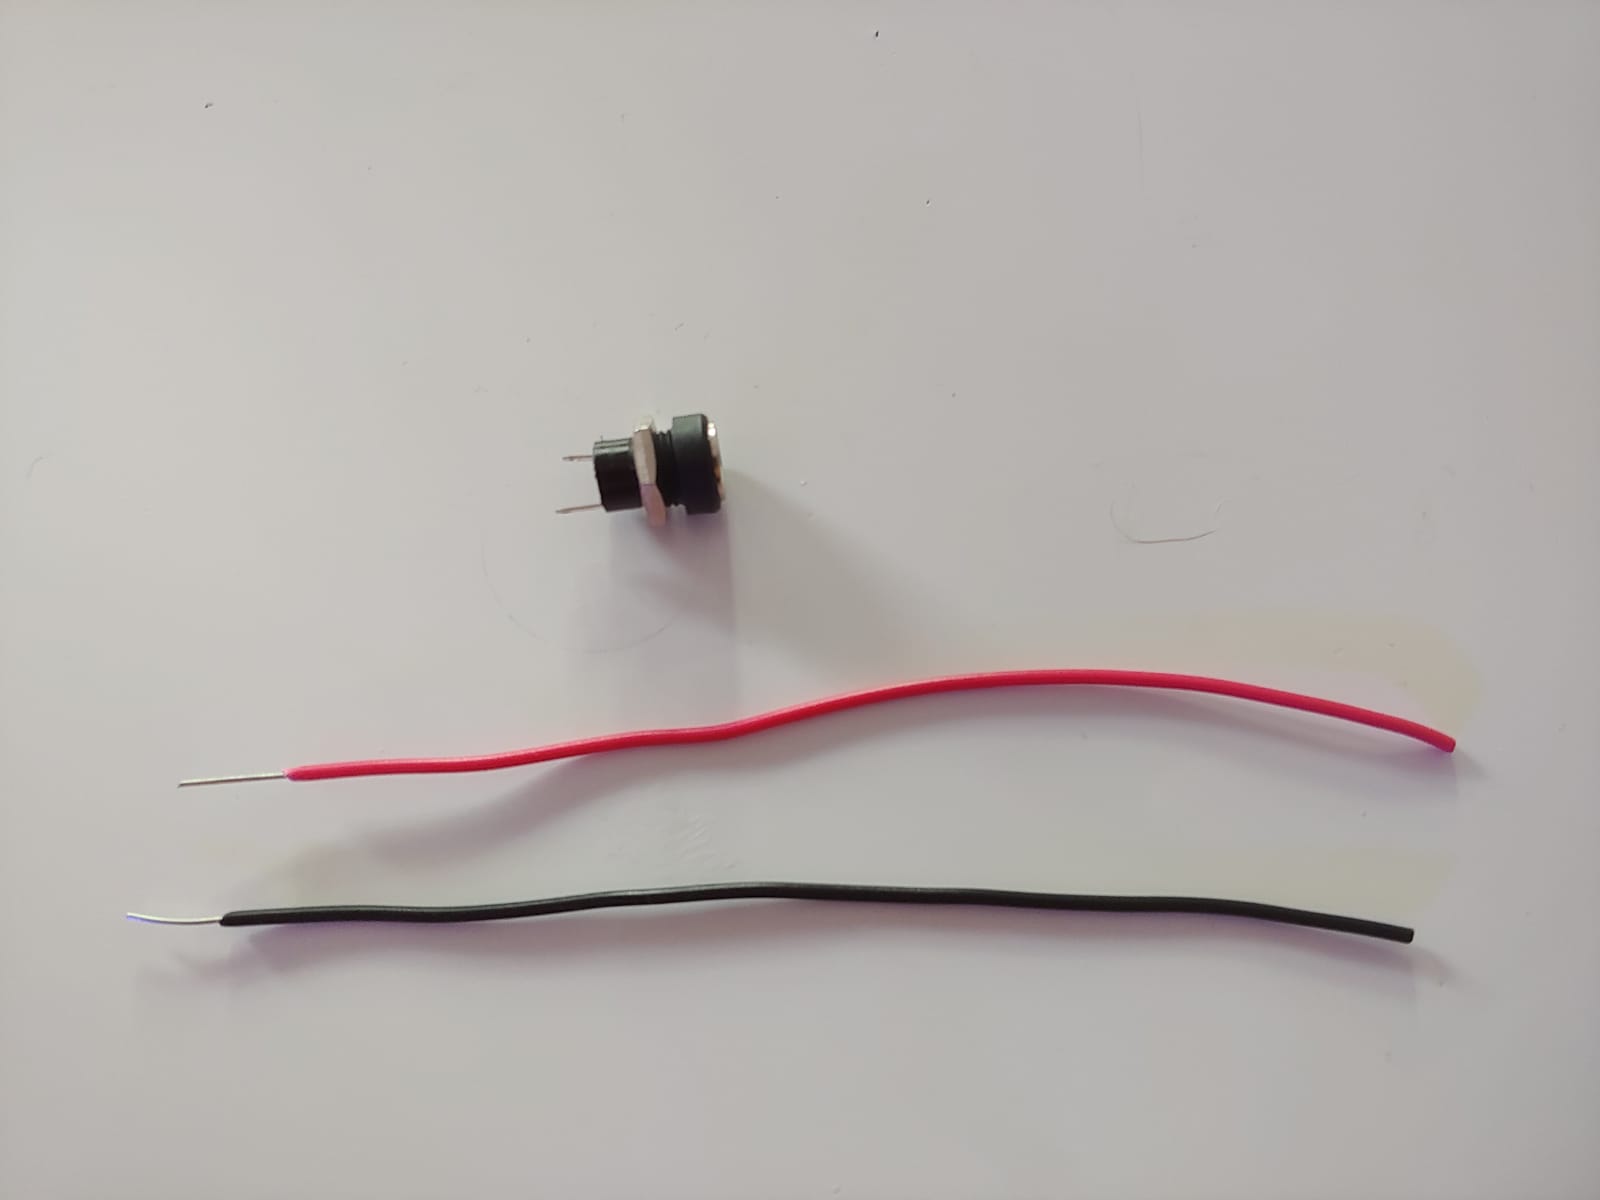
We begin to make the cables to be welded to our heads. Cut a black and a red cable of about 10 – 12 cm for each head we are going to mount. In this tutorial I will create a 3-head pump and then I will have 6 cables.
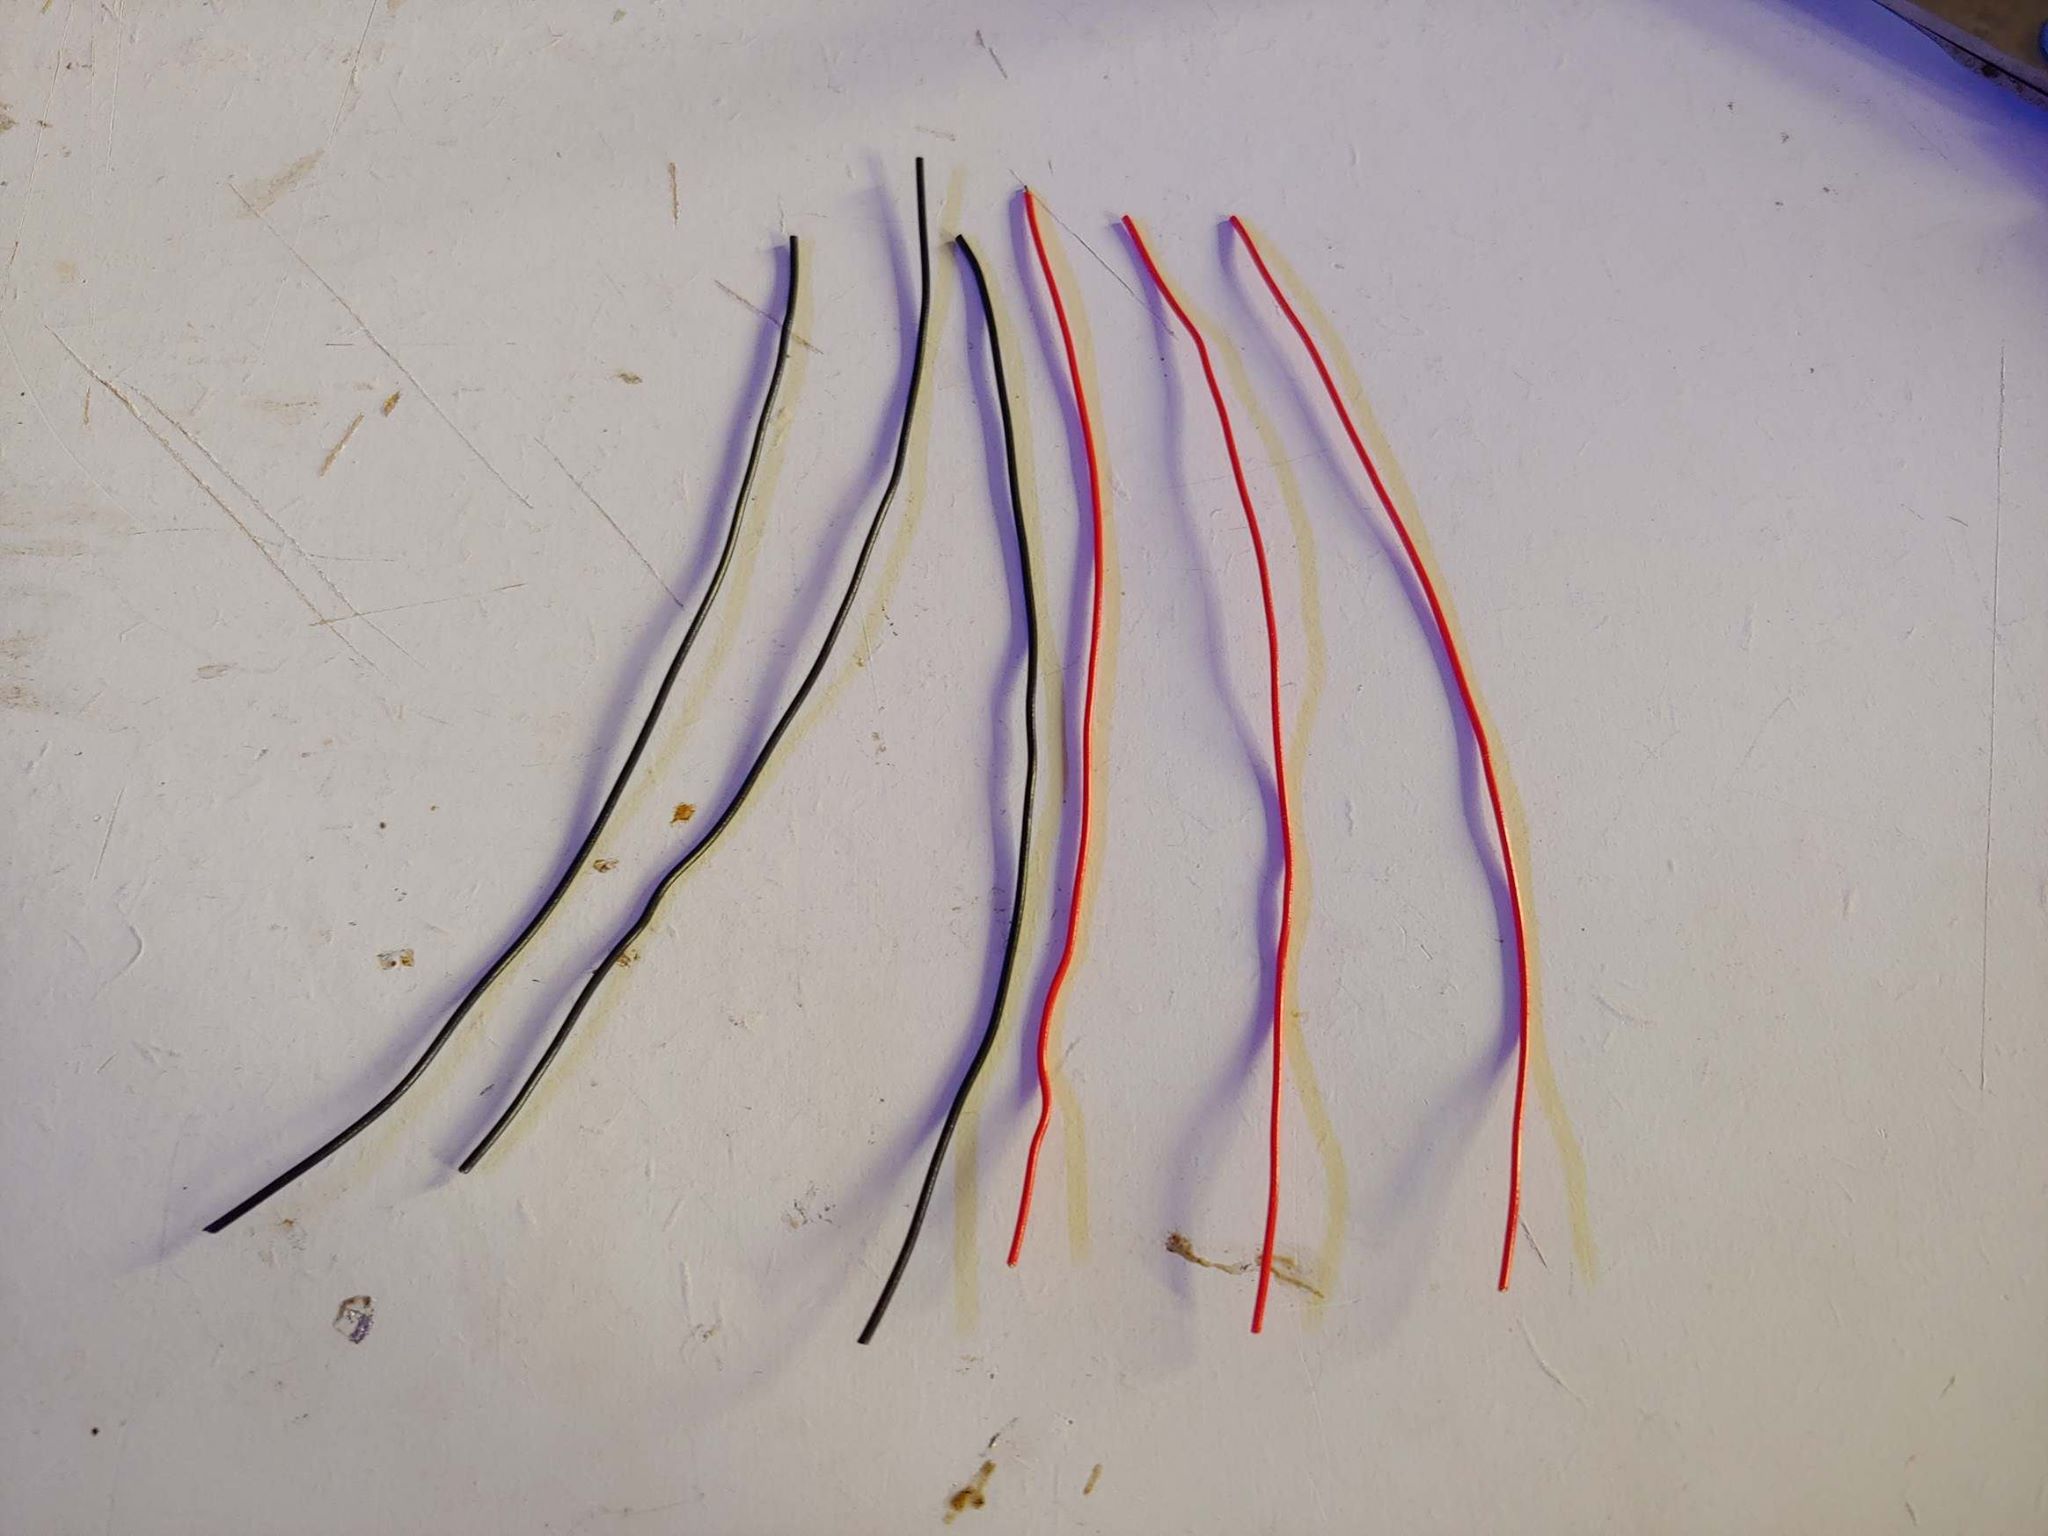
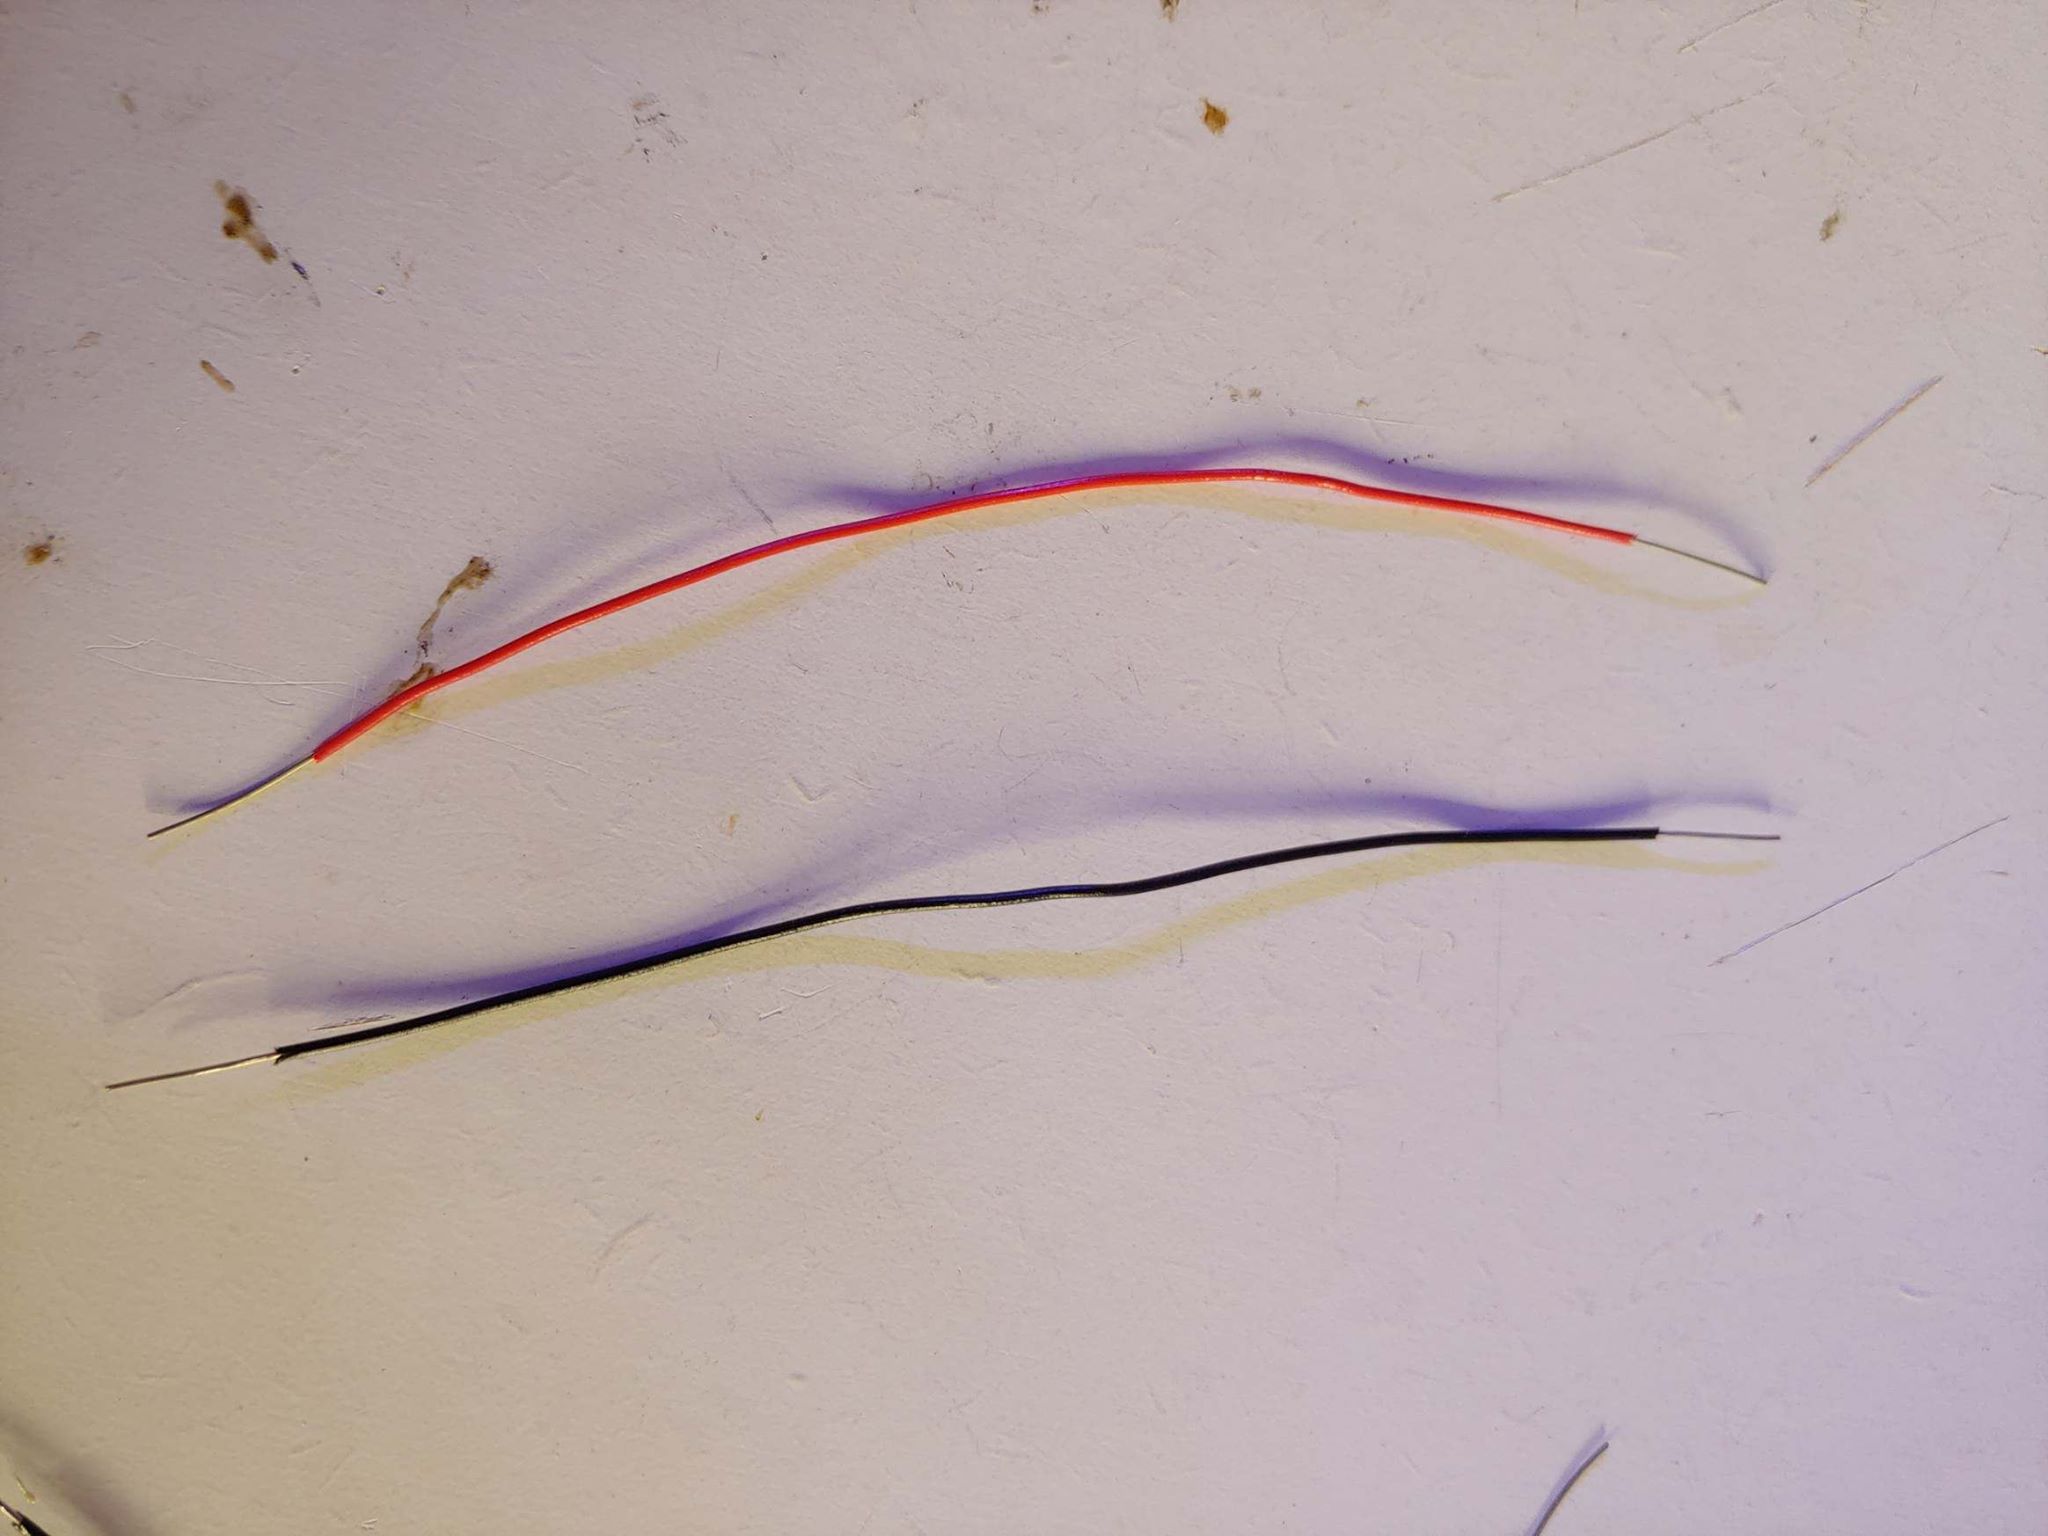
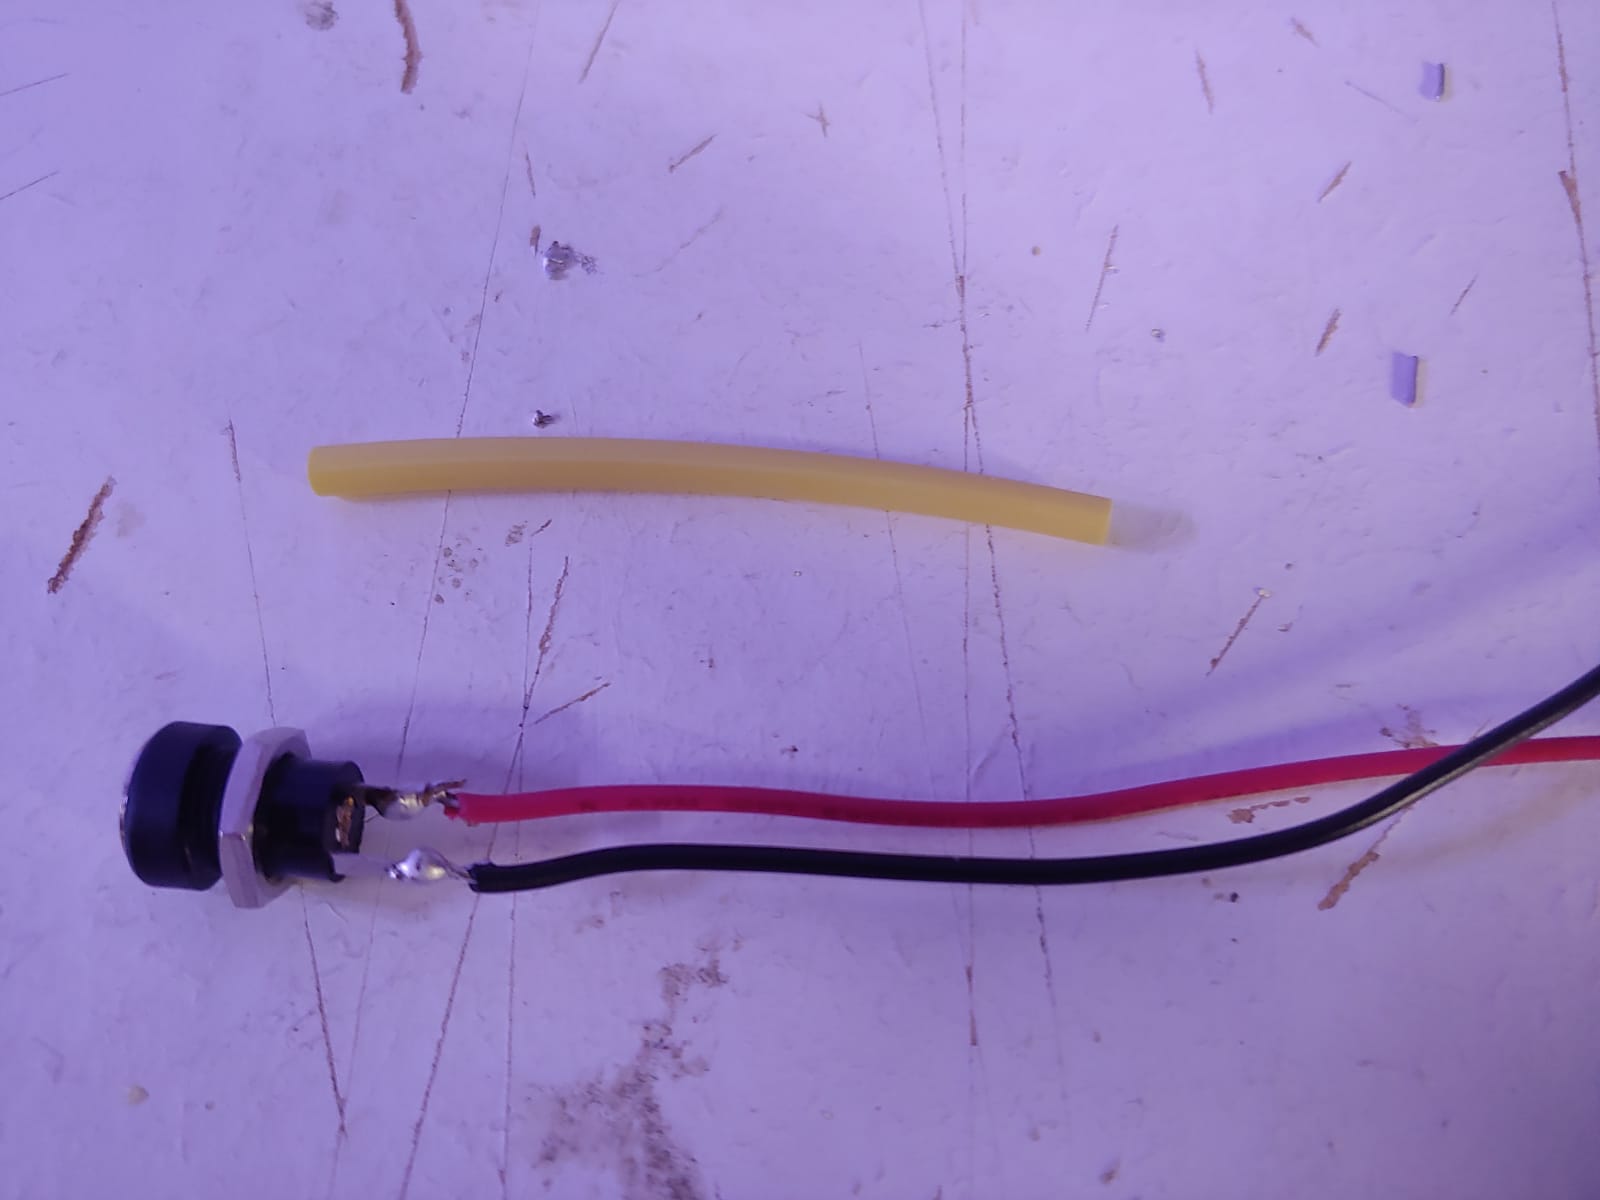
Strip the 2 ends as in the picture and go and attach them to the head of the dosometric pump. Always maintain the same configuration, for example in this photo the red will be towards the bottom of the head.
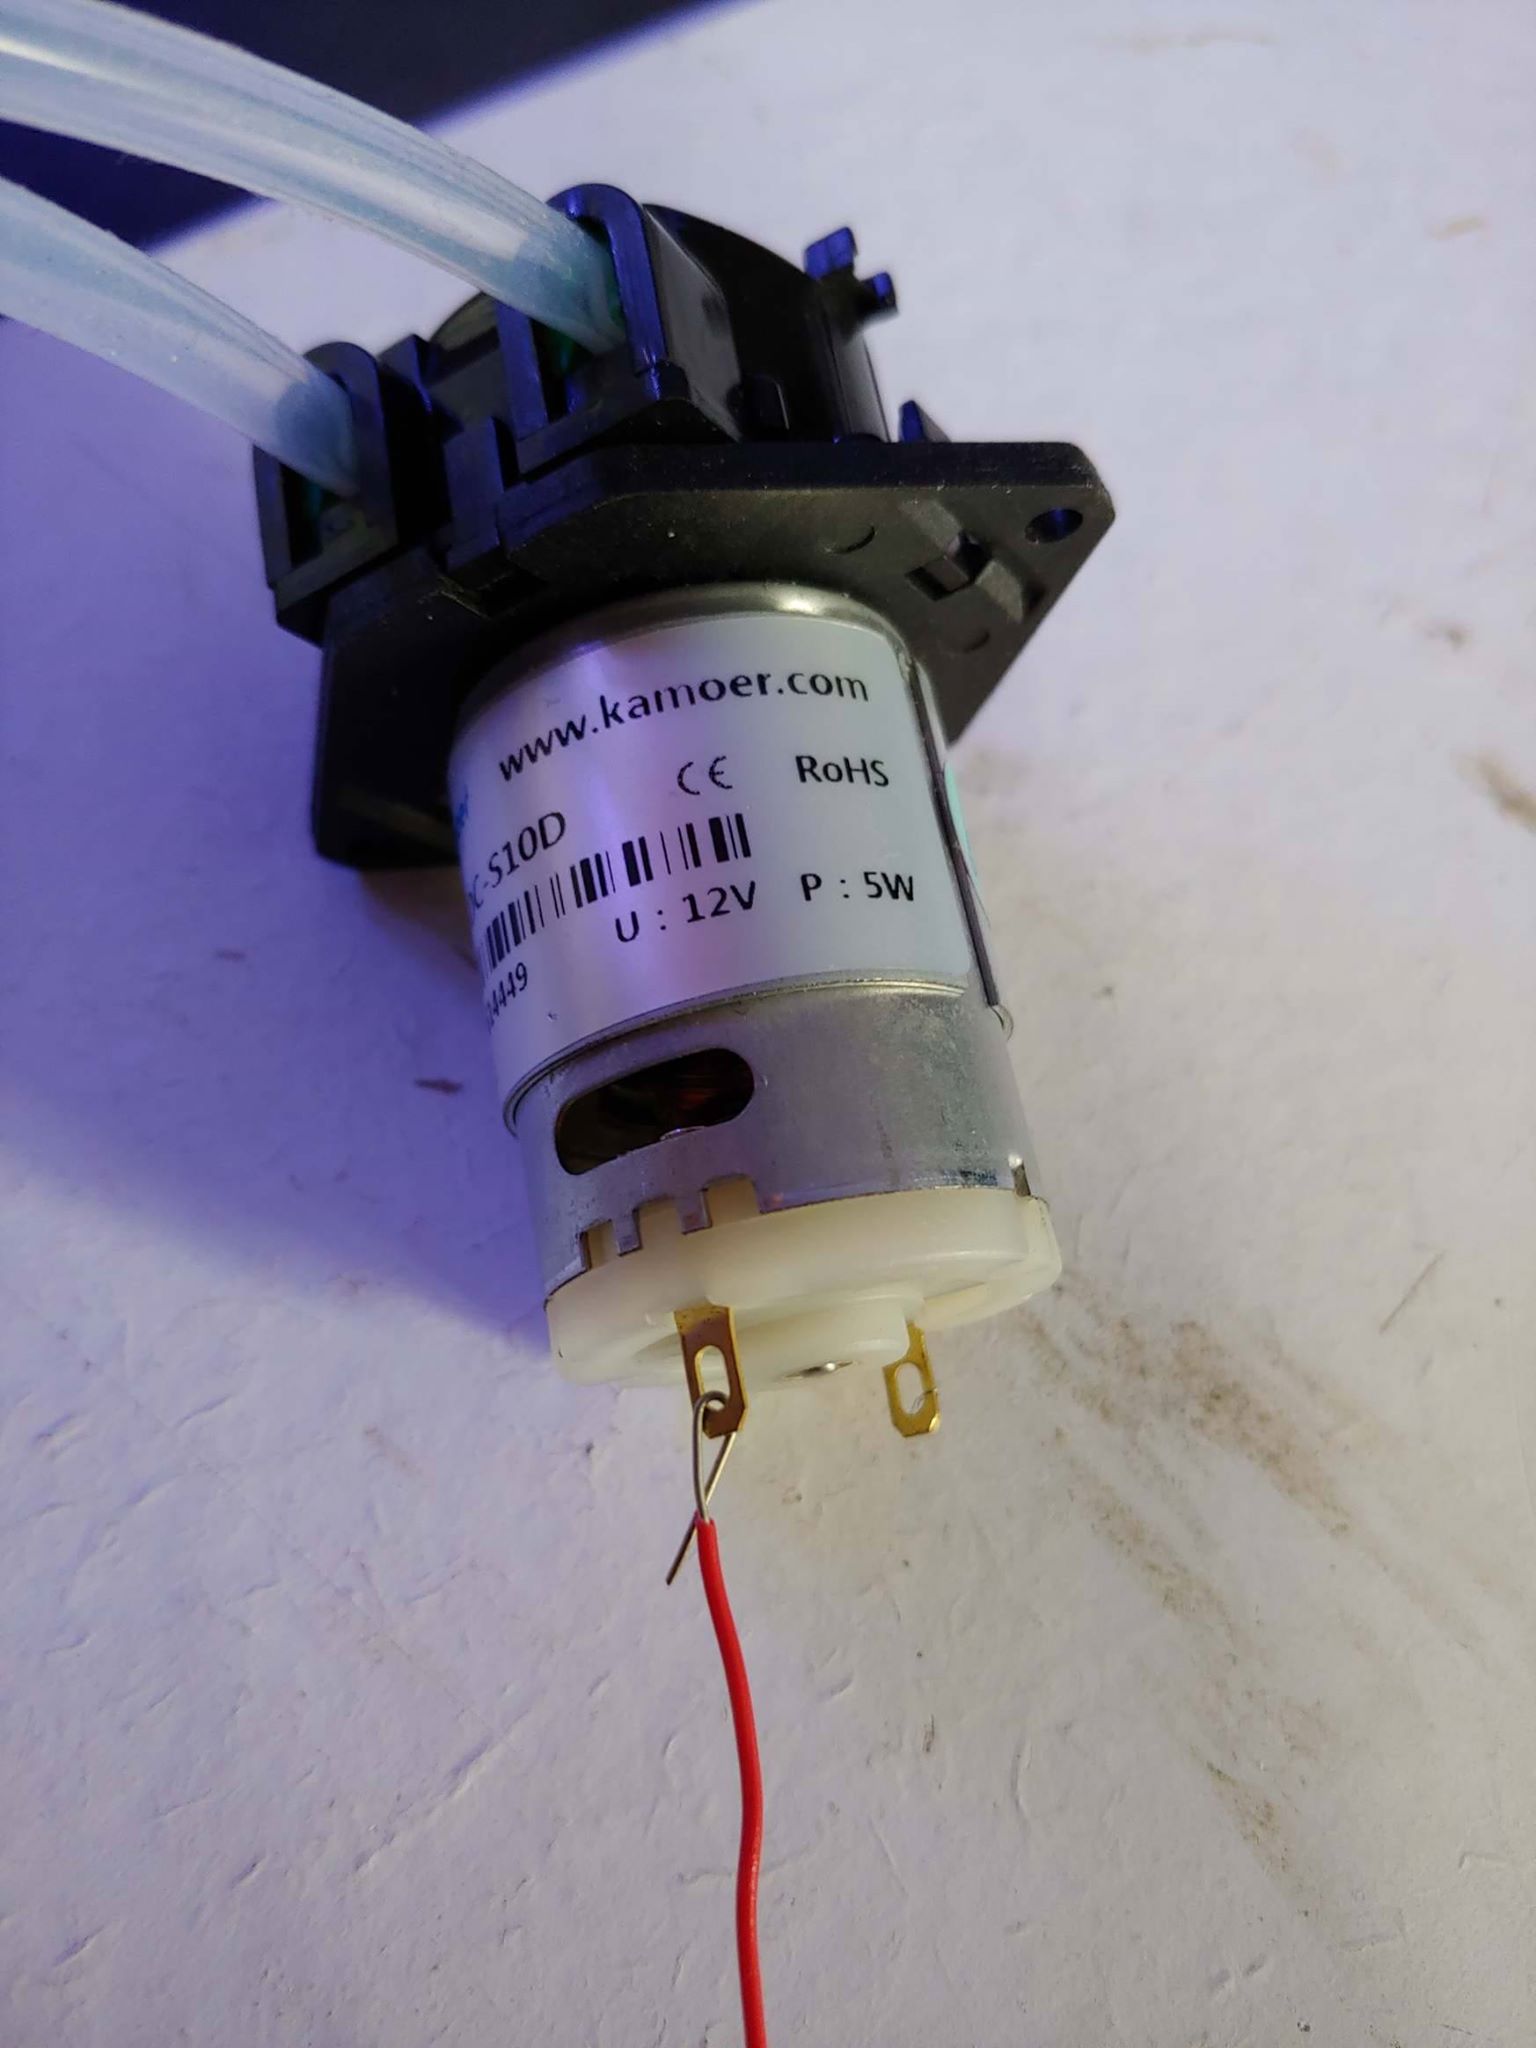
Then go on to give a solder point to avoid the wires coming off.
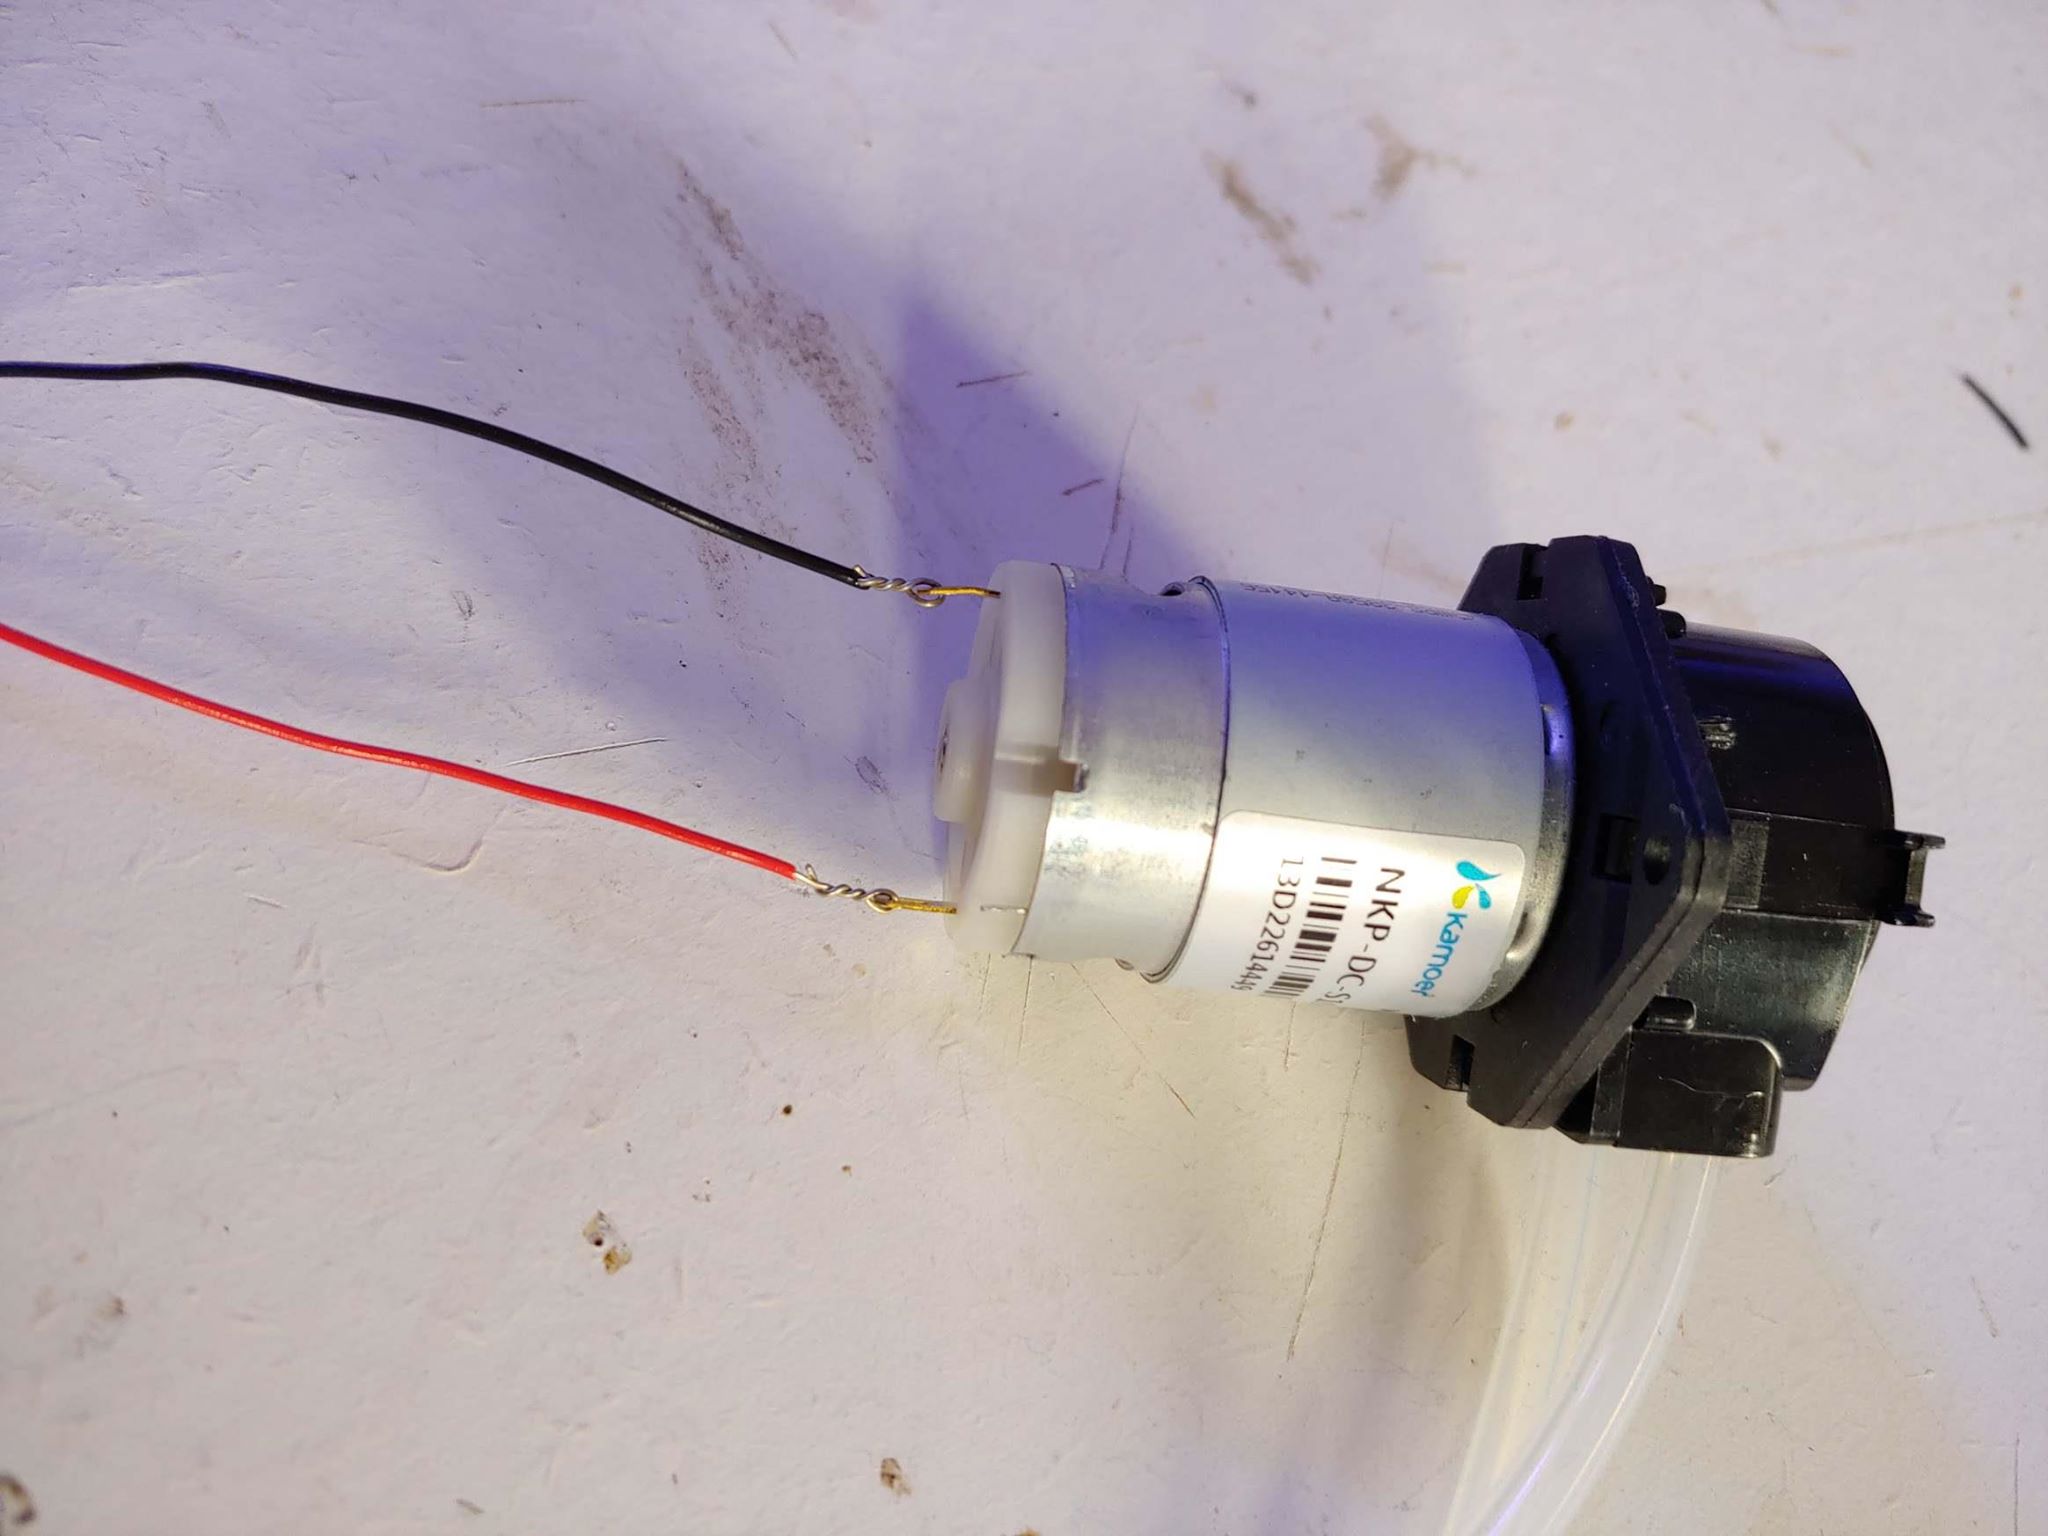
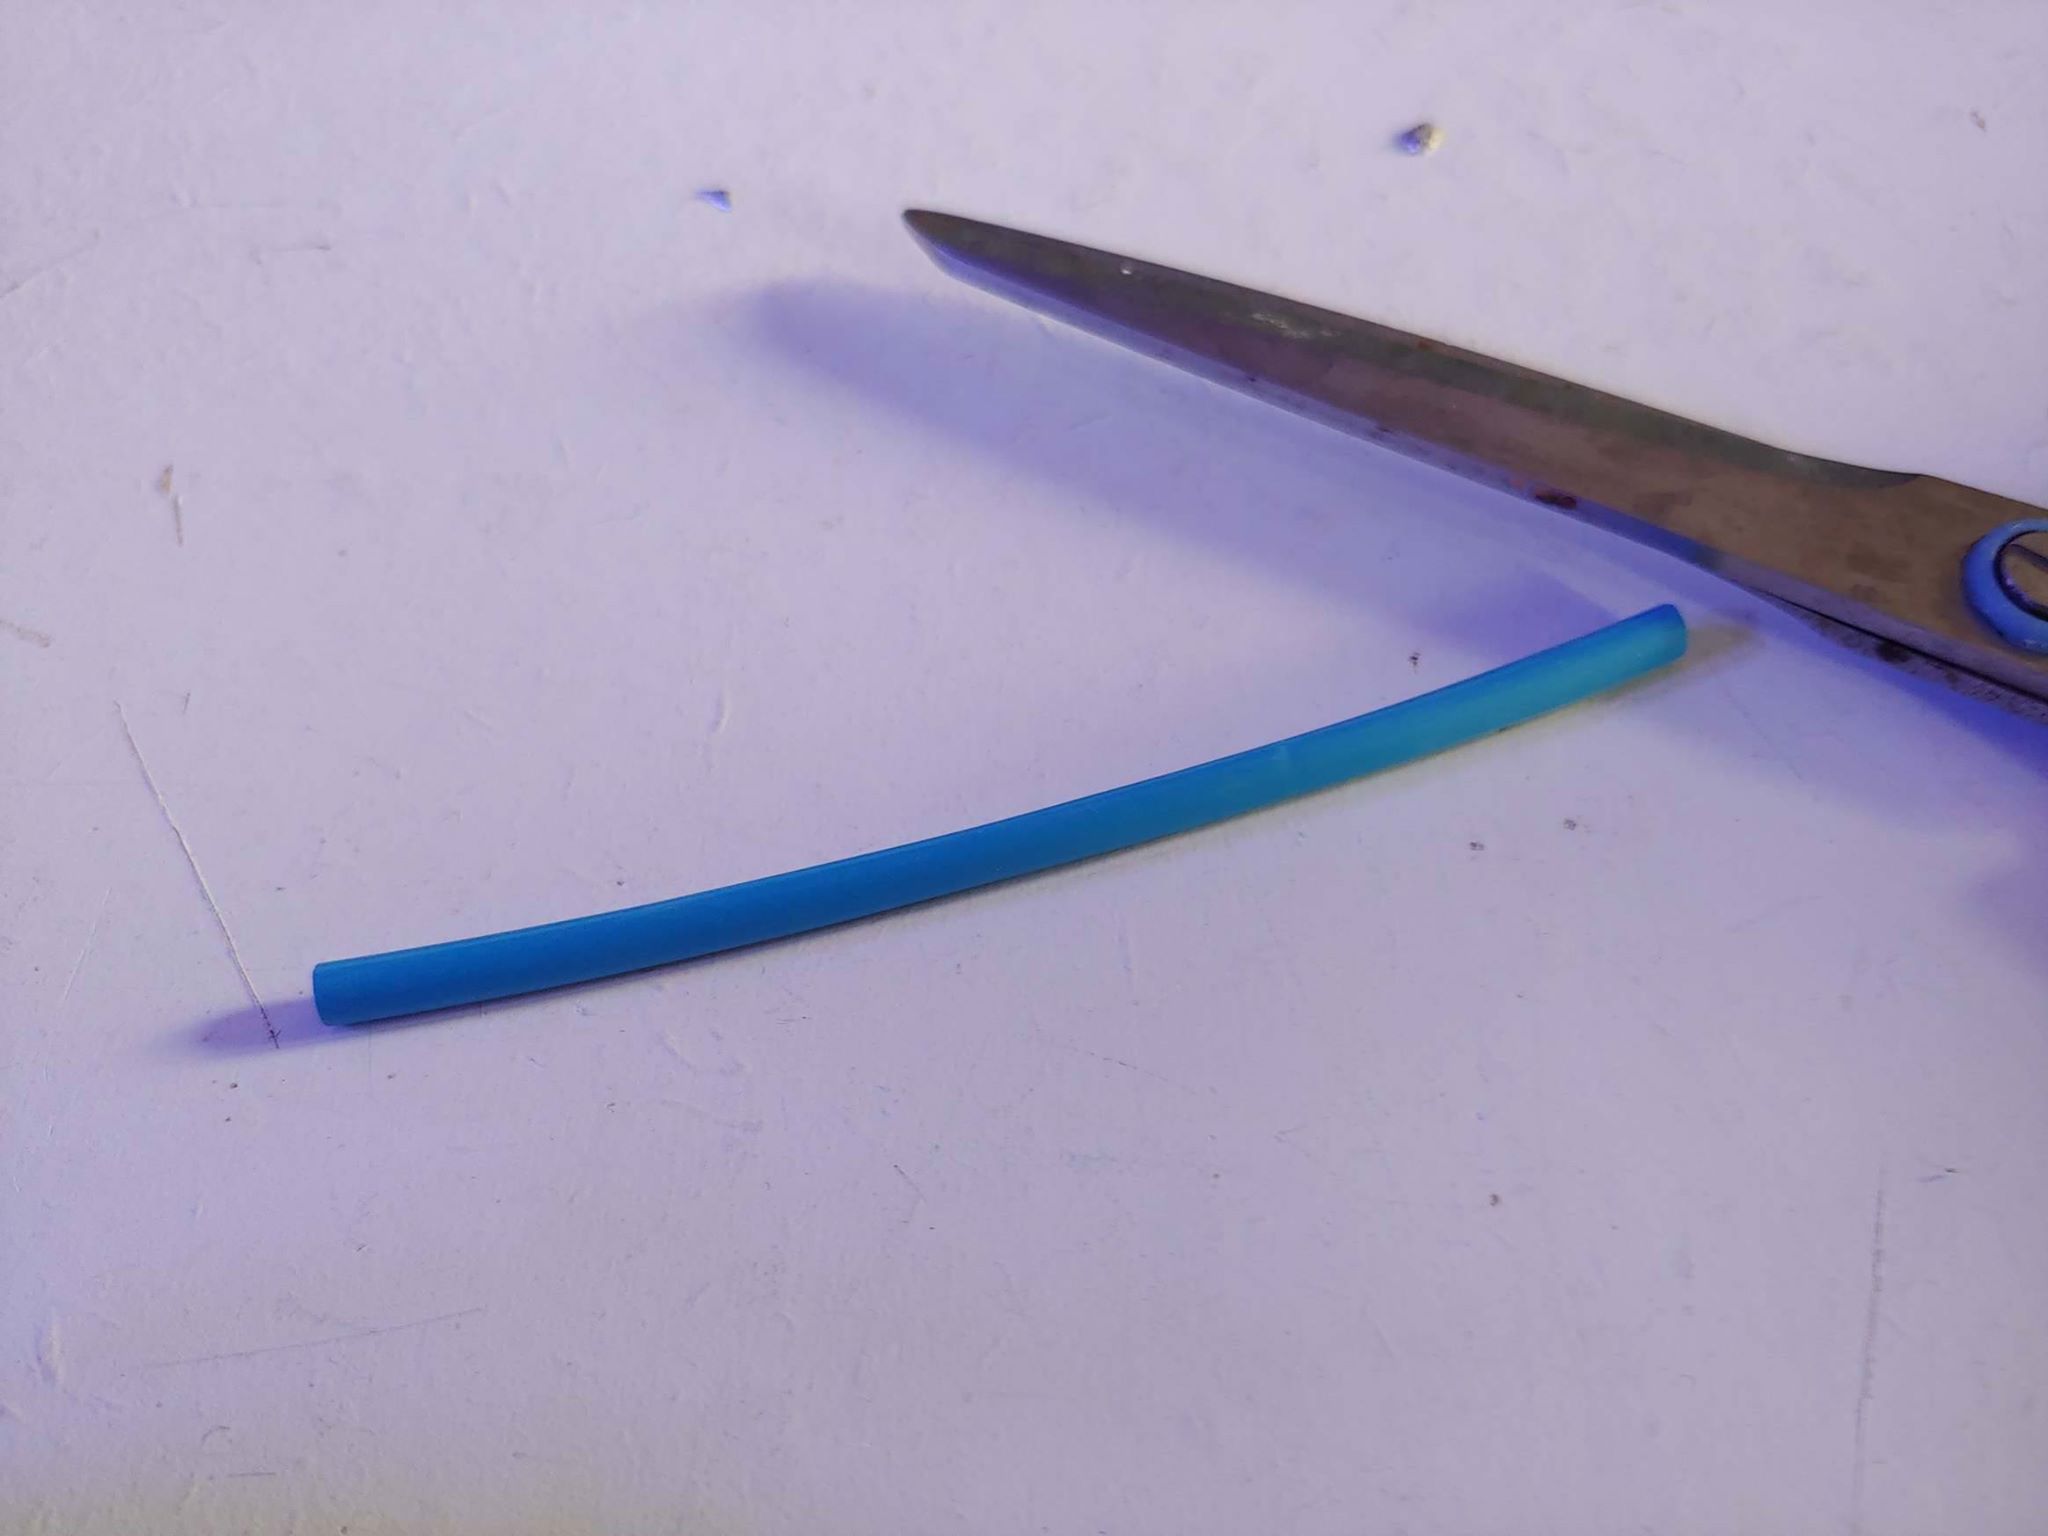
At this point, cut 2 pieces of the heat shrink tubing to cover the contacts and welds:
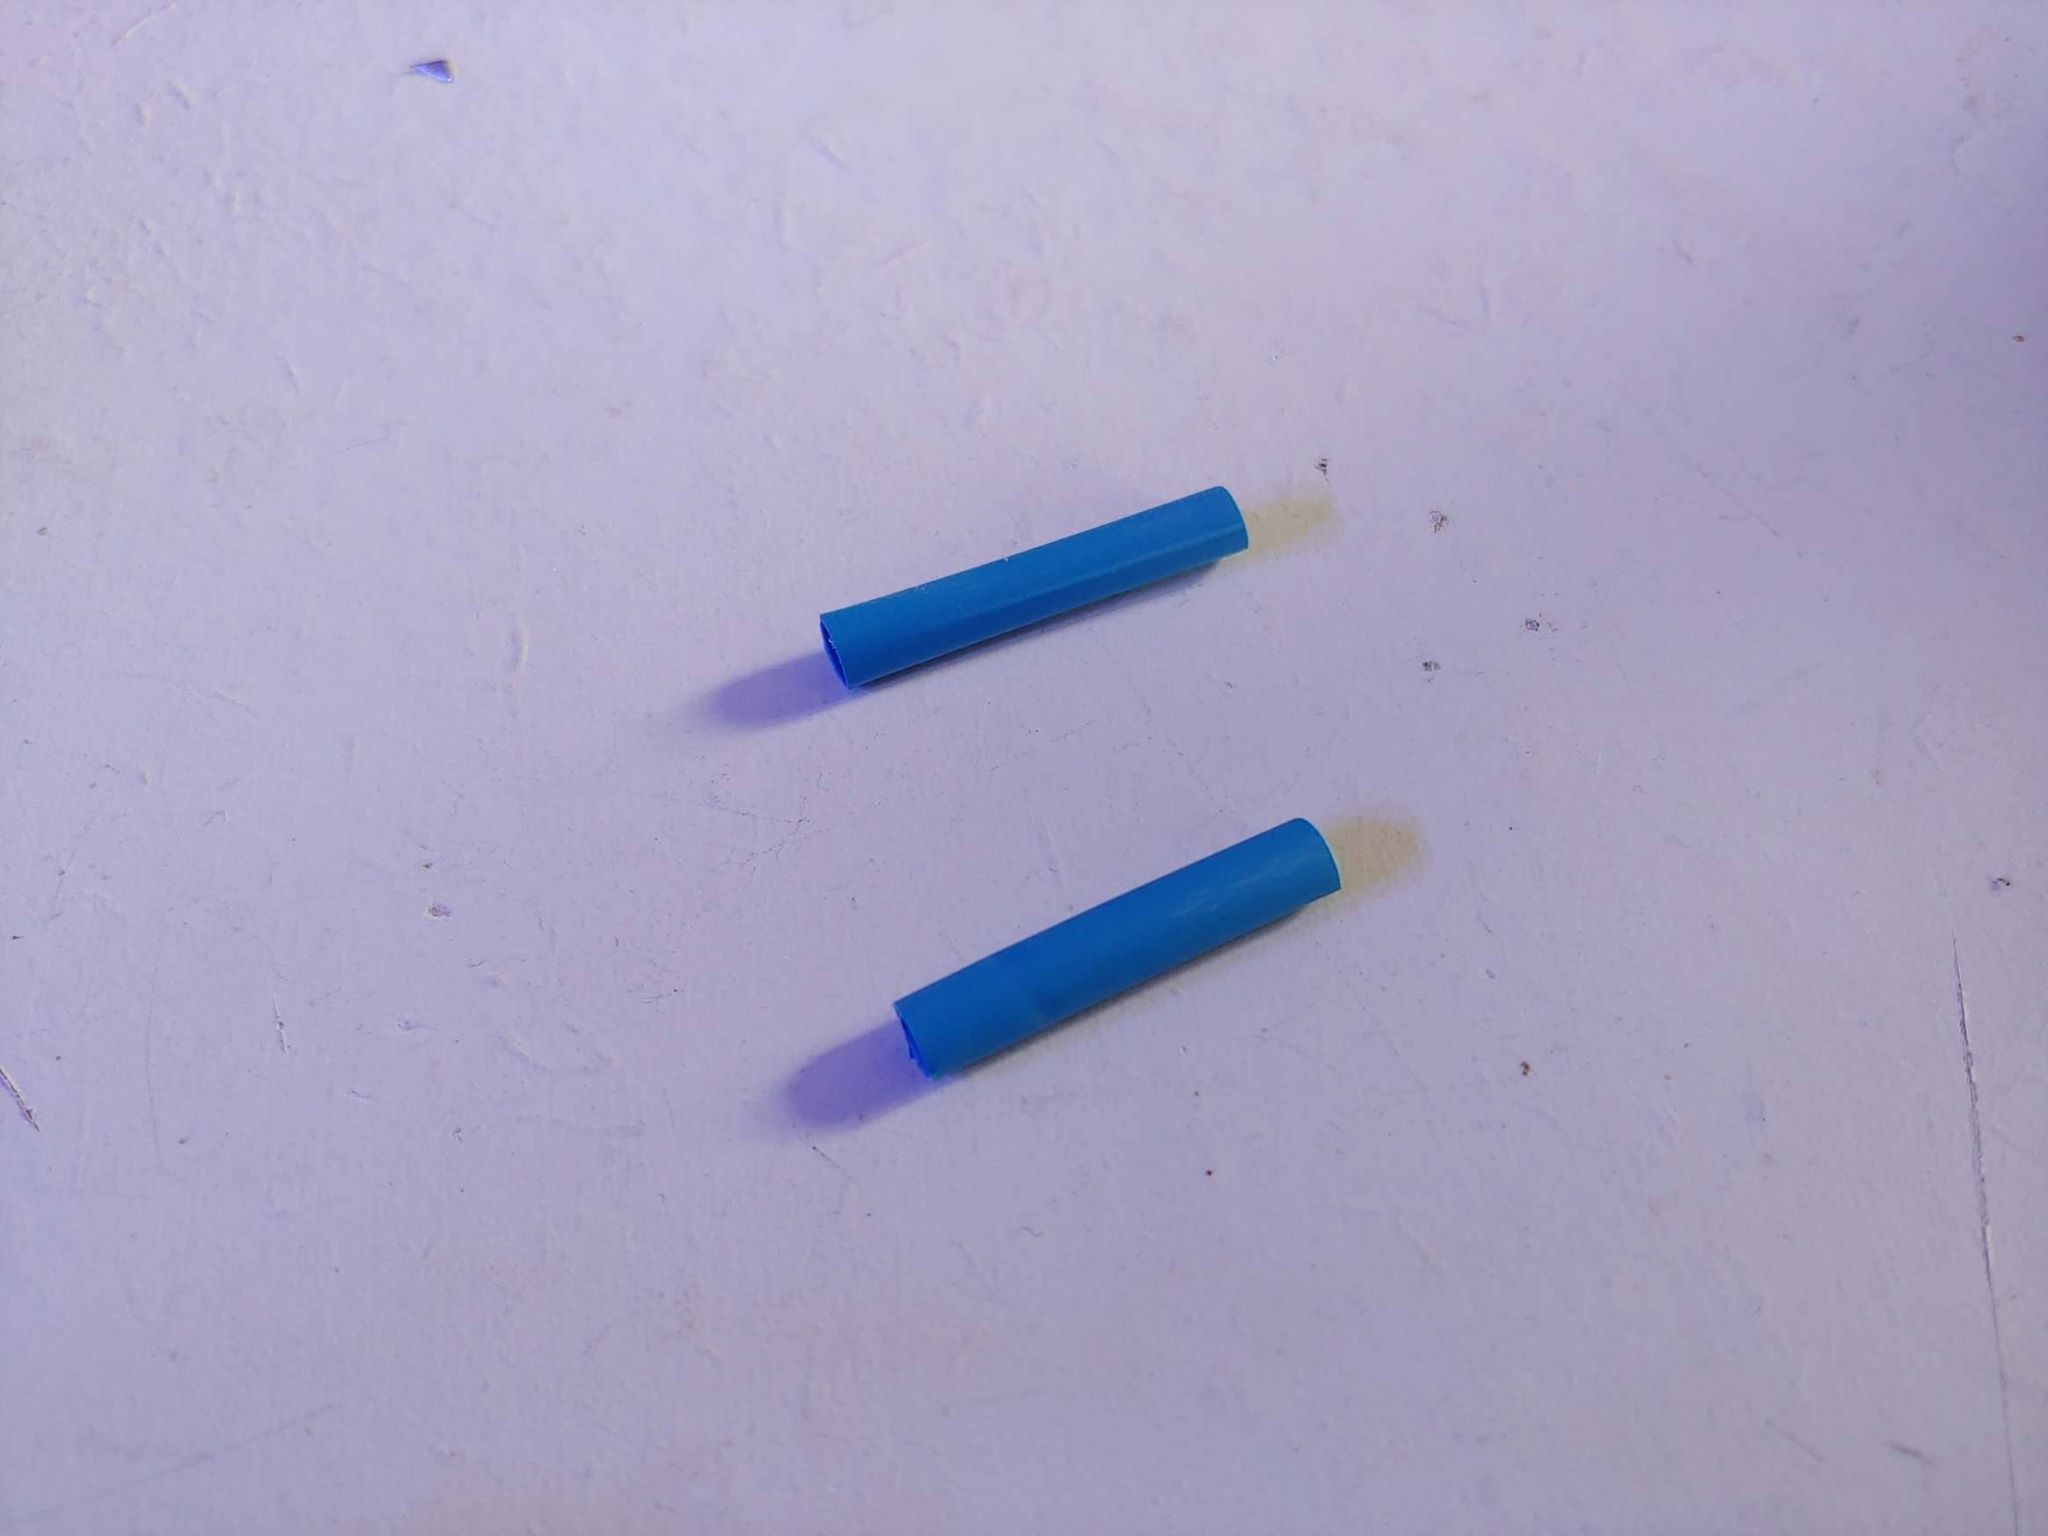
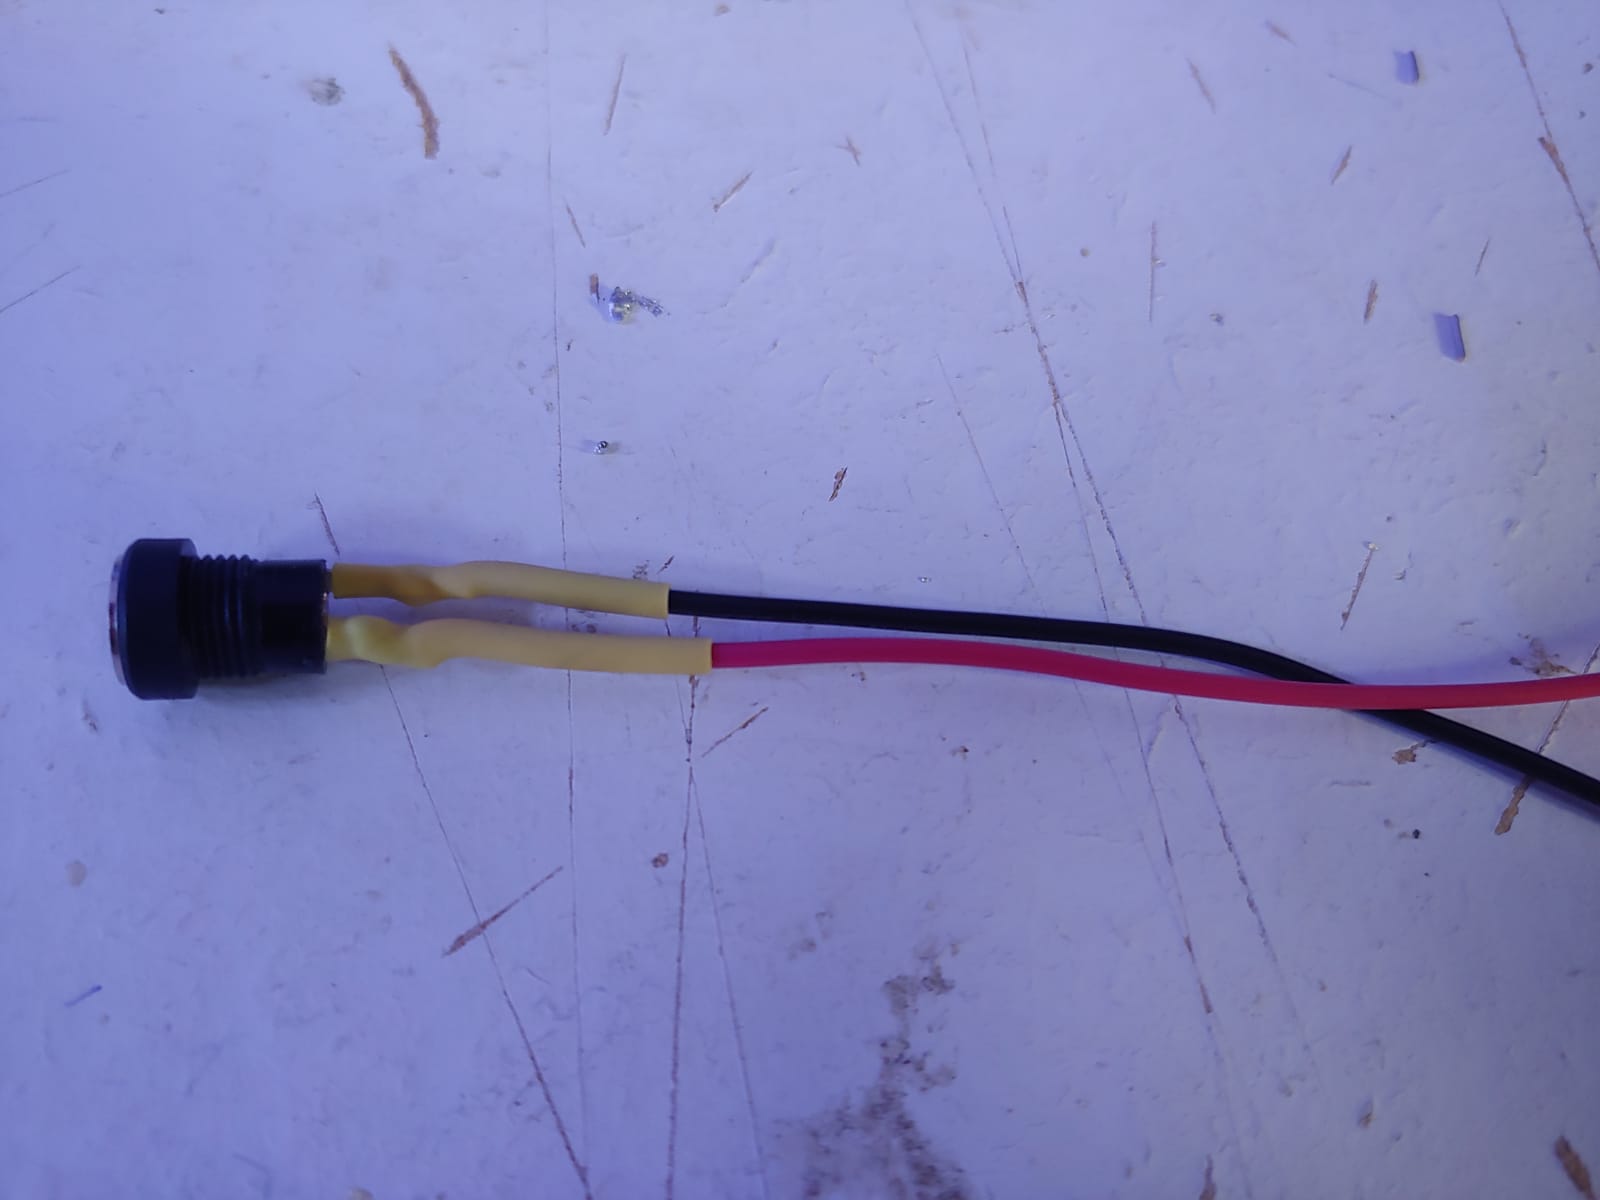
Put them in the threads and heat them with the lighter so that they adhere well to the contacts: At this point, cut 2 pieces of heat shrink the tubing to cover the contacts and welds:
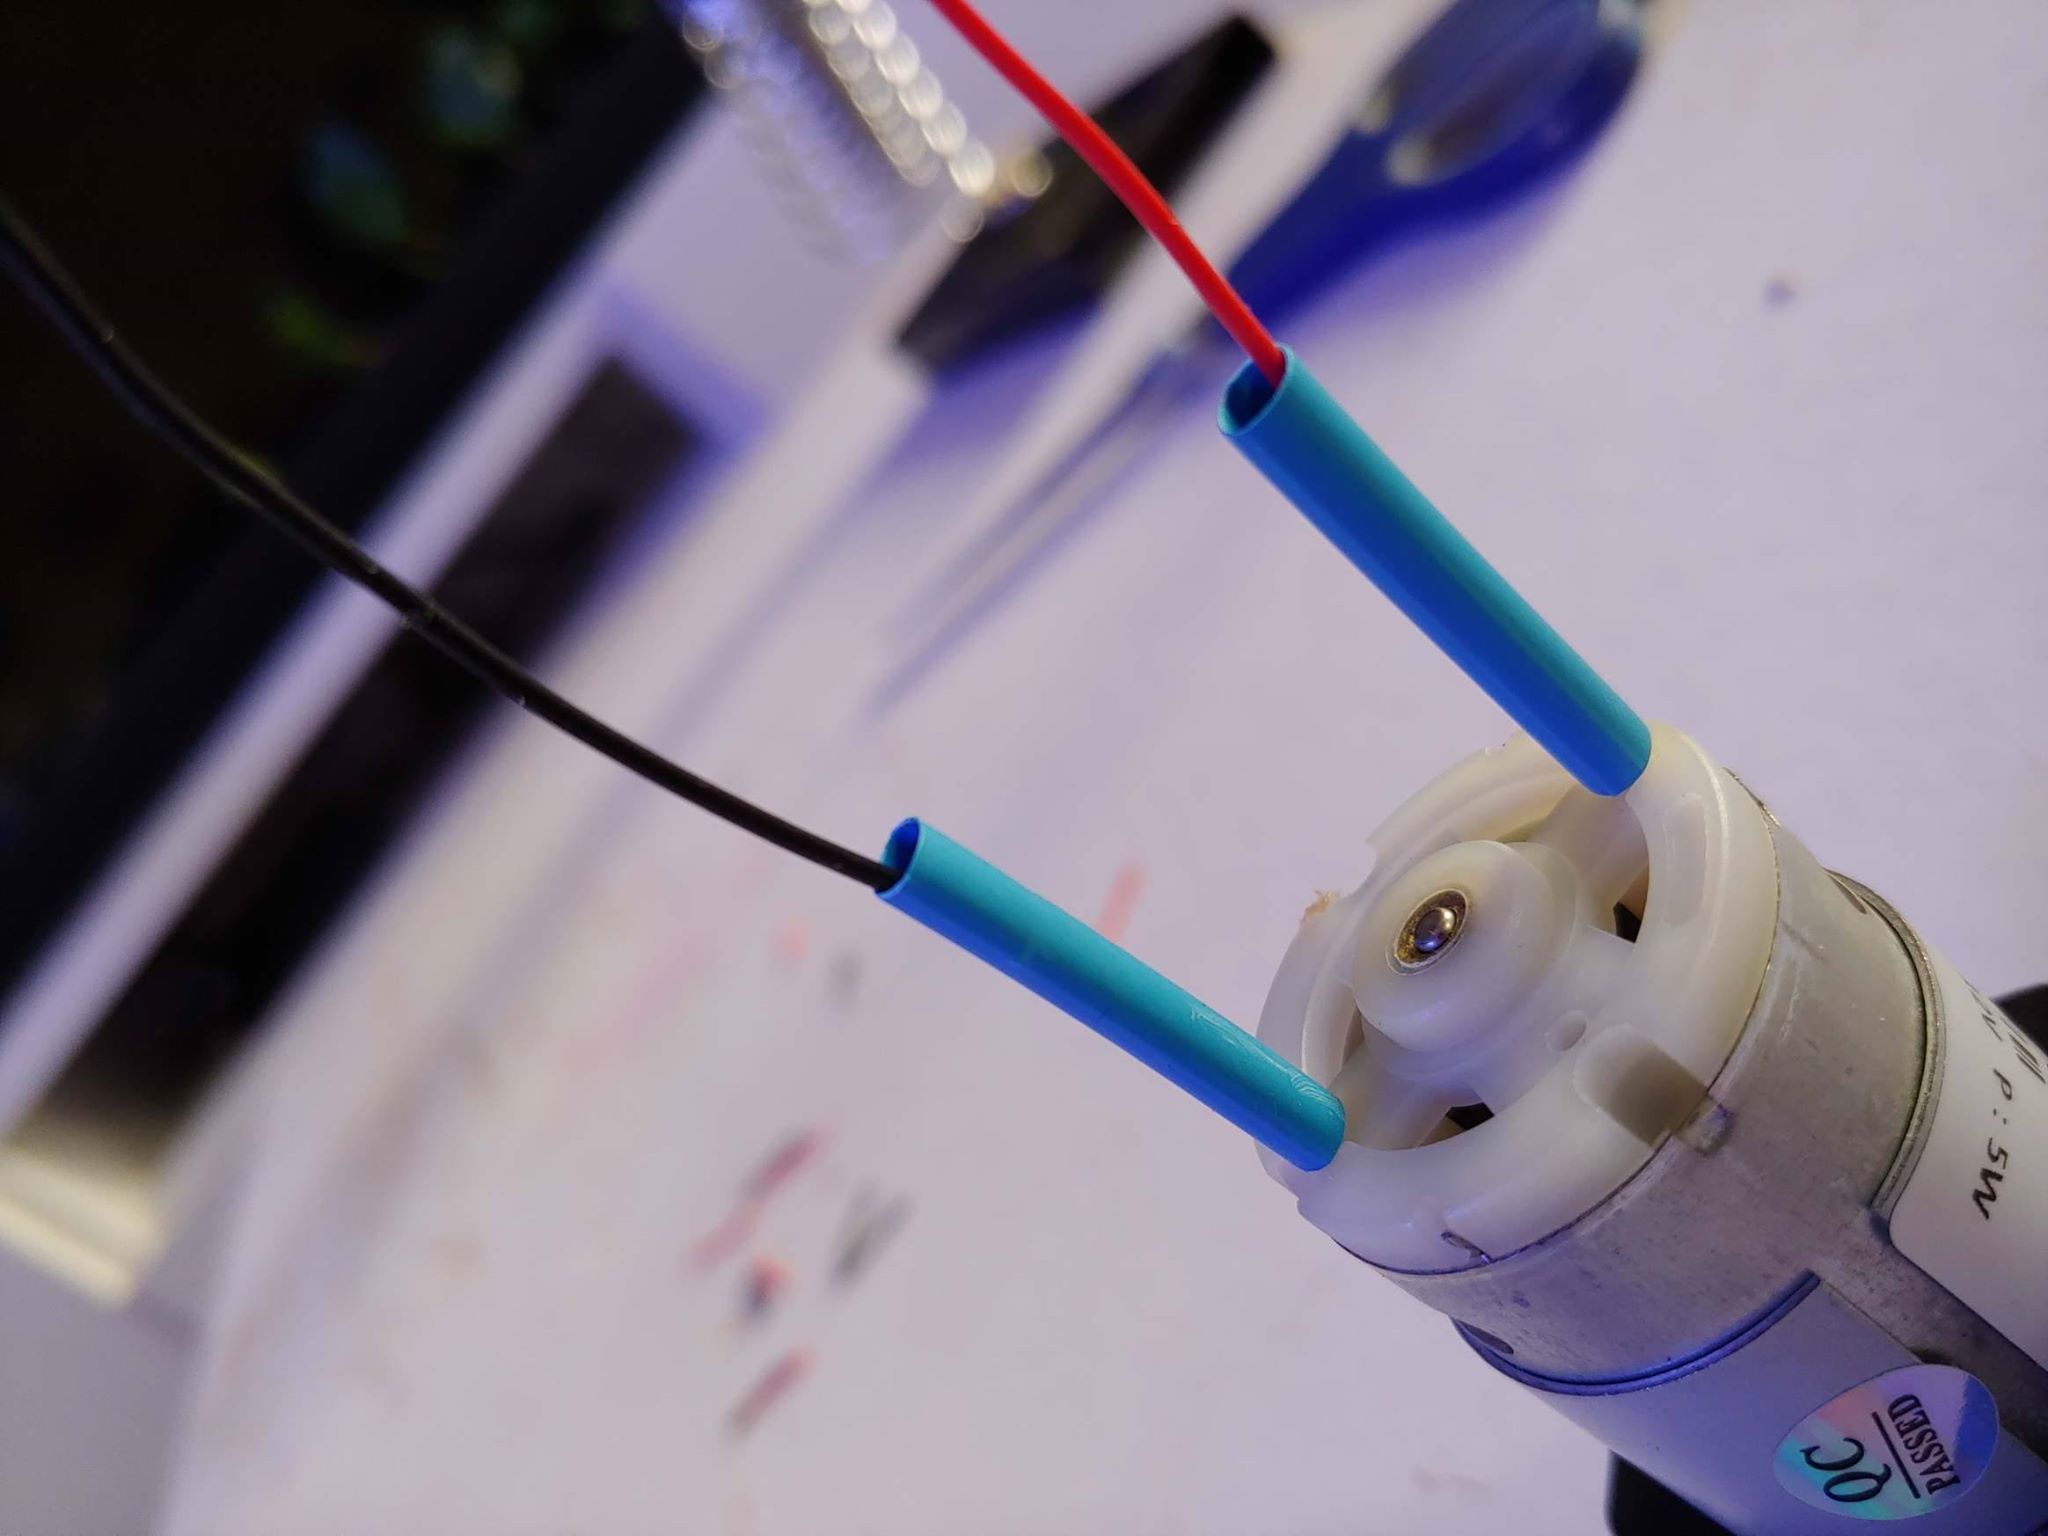
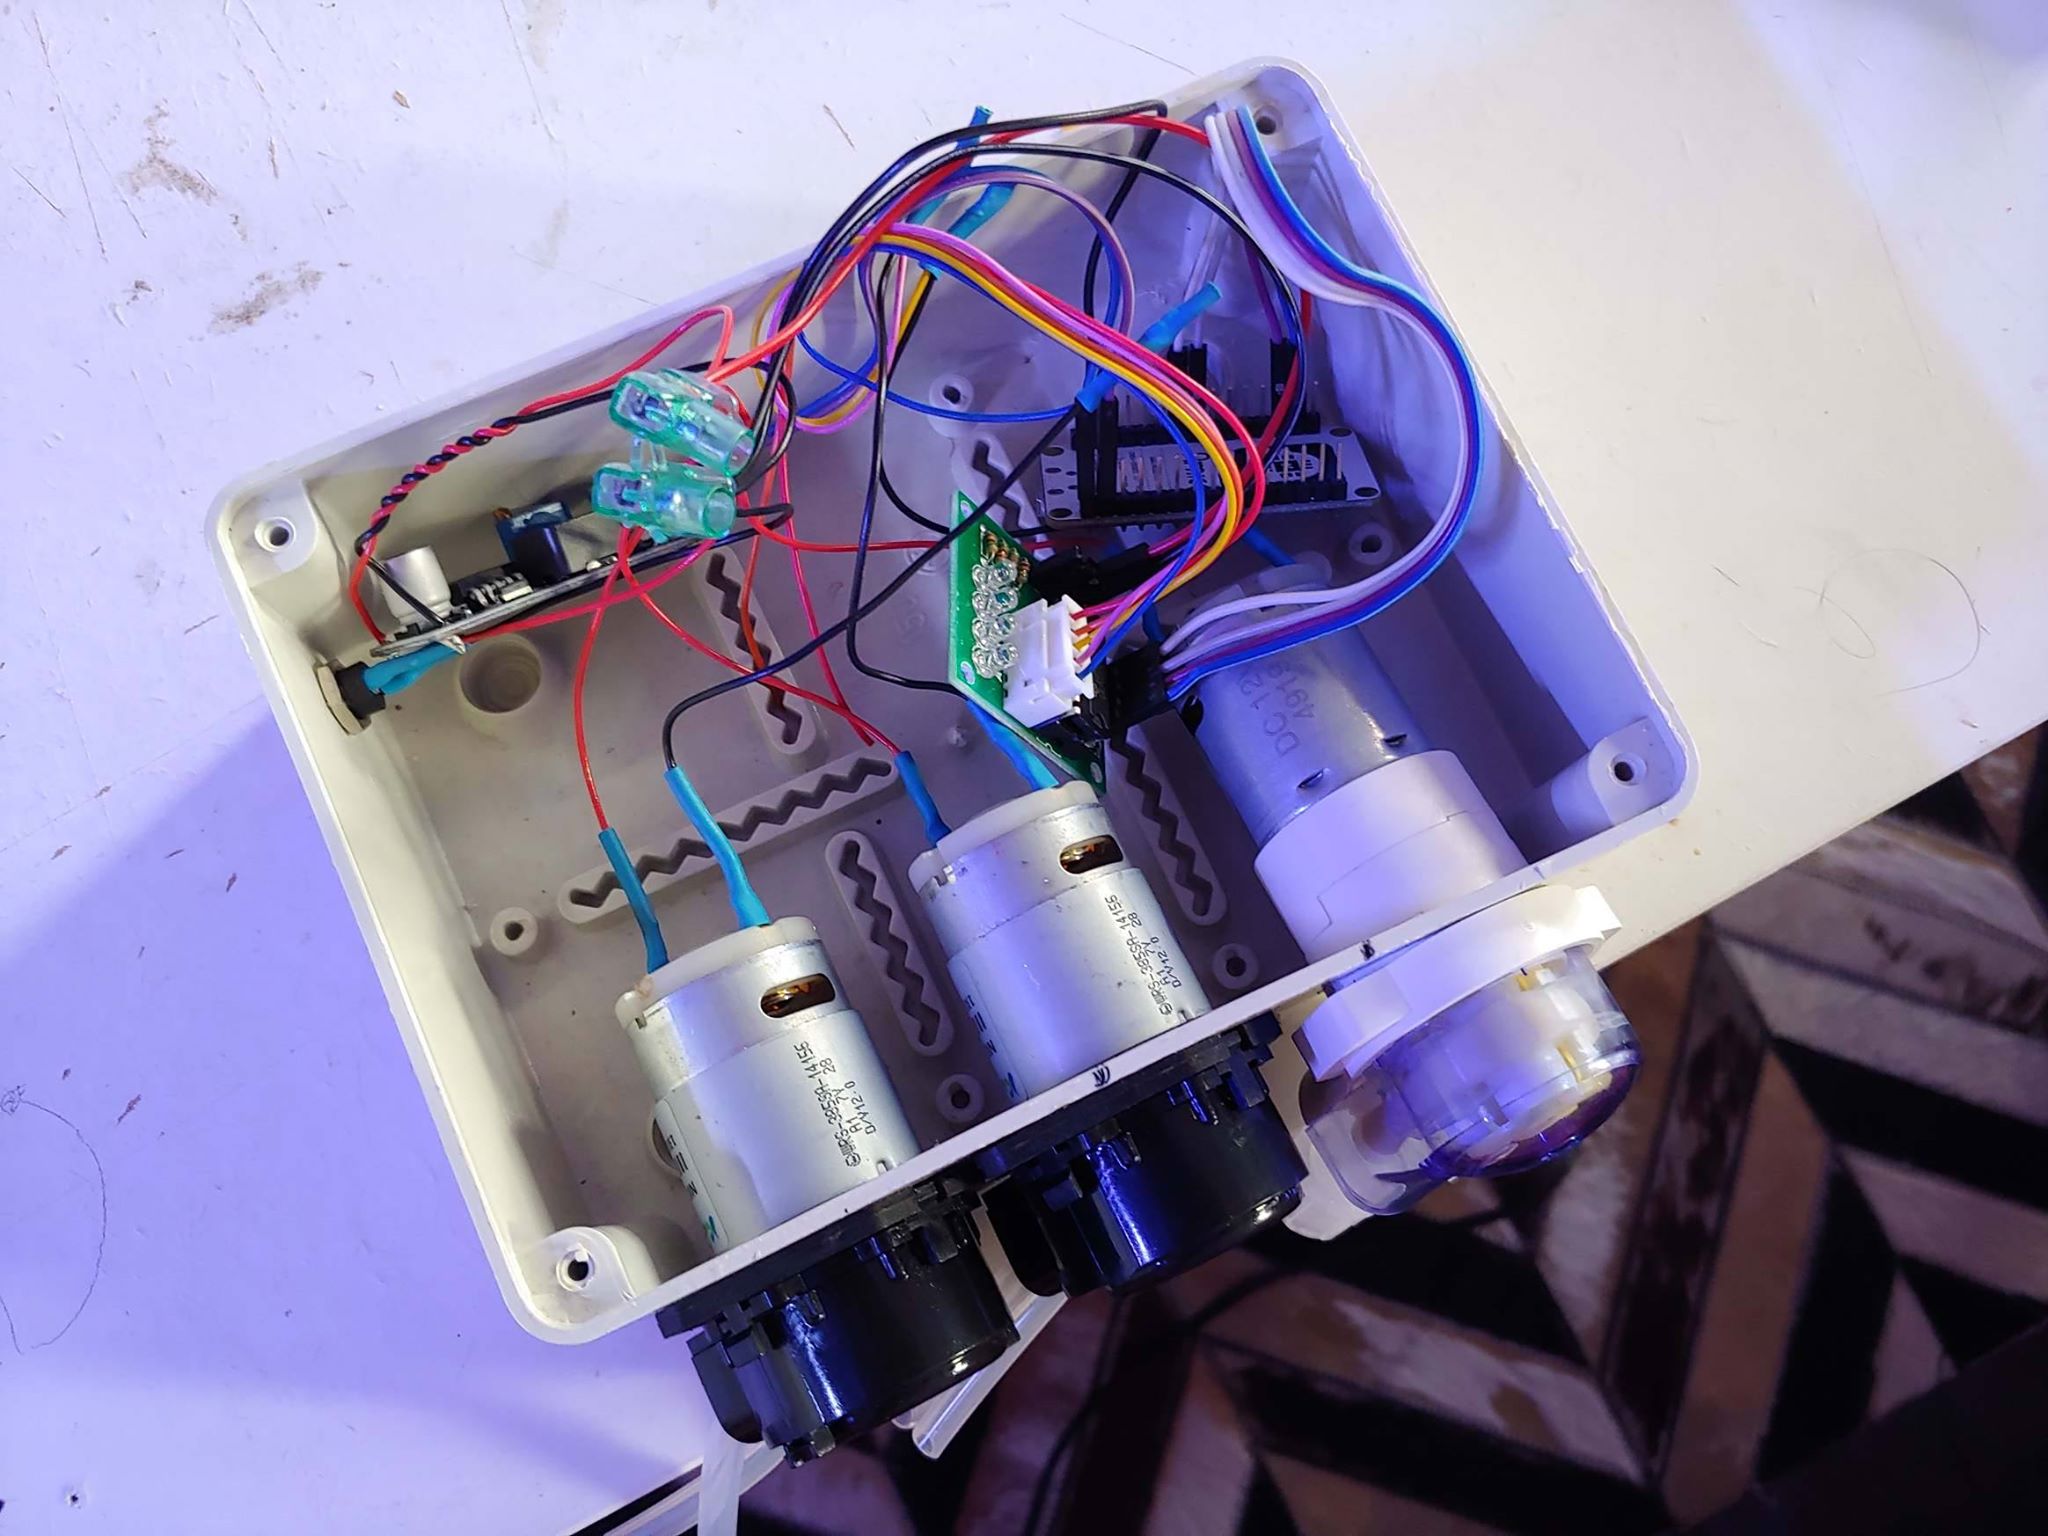
Repeat the entire procedure for each head of the dosometric pumps in order to obtain the following result:
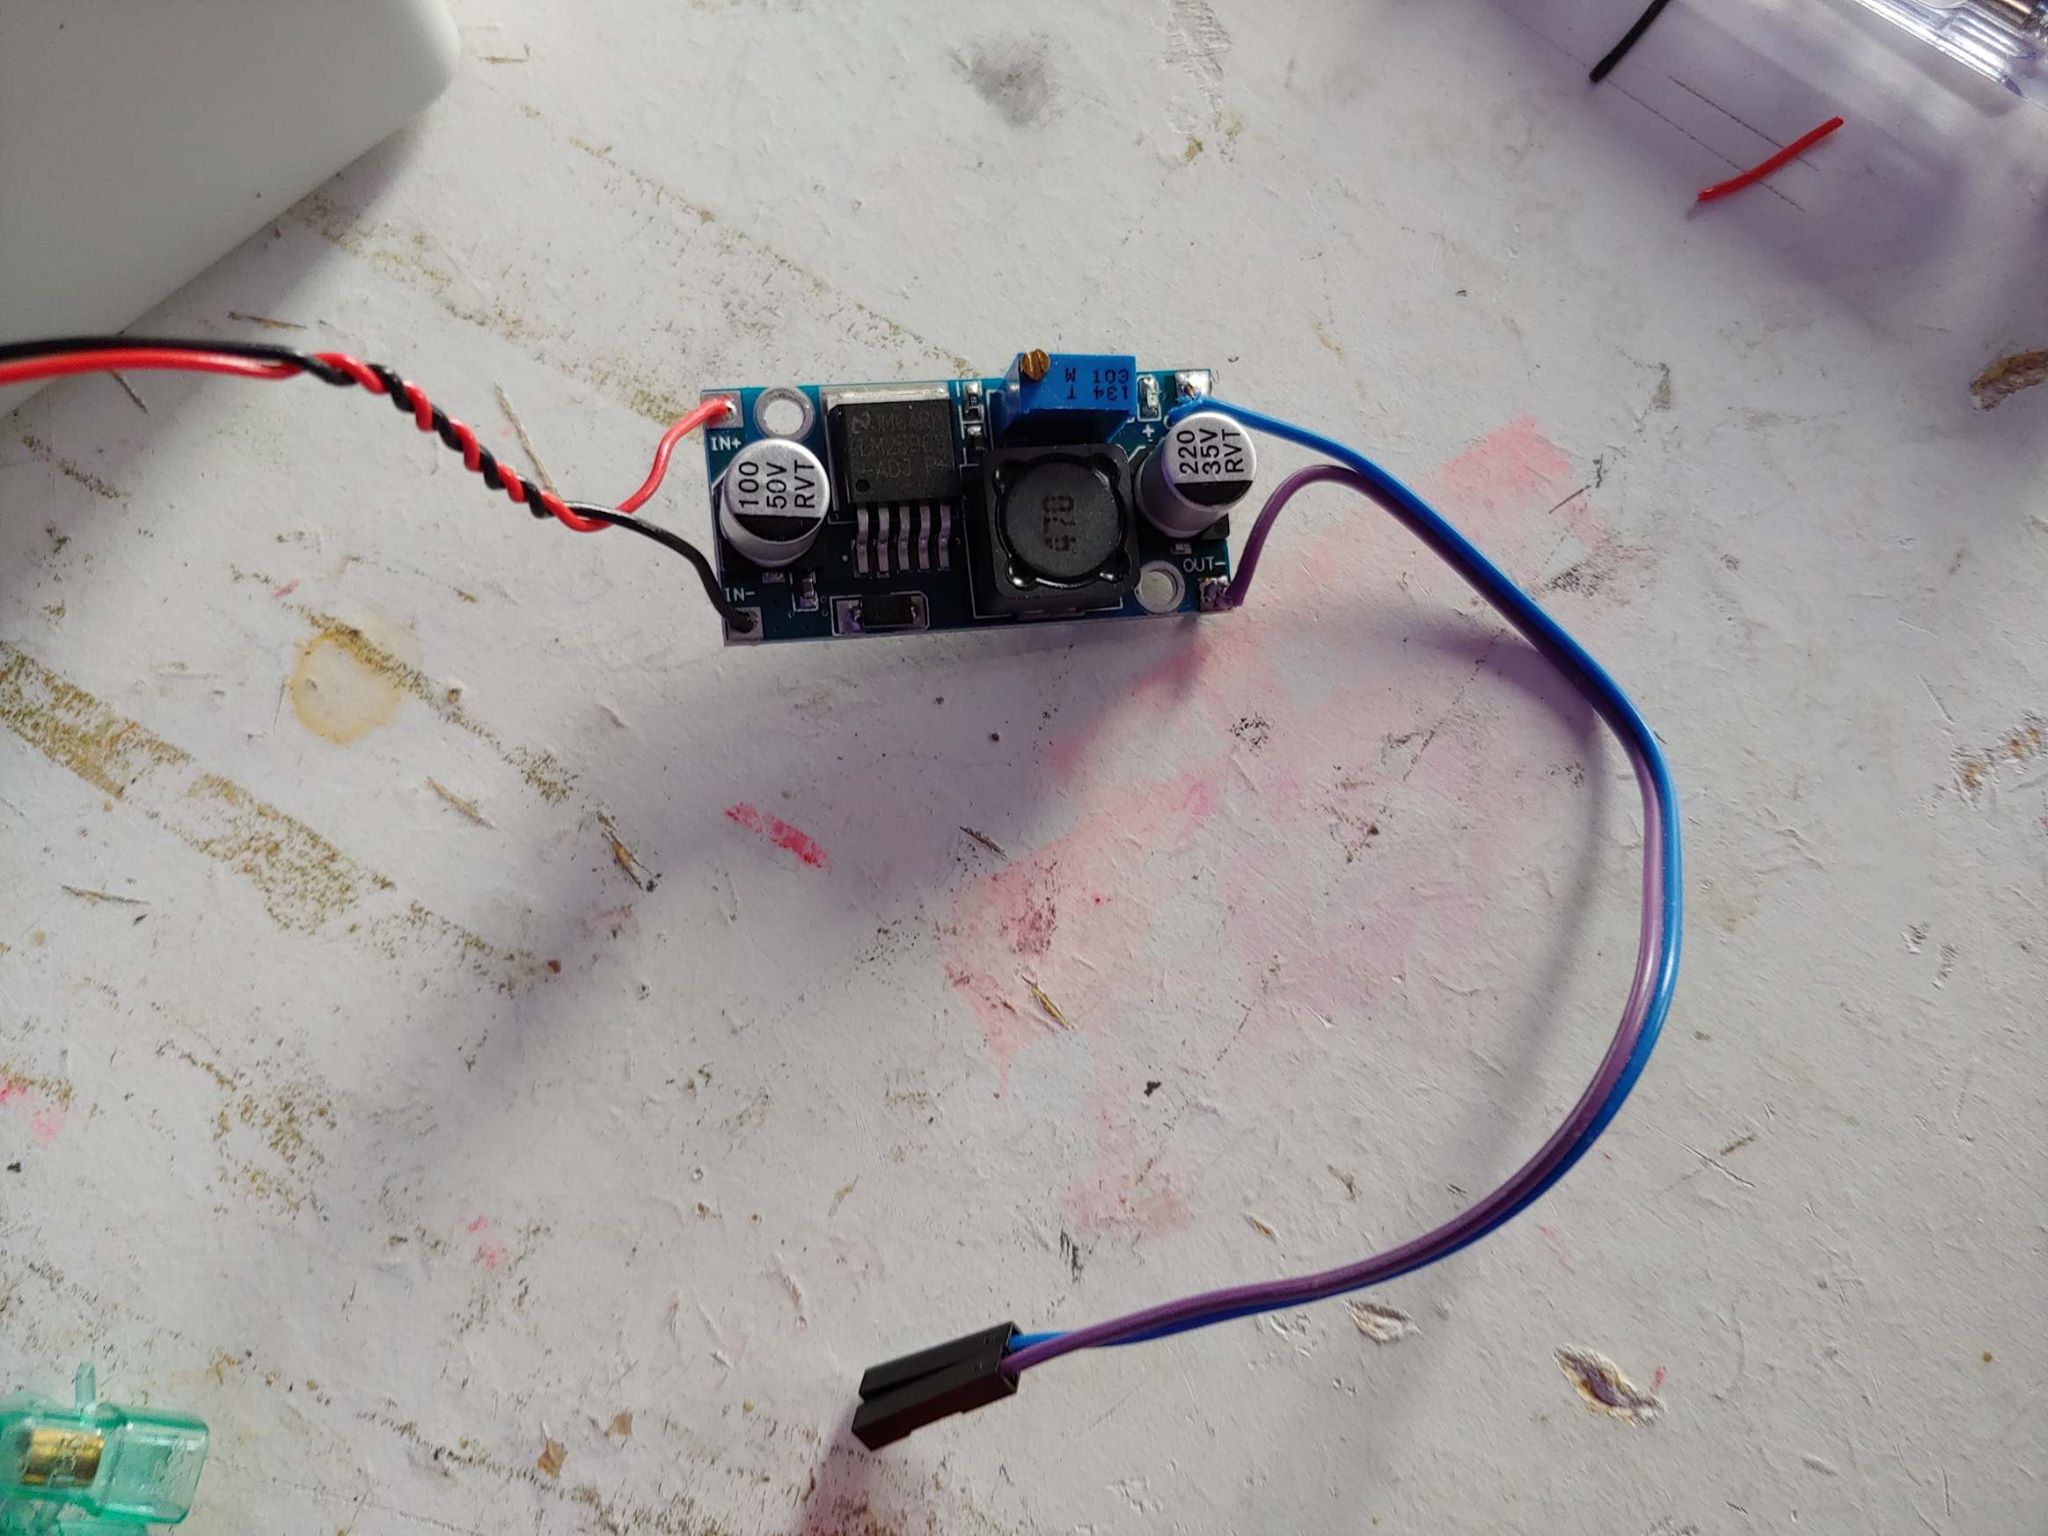
now take the 12v – 5v power converter:
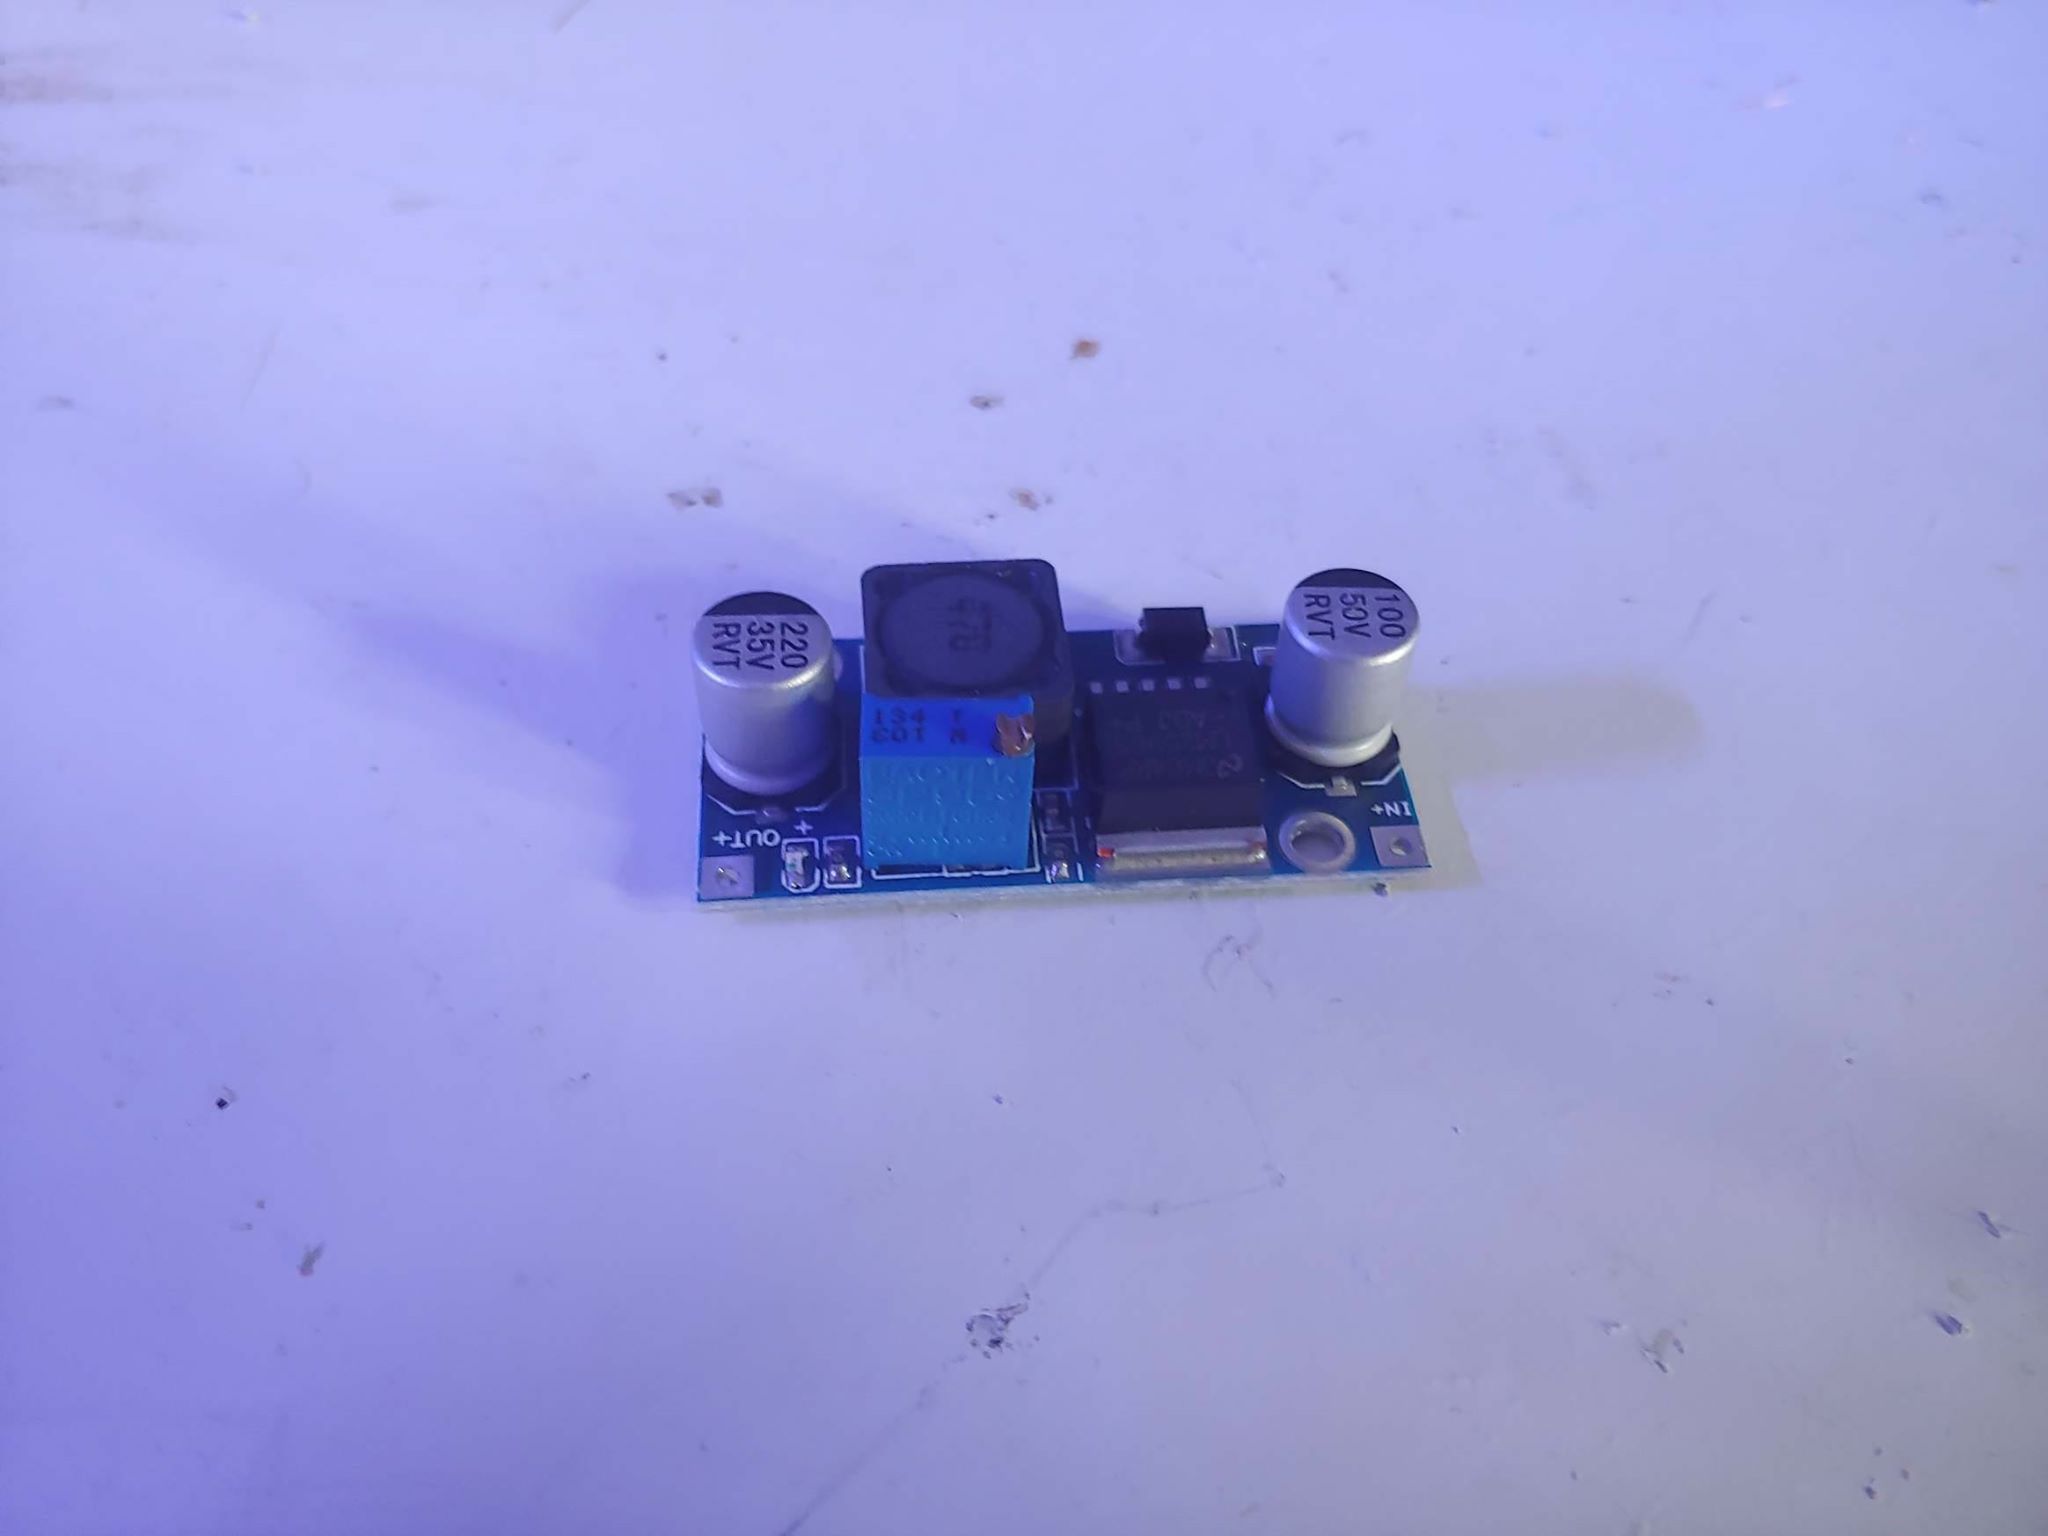
Also in this case you have to weld the wires in the 4 points indicated. Use a red wire for the pin with the word In + and a black one for the one with the text In- then cut one end of the dupont cables and solder that end to the pins Out + and Out-. In this case I used a blue thread for the out + and a purple thread for the out-:
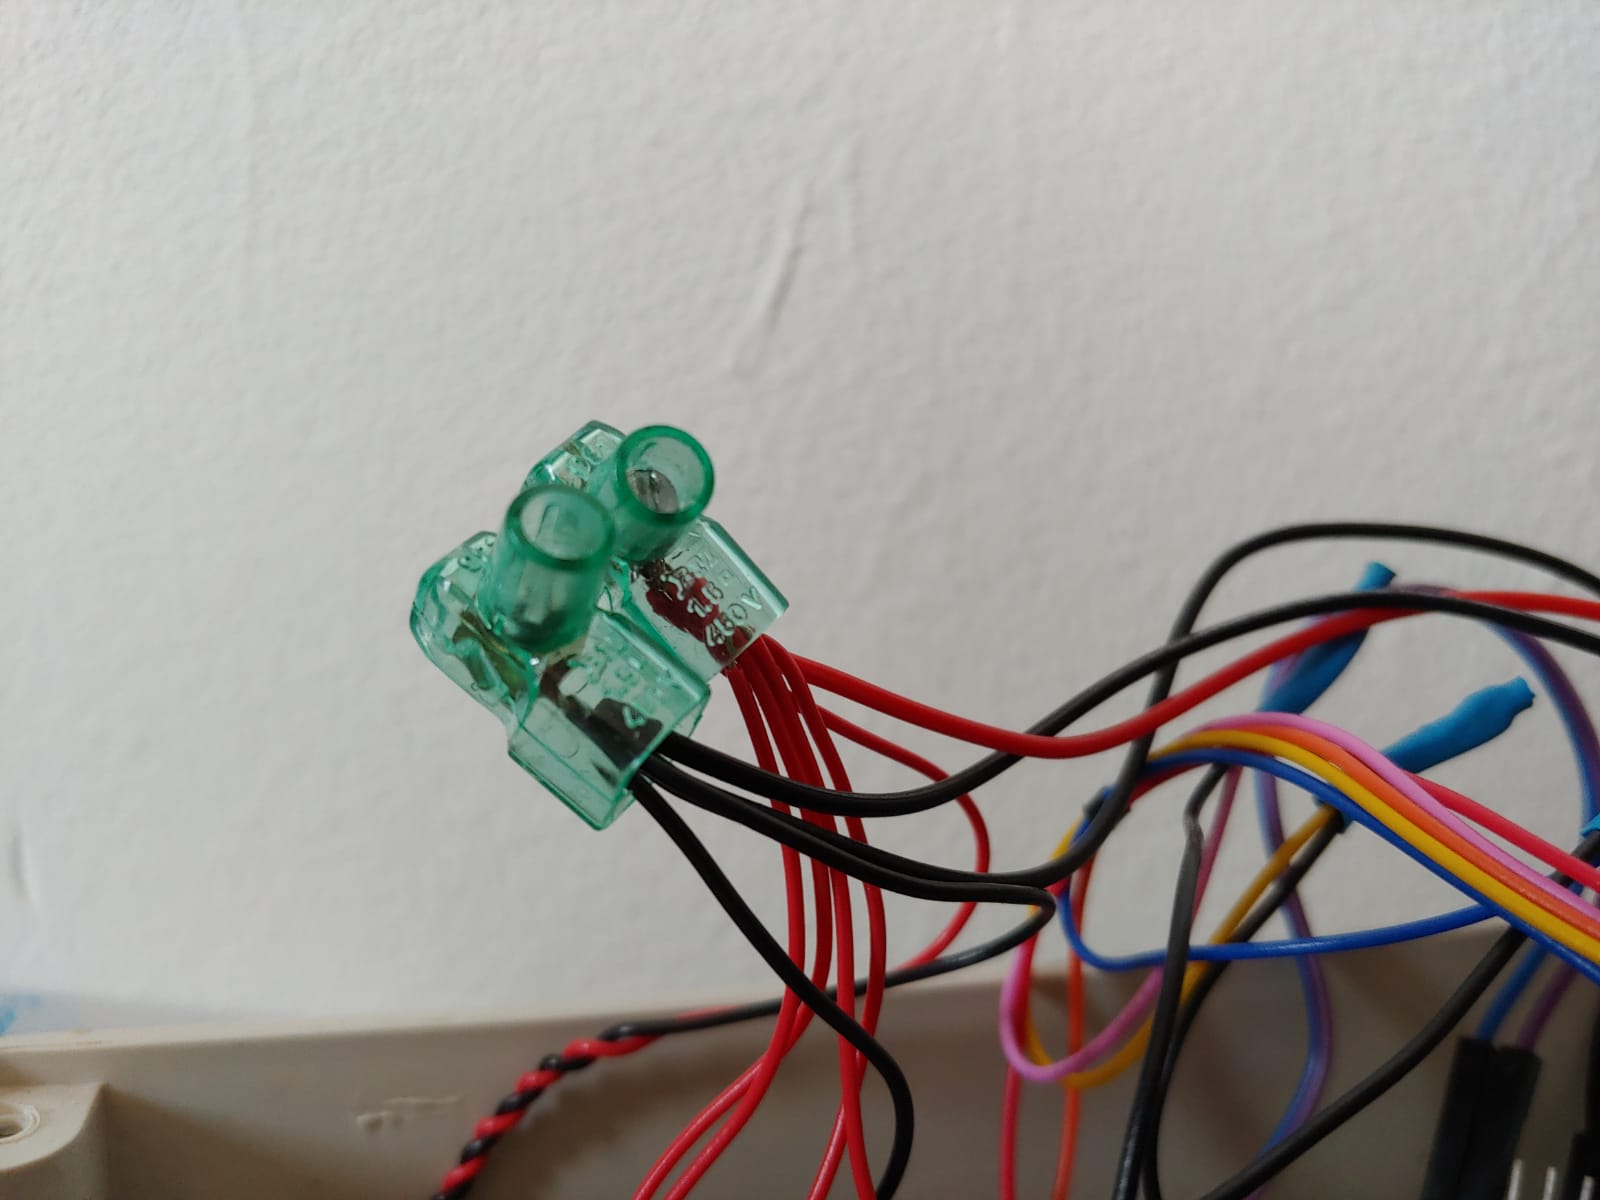
Now let’s take the connector for electric current with 2 wires, one red and one black:
Connect the red to the MOST INNER pin and the black to the most EXTERNAL pin;

Also in this case, give 2 welding points and use the heat shrink tubing to cover the contacts:
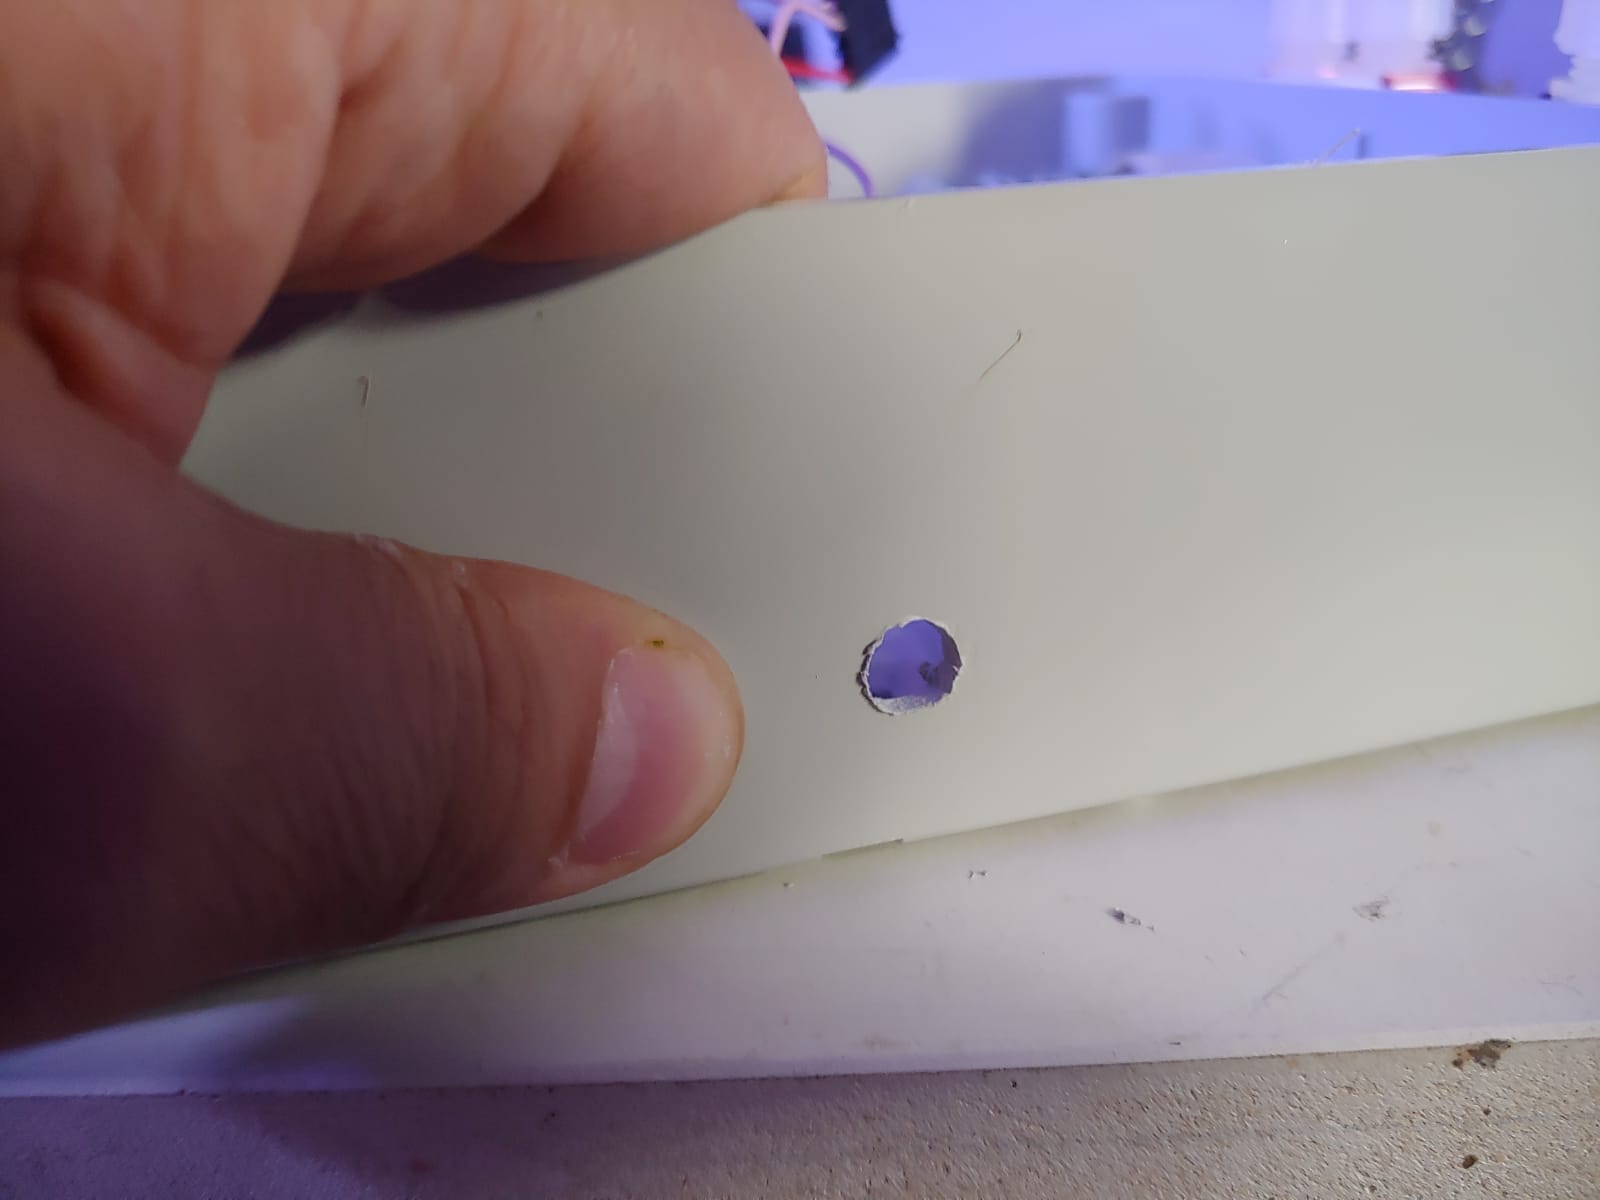
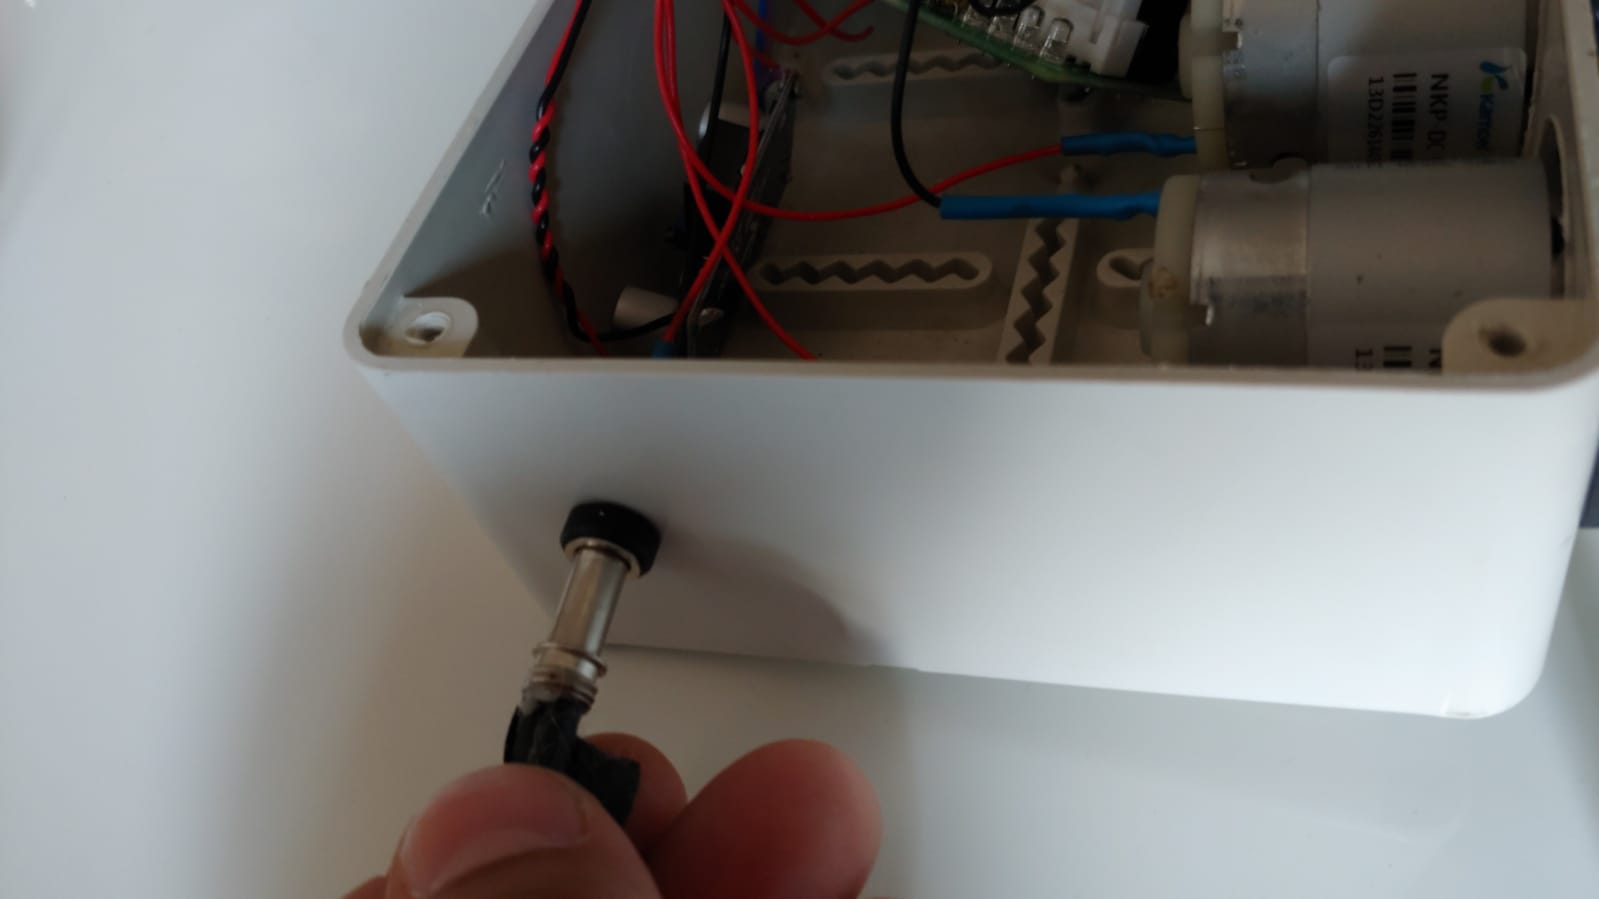
Let’s now proceed to pierce the electric box, everyone can use the method he believes, the most comfortable as I said is surely to use that tool that I have linked above, otherwise you can also do it with the drill and then with a rasp, or in any other way you feel more correct. There are 1 holes to make for each head of the dosometric pumps and 1 for the electrical connector we have just soldered:
The end result will be something like this:
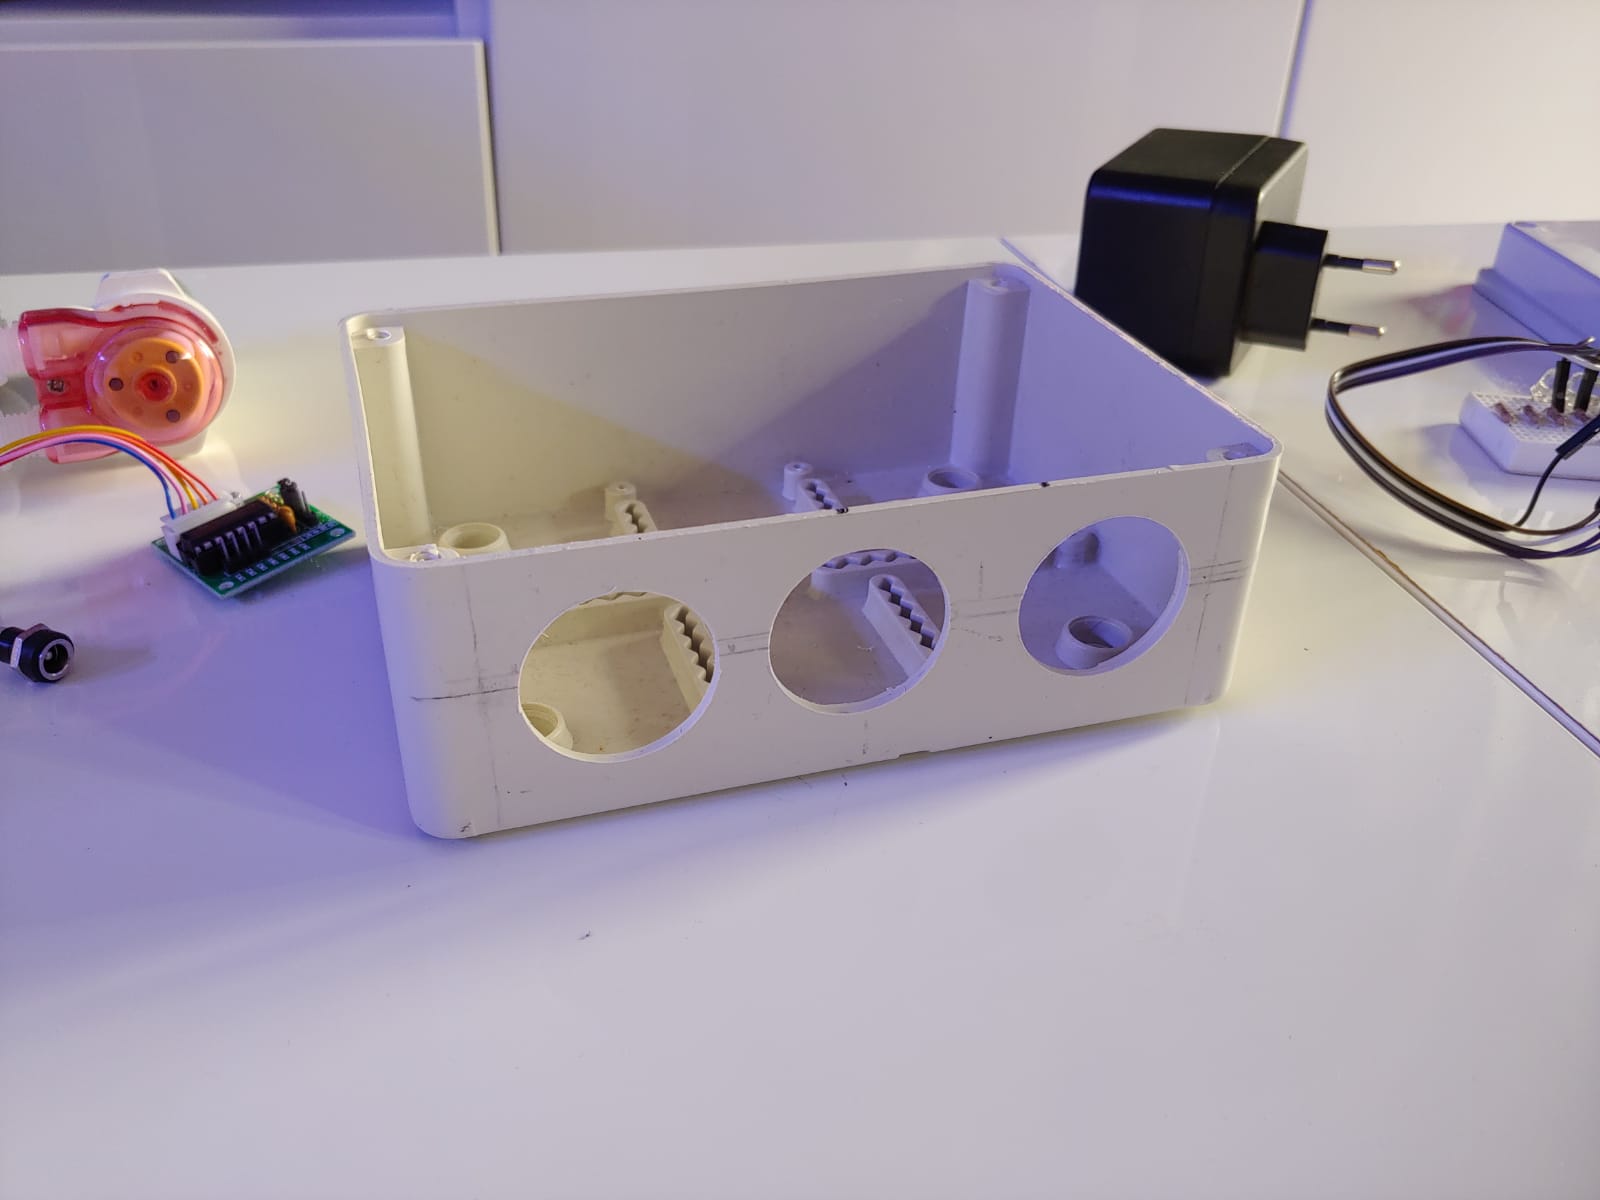
Now we just have to insert the heads and the connector in the holes just made and proceed with the connections:
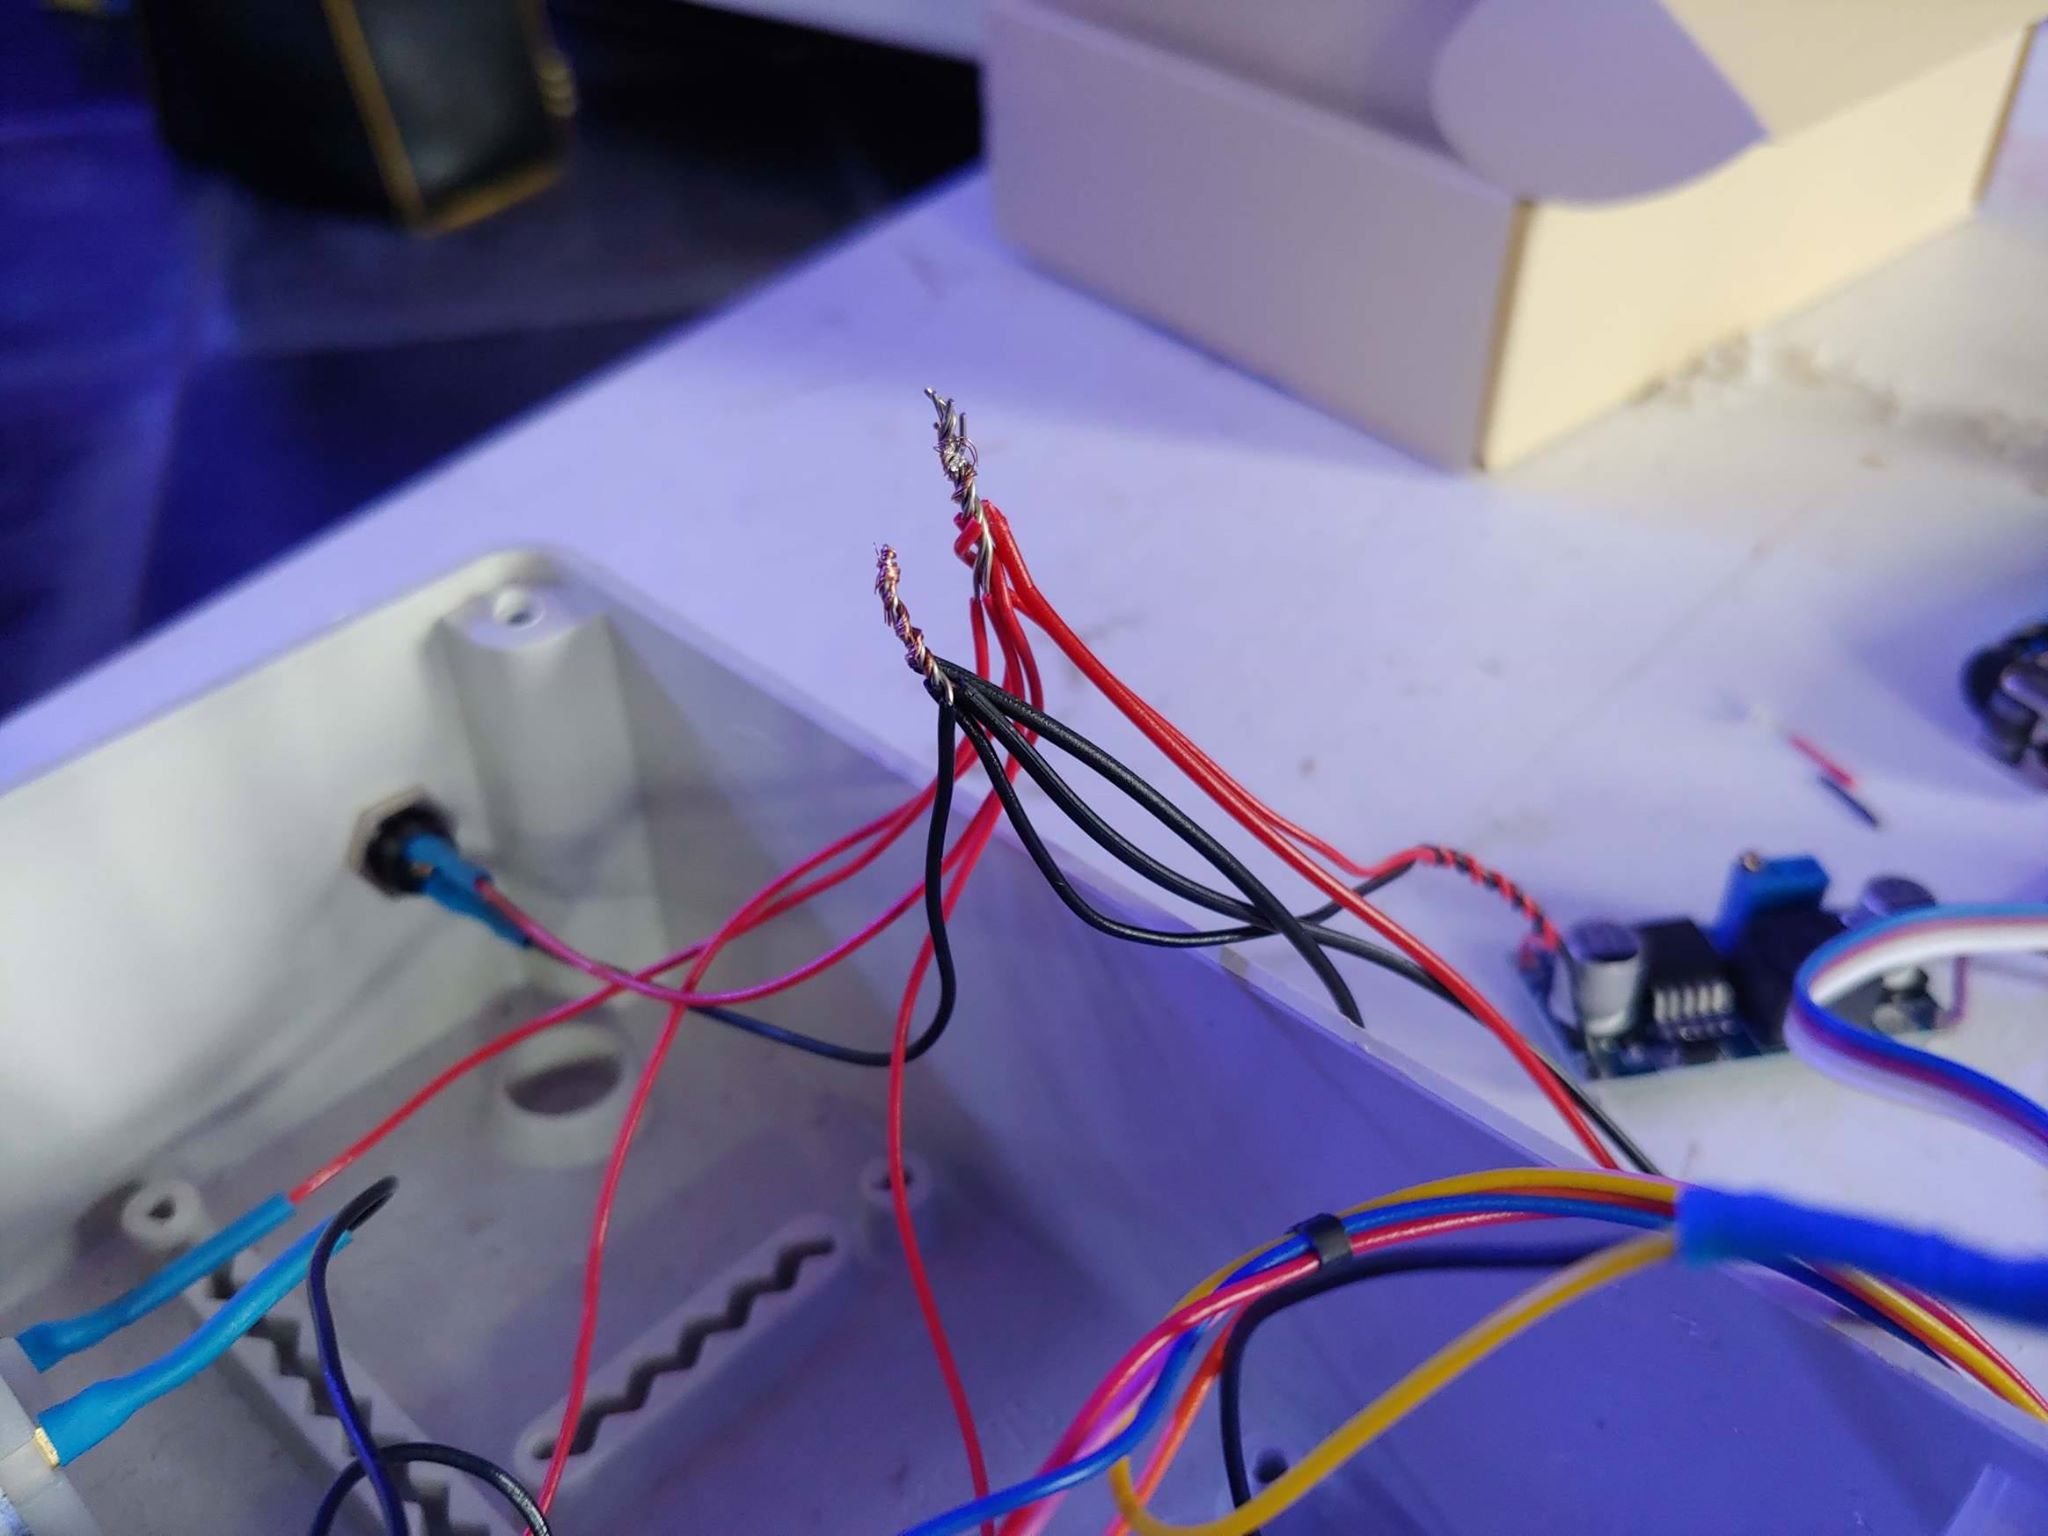
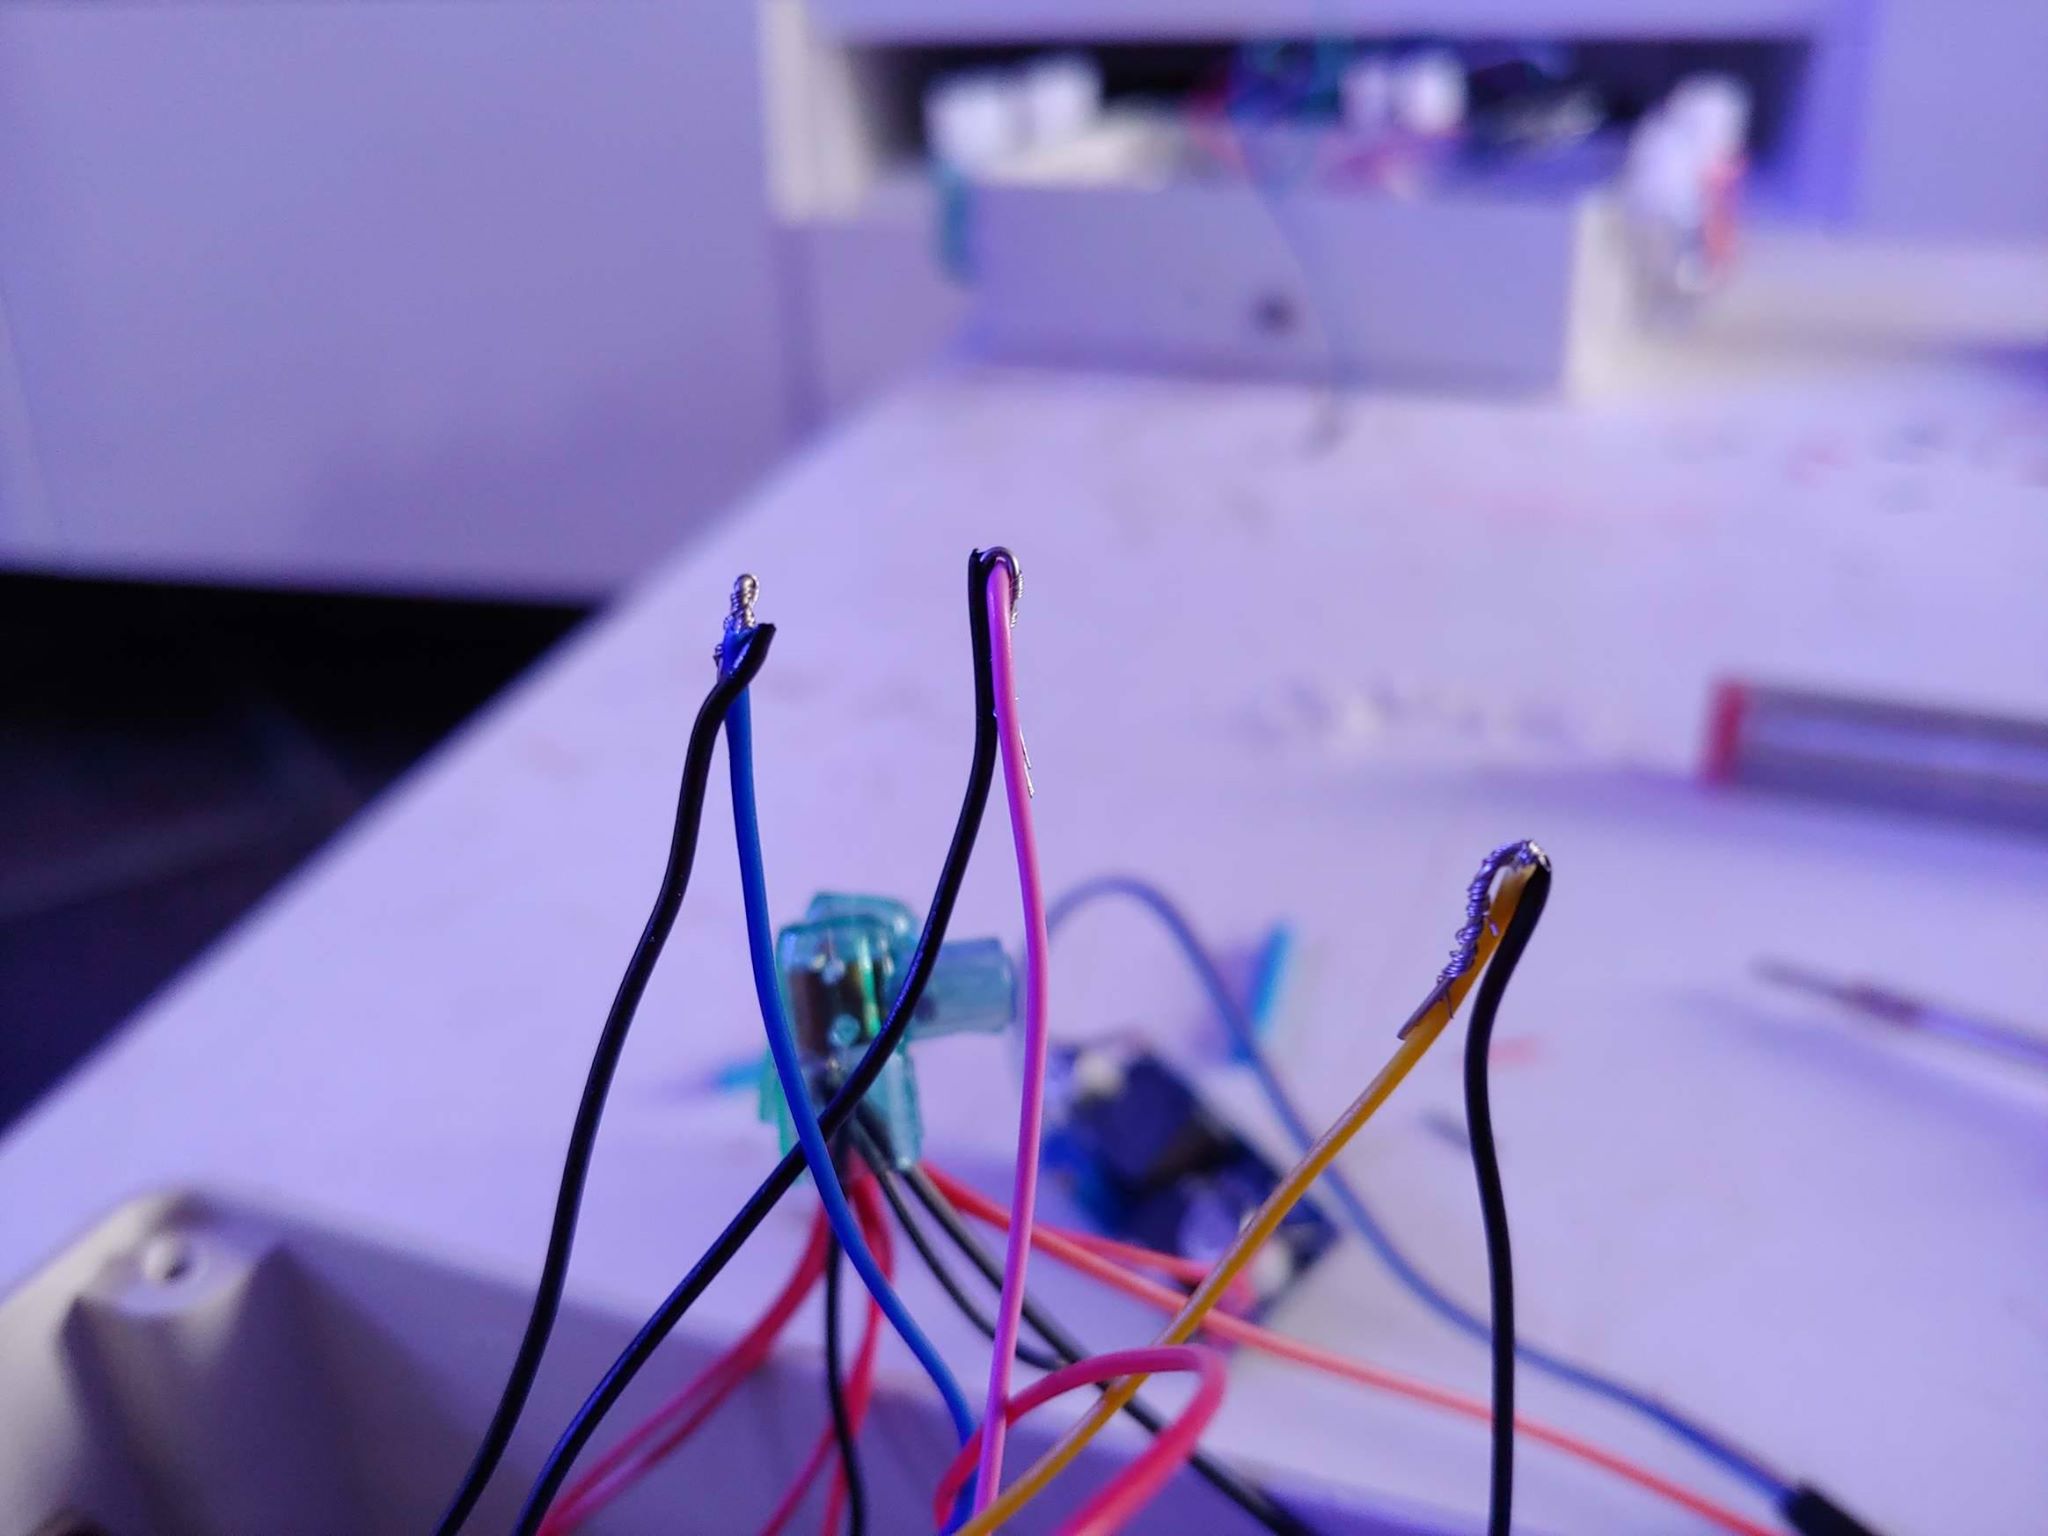
Cut again one of the ends of 3 dupont cables (possibly two black and one red) and connect together all the red ones you have, including the one coming from the converter and the one of the newly cut dupont cable:
The blacks of the pump heads are not yet connected together. You only need to connect the black of the power connector with the black of the converter, and with the 2 dupont cables just cut:

In the case of 3 heads you will then have 6 red cables all connected together and 4 black cables all connected together. If you want to do a good thing, use a mammoth to isolate them from the rest:
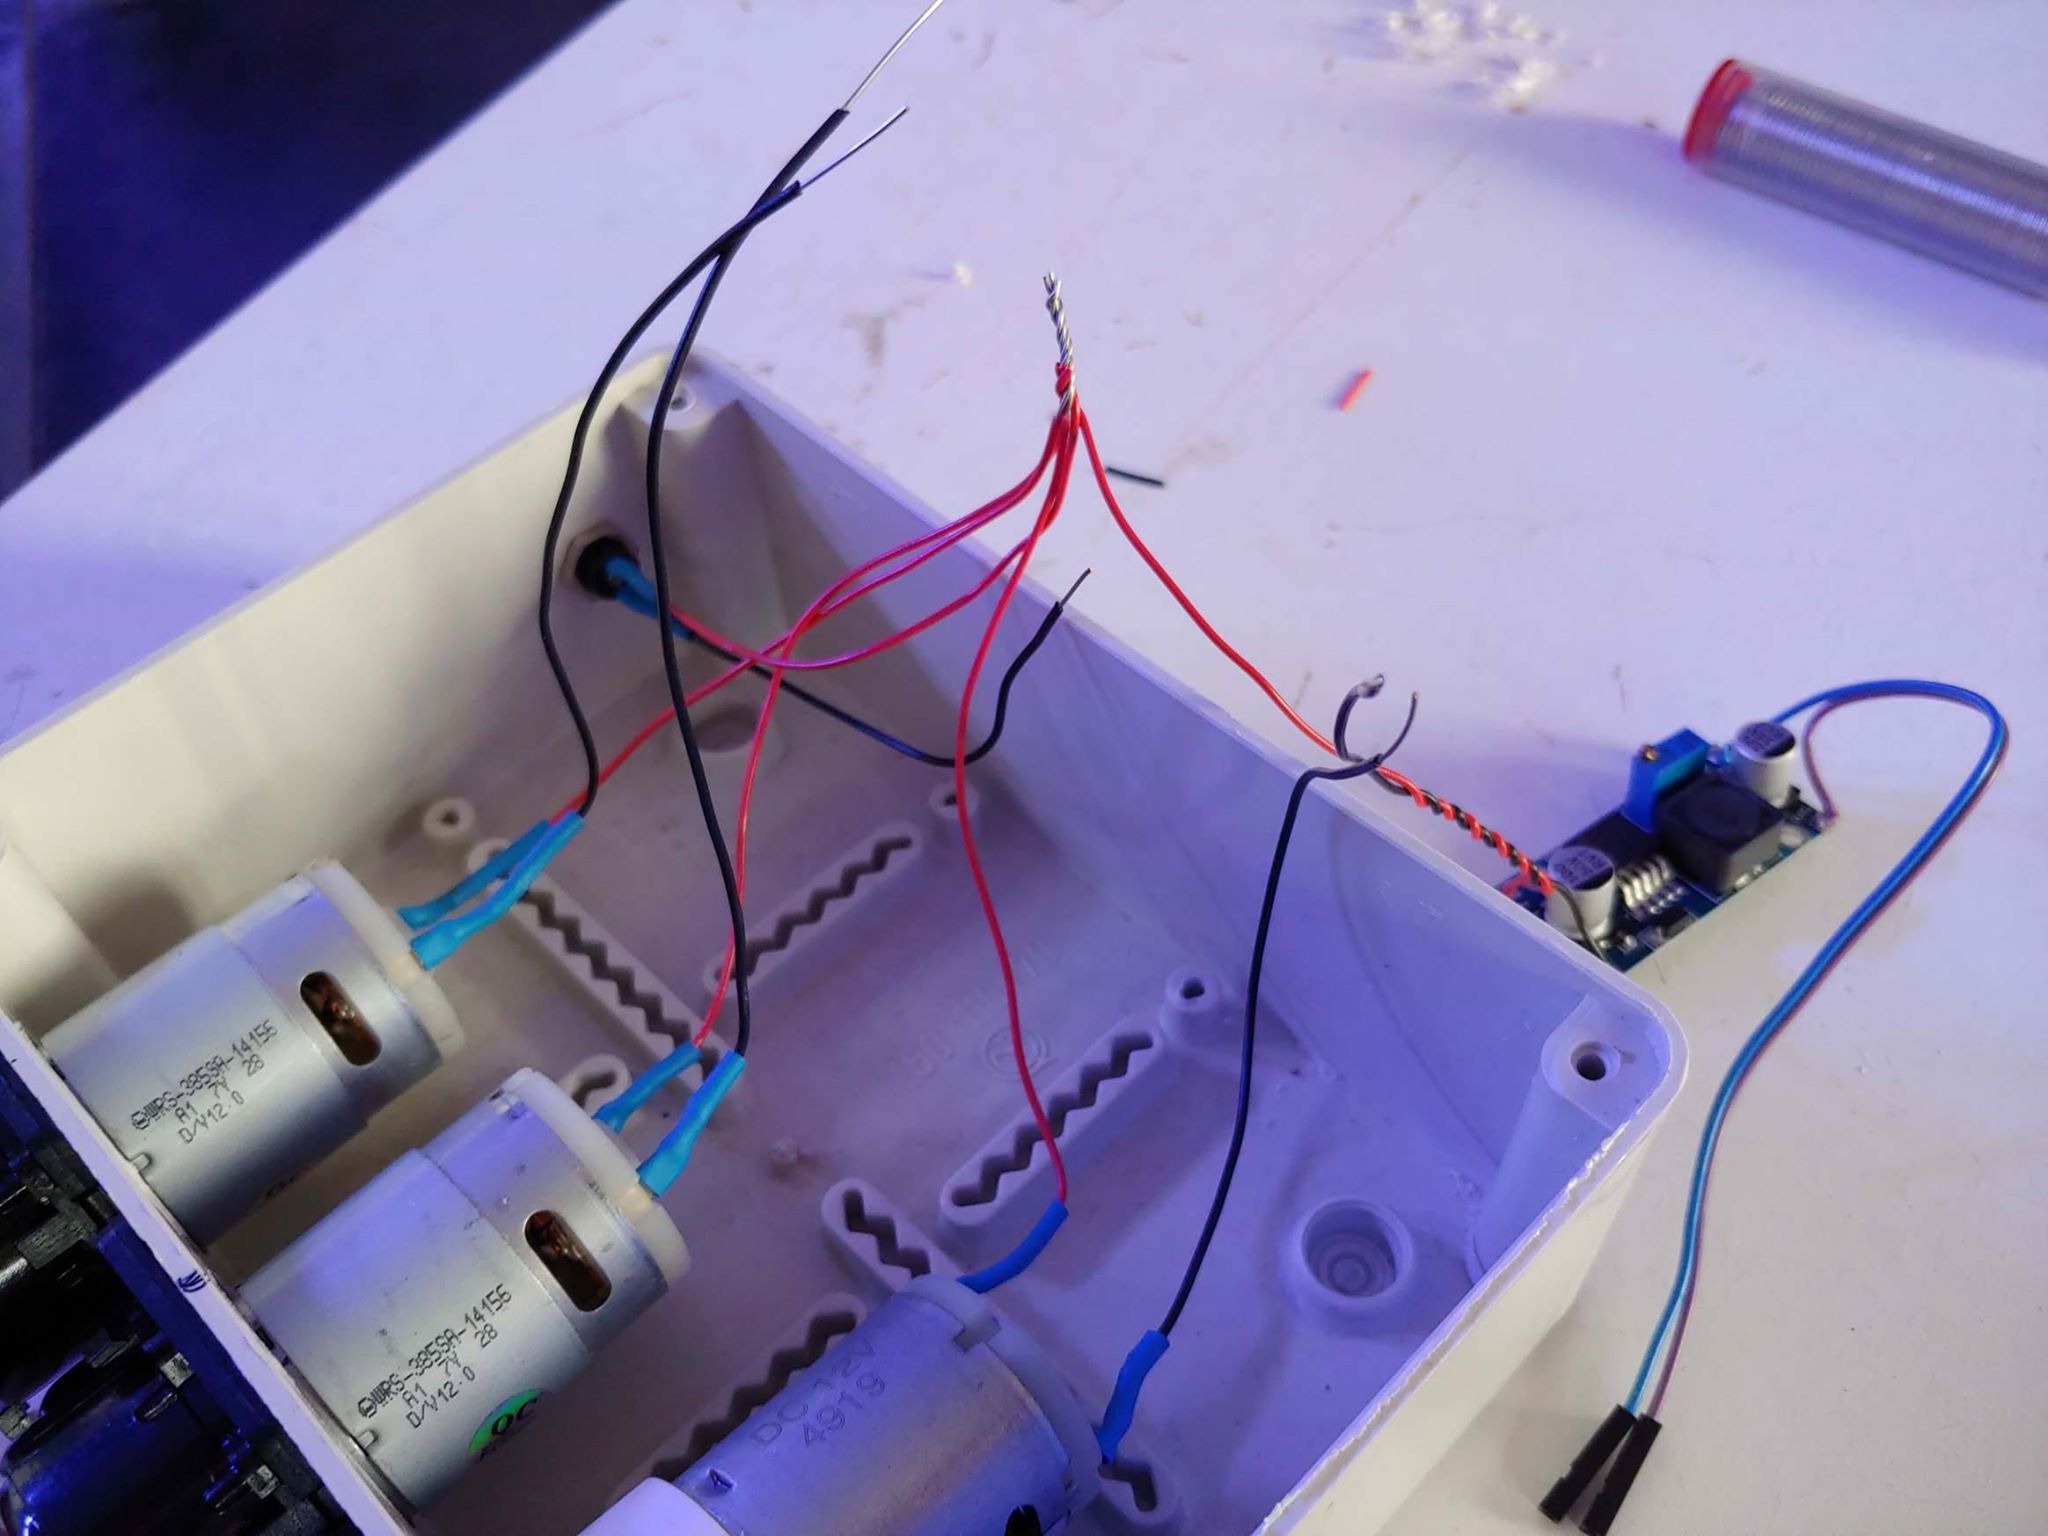
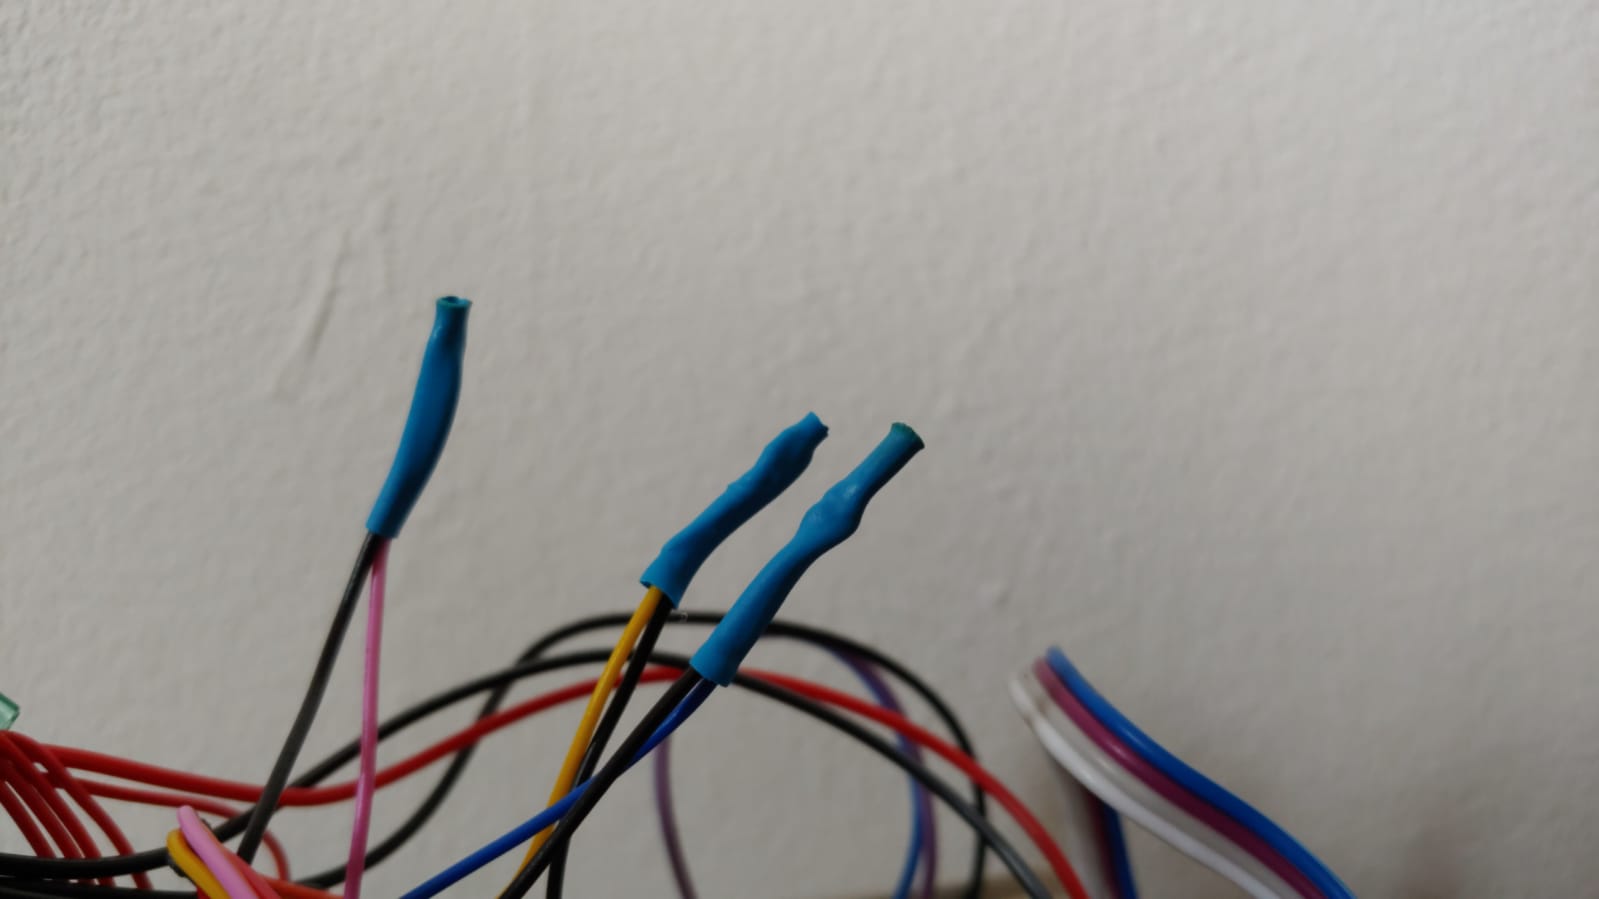
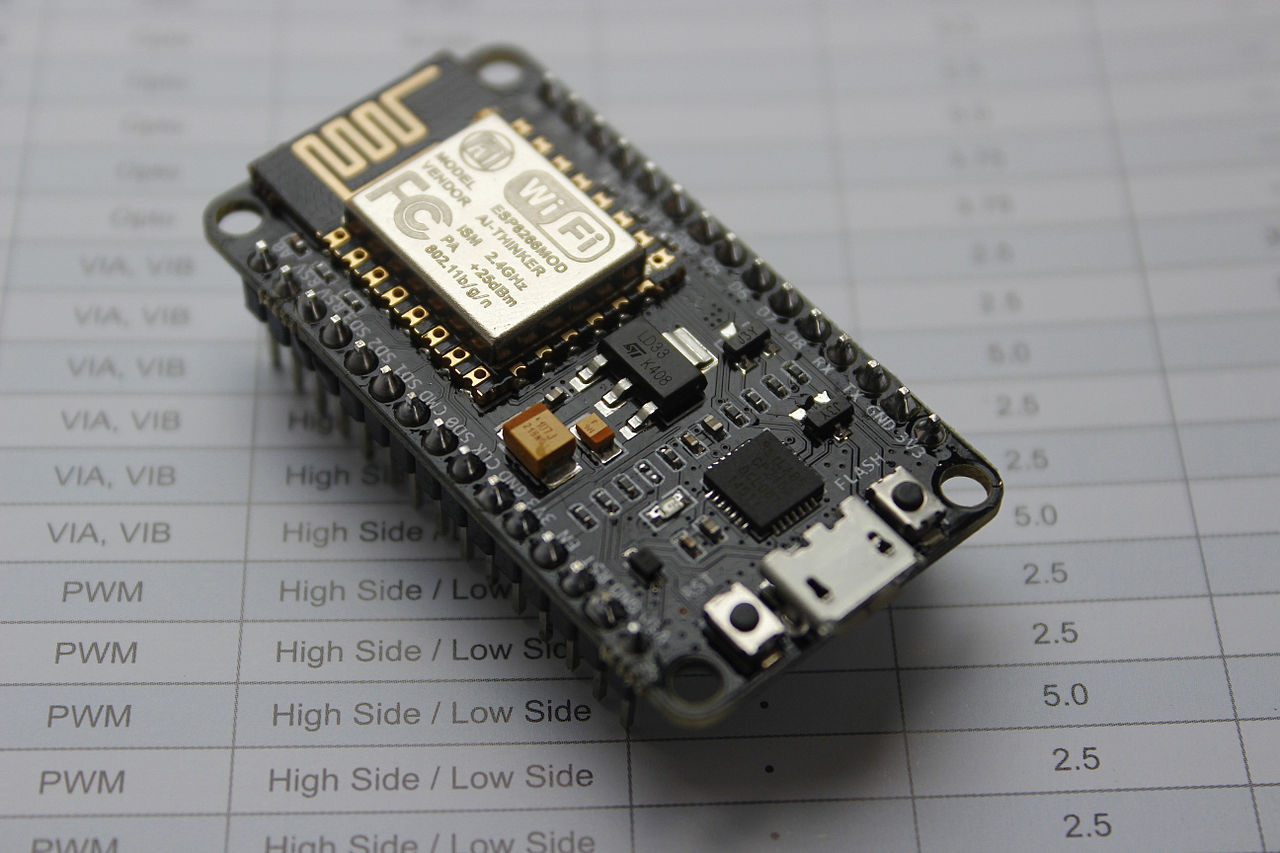
Now take the circuit with the stepper motor and CUT it, cut the cable that connects the motor to the circuit (The motor will be useless and therefore you can safely throw it):

Take the part with the connector and the wires, and connect the blue wire to the black of the first dosometric head, the pink to the black of the second dosometric head, the yellow to the black of the third dosometric head the orange to the black of the fourth dosometric head. If you have more than 4 heads, you must build the circuit yourself as per the diagram shown in the previous part, or use 2 of these circuits.
Isolate the 3 links as you see fit, with a solder point, or with mammoths. I used 3 pieces of heat shrink tubing:
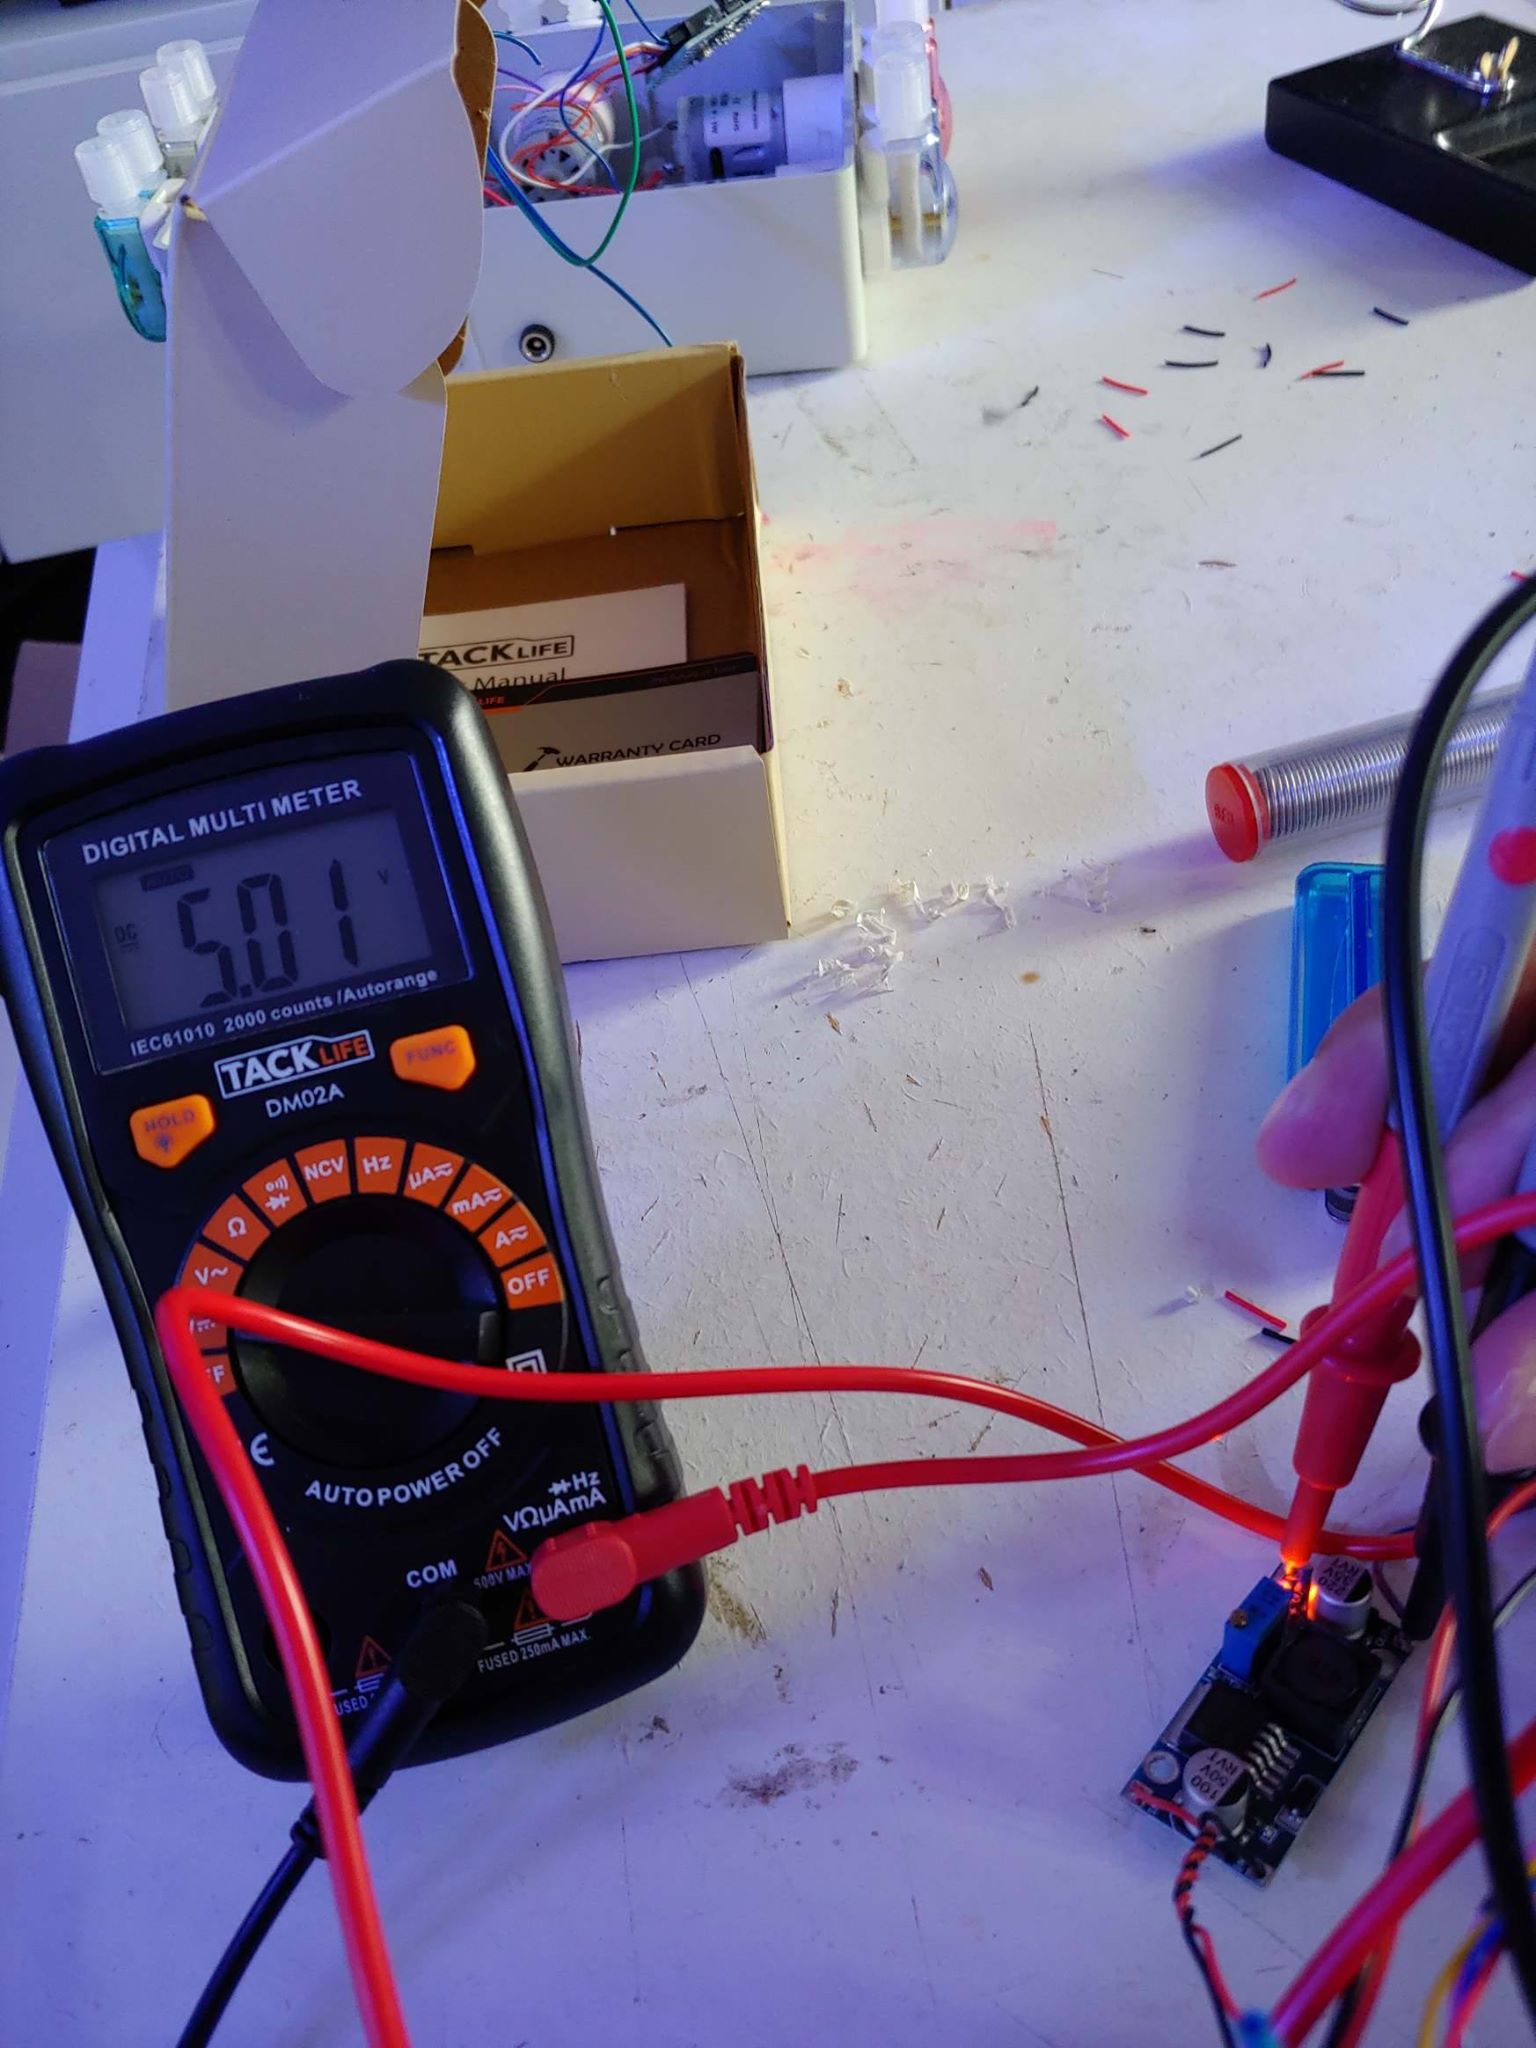
Now you need to adjust the output voltage from the 12v 5v converter. By connecting the power supply to the connector, the LED on the 12v 5v converter should light up:
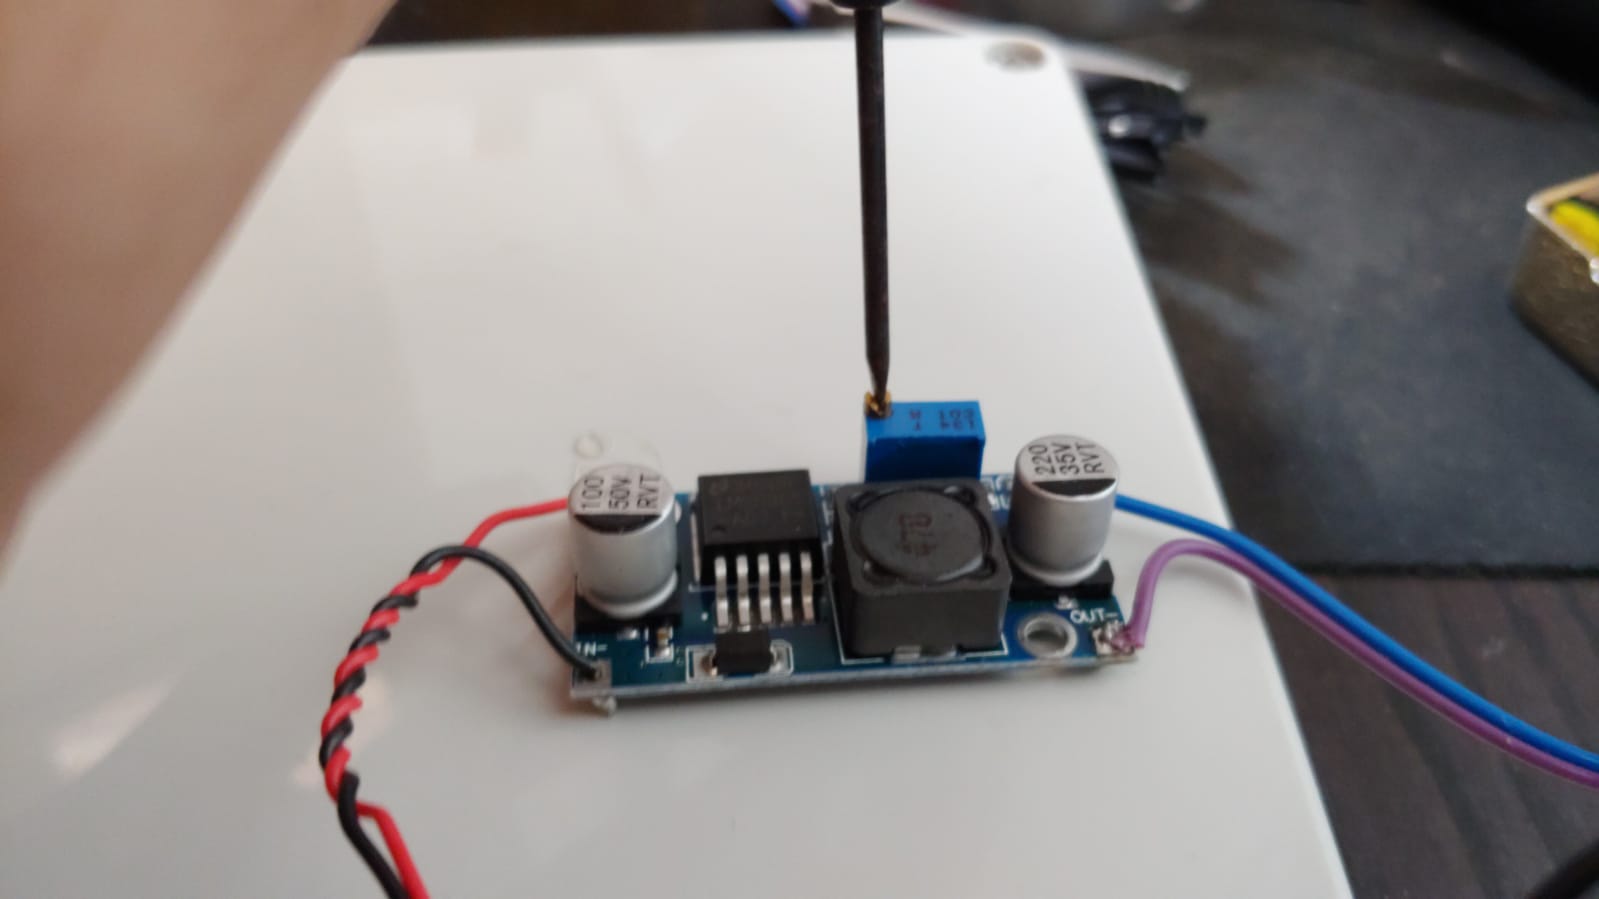
Now with a tester (multimeter) you have to put the positive pole on out + and the negative one on out-, set the tester on Vcontinua and measure the output voltage. With a small screwdriver turn the screw until the tester measures 5.00V at the output. I recommend, if you skip this part and / or the output voltage is higher than 5v you will burn the Nodemcu:
Now you need to make all the connections, but first disconnect the power supply from the connector so as not to have power:
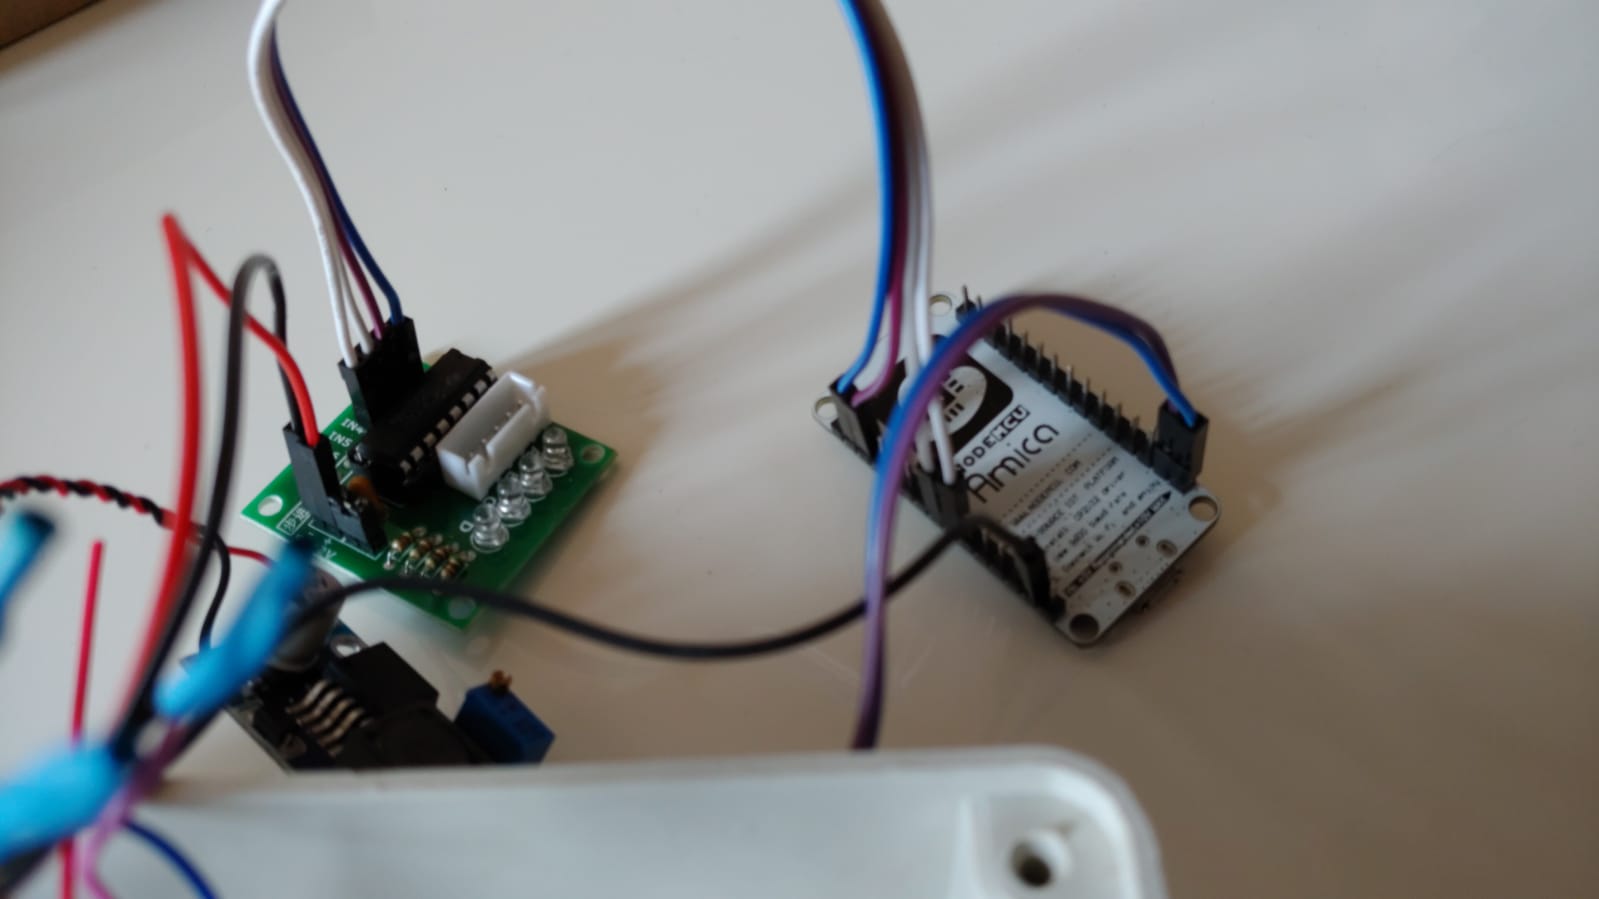
First of all, connect the converter outputs to the nodemcu, the red on the Vin pin and the black on a GND, then connect the red dupont cable coming out of the red group at + of the circuit with the integrated and a black dupont from the group of black al – of the integrated circuit. Then connect the other black dupont to another nodemcu GND:
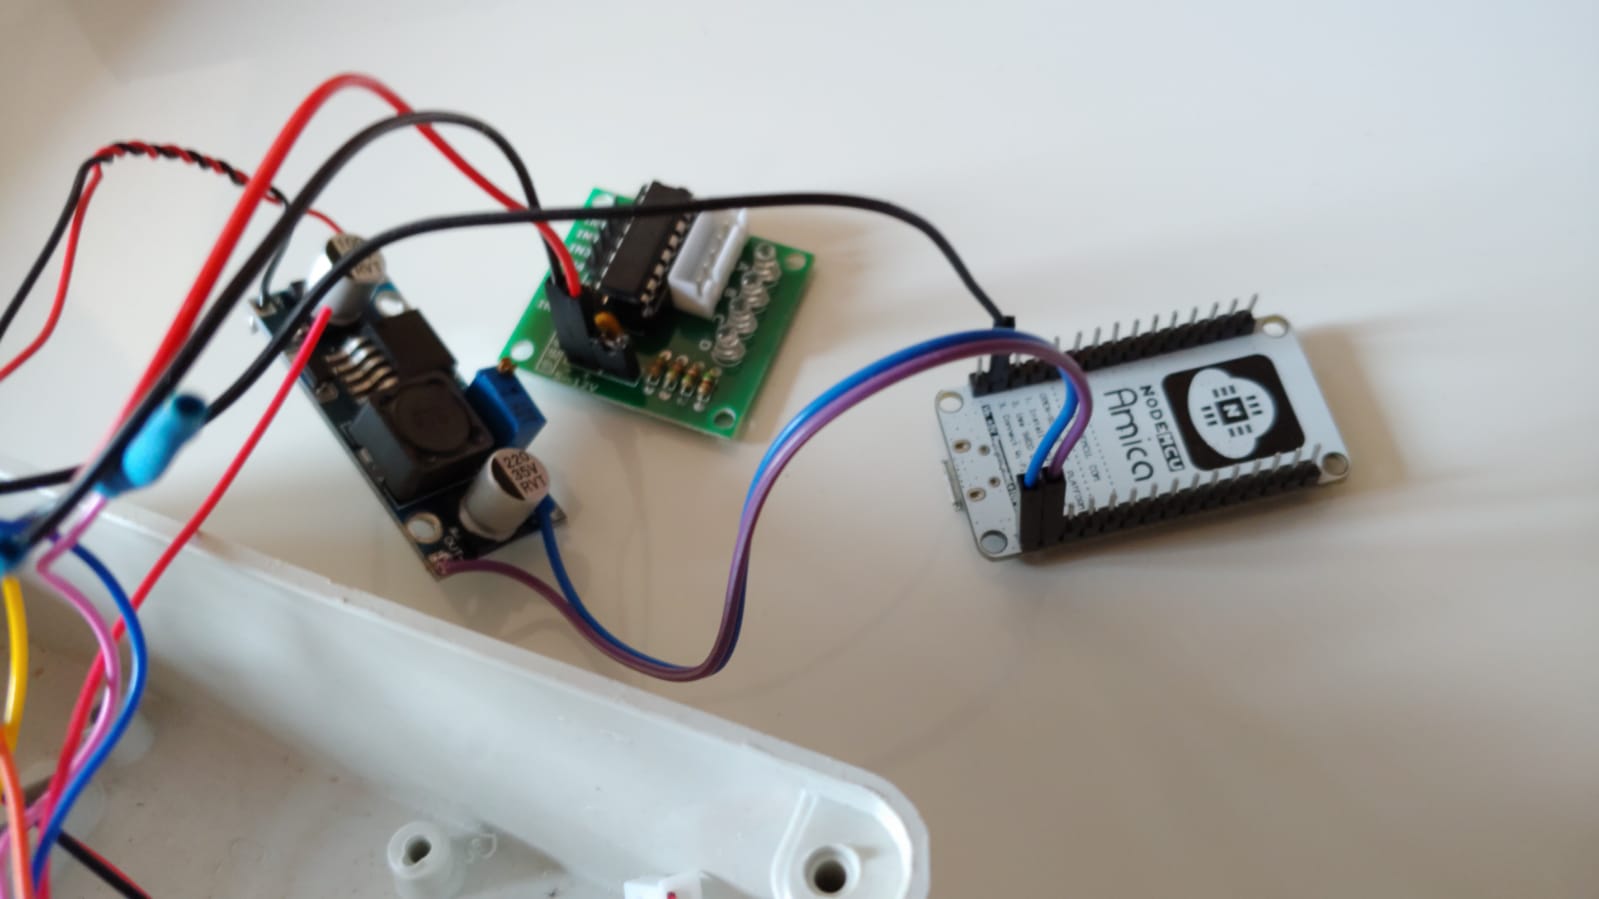
Now connect with 4 dupont cables the pins D1 D2 D5 D6 of the nodemcu respectively to IN1 IN2 IN3 and IN4 of the circuit with the input:
Et Voilà! Theoretically you have finished. Now try to see if by connecting the power supply some LEDs light up and no smoke comes out anywhere 🙂
Finally you should get to something like this:
If everything works, we just have to jump to part 3 of this tutorial to load the program on the pump.
I hope I was clear enough, if there were any doubts, don’t hesitate to contact me. Always keep in mind that I do all this without profit and therefore if there are errors or inaccuracies do not kill me.


Hi, I don’t suppose you could provide a schematic.
Also …. is the sue of of propper stepepr dosign pumps like https://www.aliexpress.com/item/32874560989.html?spm=a2g0o.detail.1000023.1.5e582bd9ngXb2S is supported?
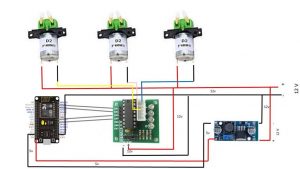
Hello Martynas, i added the final schematics to the post.
Those pumps are brushless so they aren’t supported. you can see they have 5 cables and not just 2.
Let me know if you go on 😉
Ok so if I wanted to connect propper stepper motored pumps i would have to code it myself.
Imho you should update part 1 concerning those expensive kamoer pumps. The ‘famous’ versions are the ones that use stepper motors. It would be quite an expensive mistake if someone got full stepper versions and found out they are unsupported
Beware that if you want to use steppers, not only you need to code them, but you also need to change hardware. The schematics are different and nodemcu can’t manage 4 steppers motors.
I added the alert about steppers in the first part, as you suggested 😉
Hello danilo
Thank you to this project , i have completed this project easily , how the timer option will work in a user panel.
thanks for this project
Hello, i’m glad you completed It easily.
You can program It by selecting the start time and the end time, and how many doses you would like in that period.
For example if you want the pump 1 to dose at Every x.00 hour you can program It ThIs way:
Start 0.00
End 23.00
Doses 24
He Will dose 1 time at each hour.
If you want to dose the pump 2 at x.30 every hour you can set:
Start 0.30
End 23.30
Doses 24
Hope i explained 🙂
Hello danilo
please explain Doses (/Day): Option and timers option not working error massage ( Cannot communicate with dosing pump, check it’s not dosing right now )
Doses/day is the number of doses the pump will divide the amount of liquid you set in Volume(ml) option.
Example if you set 100ml in volume, and you set 20 doses/day, it will dose 20 times a day for 5 ml amount each time.
Hello Danilo, incredible project, my congratulations. I have some doubts: 1 – Is it possible to include an RTC chip so that the time setting is maintained in a power outage or internet access?
2 – Can I configure the Dashboard so that only the information of the dosing pumps is displayed keeping the other information hidden?
3 – Is it possible to include an access even if it is basic to the doser directly when it is in the aquarium location without having to use the access via iot website? I ask this, because if the site goes down due to maintenance or another problem we will be without access to the device.
Sorry for the many questions and thanks for listening !!!
Hello Fabio,
Thanks fot your comment.
1) rtc would add a lot of complexity to the project and to the assembly and semplicity is the first goal in this.
Moreover time settings are mantained even if you loose connection. The only short period that you would have the wrong time is the time from the return of the power and the start of the connection…
2) i would like to do it, but time is short, and i have many things to do. I will do it sooner or later.
3) The interface on the local network would be so bad, and long to develop. So i prefer to leave it online on my website 😉
Hello danilo, https://iot.joy-reef.com/login , isnot working , Error (These credentials do not match our records.)
HI All
Firstly thanks for sharing this project!
Been having difficulty with this build for a while as the wifi on the nodemcu keeps dropping out. Just wondering if anyone else is having this issue?
It appears when the MCU powers up but then disappears after about 30 seconds so i cant connect to joy reef via wifi.
Does anyone have any ideas how to solve this? (am using 2.4g wifi with noduce mcu right next to router and no issues with other devices)
Thanks
hello my friend. This should happen after you enter your wifi credential and you wrote something wrong.
You just could try to flash it again setting “Yes, wipe all data” and try to make the first configuration again.
If you enter your wifi credentials correctly you should stop seeing joyreef at all, and find the nodemcu in your router.
Great thanks Danilo will try again and see how things work out! cheers
Hi there trying to make the 6 dose pumps where i connect the last 2? i have D1D2D5D6
Hi Cristian,
Pins are: D1, D2, D5, D6, D7, D8
Let me know if everything is ok!
Hi Danilo, i love your project its very helpfull, but i found small issue,
When my internet connection loss for a day and back online again, online status on the dashboard will not updated. Its show last time online 1 day ago.
Its normal or just a small bug.?
Hello, Thanks for your feedback.
It’s not normal, it should come back online, and you should have an email to warn you.
Try to reset the doser and see if it fixes 🙂
I made a higher resolution of the schematics to help if anyone needs it
https://imgur.com/a/xrQSFDh
Thank you very much!